Happy Monday everybody! I hope everyone (where appropriate) had a Happy Thanksgiving. I truly am blessed and hope to be more mindful of the little blessings that come my way every day.
Have you checked out the new challenge for this week on SIMON SAYS STAMP AND SHOW? Simon Says Show "STARS". Hop on over to the blog and check out what the "STARS" of the Design Team have made for you this week! They are jaw dropping examples of what you can do with STARS!
Have you checked out the new challenge for this week on SIMON SAYS STAMP AND SHOW? Simon Says Show "STARS". Hop on over to the blog and check out what the "STARS" of the Design Team have made for you this week! They are jaw dropping examples of what you can do with STARS!
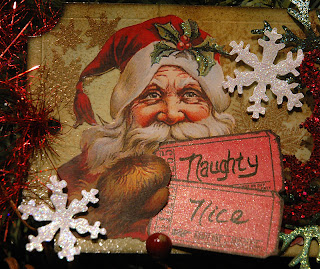
I'm really in the Christmas spirit and wanted a new "vintage" tree topper for a vintage tree I am creating. So, I made a vintage "Christmas Star" tree topper featuring a beautiful Santa that I found online and sized to fit my large glittery snowflake aka my "Christmas Star".
I love texture and dimensional pieces. Even though this image of Santa is one of my all time favorites, I wanted him to appear even more lifelike. So, I lightly tinted some white Fun Flock to diminish the stark white and make it appear to be aged flocking. After all, this is a VINTAGE piece! Then, using my finger, I spread a little glue everywhere I wanted to attach the flocking; the brim of Santa's hat and on his beard, mustache and eyebrows. I sprinkled the flocking over the glued area, lightly patted it in place and shook off the excess. Next I pinched some Art Glitter Crystal Ultra Fine Glitter in my fingers and sprinkled it on Santa's flocked beard and hat brim. I love it when Santa has a magical sparkle about him! I also added some Rock Candy Stickles to his red hat. They dry clear but leave a really neat vintage chunky crystal glittery effect.
I stickled around the perimeter of my Santa with Platinum Stickles for an even more vintage look and to better define him.
When I was little, I remember that crepe paper or something that looked like crepe paper was oftentimes a part of Christmas ornaments. I took some white crepe paper and sprayed it with my own concoction of Tea Dye and Vintage Photo Distress Ink Refills mixed with water in a Mini Mister. That instantly aged the white crepe paper. Then, using a needle and thread, I gathered the crepe paper into a ruffle that would encircle Santa's head. I cut another of Santa's head out, only a bit smaller than the one I'd just flocked and stickled. Using 1/4" Wonder Tape, I attached the crepe paper ruffle to that smaller cut out. Then I added a piece of vintage red and silver tinsel garland that would also encircle Santa's head.
(Here you can see all of the layers behind Santa's head, including the Angel Hair Halo.)
When dry, I popped my Santa head on top of the layers of the big glittery snowflake, the gathered crepe paper, the tinsel garland and the angel hair halo. Speaking of Angel Hair....
It was also used a lot on vintage Christmas ornaments and tree toppers so I decided to incorporate a little of it onto my vintage tree topper. I wanted the Angel Hair to represent a halo or a beautiful aura behind Santa's head. I lightly twisted some Angel Hair onto a thin wire and glued the two ends underneath where my Santa head would go, giving a halo effect. Above Santa's head, I added 5 gold stars I punched out of a thin piece of gold sheet metal. Then I stickled them with Platinum Stickles to better match the other metallic embellishments. I glued them into place on the Angel Hair halo using Glossy Accents.
I wired the jingle bells onto the exterior limbs of the snowflake. I love it when they jingle! And I love the way they accented the ends of the snowflake.
I used the hard cardboard roll that my thin sheet of metal was stored on as the "sleeve" for my new Christmas Star Tree Topper. (The top of my tree can just slide down into the hard cardboard roll for it's placement at the top of my tree.) I covered it with a scrap of Graphic 45 candy cane striped paper and distressed it with Gathered Twigs Distress Ink (from Tim Holtz' Limited Fall Collection). Then I hot glued my Christmas Star Tree Topper to one side of the roll. On the back side of the roll, I hot glued another plain large snowflake in the opposite direction of the one on top. That way, I got a much more interesting snowflake pattern to accent my Christmas Star Tree Topper.
Now all I have to do is slide my new Vintage Christmas Star Tree Topper in place and hopefully it will grace our little vintage Christmas tree for years to come.
Now it's YOUR turn to create something wonderfully vintage or Tim Holtz-ish using STARS. Then enter it in our Simon Says Stamp and Show Challenge. YOU could be the lucky winner of our generous sponsor's
$50.00 CREDIT VOUCHER!!!! And...if your entry is voted on as one of the TOP THREE entries for the week, you will be recognized for your wonderful art with our coveted TOP THREE BLINKIE to proudly display on your blog.
So, get the stars out of your eyes and into an art project! I can't wait to see what you've created!


