Showing posts with label Simon Says Stamp and Show Challenge. Show all posts

Sunday, August 4, 2013

YOU'VE GOT AIRMAIL ~ ALTERED ENVELOPE

Happy Monday to you all! Thanks for taking the time to stop by my blog.

This week ... "You've Got Airmail!" 

I decided to try to do something different than using the obvious airplane stamps, or doing something strictly with post cards.  So, I decided to take an envelope ... something that could be airmailed and alter it into something vintage.  While thinking of "AIRMAIL", I thought about wings; which made me thing of butterflies; which made me want to add one to my altered envelope.  So ... without further adieu ... here is my finished project.


It began as really plain and not very attractive brownish-grayish envelope measuring 4 1/4" x 9 1/2".  I covered the body of the envelope with Matte Multi Medium and then text from an Austrian book that was recently given to me by a friend and someone who's work I truly admire, Claudia of Von Pappe II.
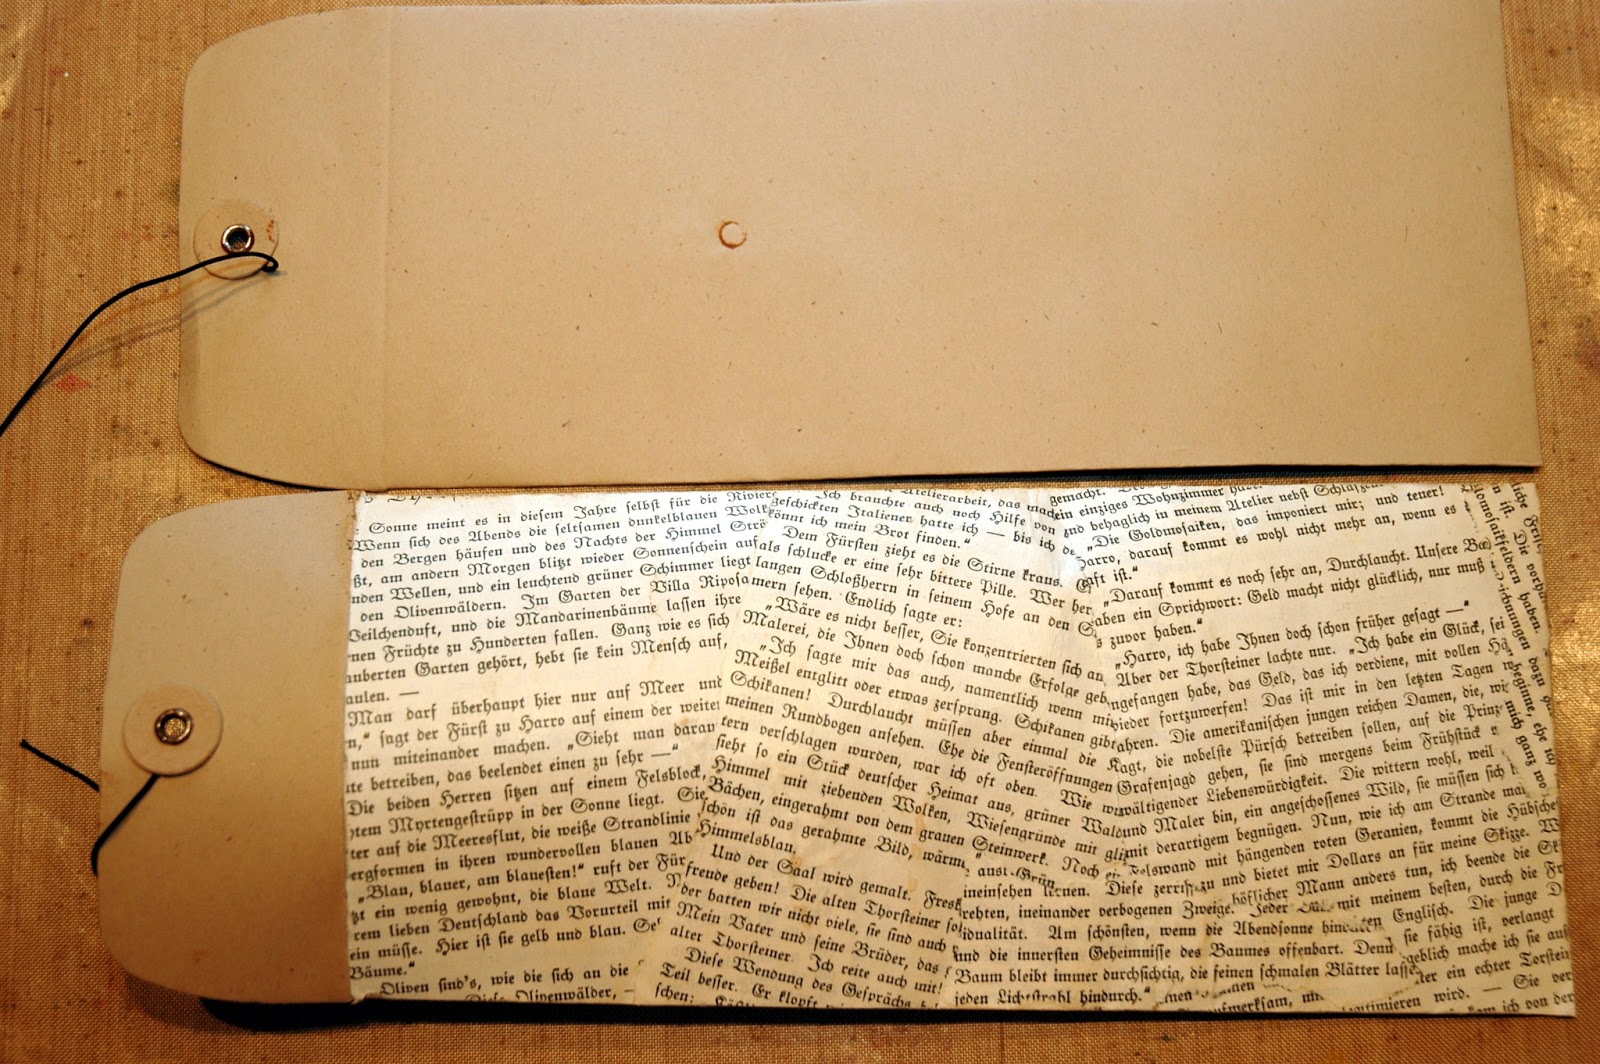


I had sealed the book text with the Matte Medium so when I sprayed the rest of the envelope with Calypso Teal Dylusions Ink Spray, it only penetrated some of the areas of the text.  But, I liked the look.

Making "Skins" of photographs.

I love this technique.  It's not transferring images but making what I like to call a "skin" of an image.  Using this technique, you can create all sorts of semi opaque images and then just adhere them over book text or whatever background with Matte Multi Medium.  You have the image and some of the background is visible underneath it.  It gives a very cool "ghosty", nostalgic feeling to vintage pieces.

I selected two vintage images; a man and a woman and sized them to fit on opposite sides of the envelope.  I then edited the photos to be in an oval shape.  They measure 3 1/4" x 2 1/2".  I printed them out onto cheap printer paper.   


Then I began with one coat of Matte Multi Medium brushed over each image.  Let it dry.  Then brush another layer of Matte Multi Medium over the images, only this time, instead of going up and down, brush across the image.  Let it dry.  Then brush another layer of Matte Multi Medium over the images going back up and down again, rather than across-creating a crosshatch appearance.  Let it dry.


Then begin removing the paper by thoroughly wetting the paper and lightly rubbing your thumb over image to remove the paper pulp.  Keep rubbing the paper until the image is clear.  (As it dries, some paper "fuzz" will reappear.  You can repeat adding water and lightly rubbing off the remnants of paper or you can just add the picture to your piece and brush Matte Medium over it to seal it.  That will seal the image and the paper fuzz will not be seen.


I created four "corners" to add a real vintage feeling to the altered envelope by die cutting these sweet little ornate pieces from Simon Says Stamp's own collection of die cuts.  This one is Allegro Corner.  I die cut it on white cardstock and sprayed it with Vintage Photo Distress Stain that I transferred from the original container into a 2 oz. Mister Bottle.  Works great!  I heat set the stain and then I added Treasure Gold Copper Guilding Wax.  The one of the left has the Guilding Wax applied.  The one on the right has just the Vintage Photo Distress Stain. 


I repeated this same technique to create the beautiful iridescent almost stained glass effect butterfly in the center of the envelope.  This is Memory Box's Chloe butterfly.  She's lacy and gorgeous! I first die cut her onto white cardstock and then sprayed her with Vintage Photo Distress Stain.  I then lightly spritzed her with Biscotti.  But, honestly, I decided to do something different with her, so the Biscotti won't even show up.  


I sprayed a piece of text cardstock with Perfect Pearls Turquoise Mist.  Perfect Pearls is not like Glimmer Mist or Ink Sprays.  It is almost transparent, adding more shimmer than color.  So, I sprayed and dried and sprayed and dried until I got a nice iridescent glow.  Then I die cut two butterflies, gluing one on top of the misted text paper (using Glossy Accents on all of the die cut areas on the underside of the butterfly.  Then I started to wipe (using my fingertips) some Treasure Gold Florentine Guilding Wax.  Love the rich, deep antique color!  Finally, I added some of the Guilding Wax right onto the wings, producing a very aged appearance.


Here is the left side of the envelope.  I stamped some Post Card images from Tim Holtz' Postcards stamp set onto the flap using gold pigment ink.  The vintage photograph was added on top of the envelope using Matte Multi Medium.  Then I brushed over it to seal it.  Then I added the delicate corners.  I added sweet little Melissa Frances pearls.  Finally, I added the little roses sprayed with Vintage Pink, Vanilla Breeze and Lemon Zest Glimmer Mists.  


Here is a better photograph of the iridescent butterfly popped onto the center of the envelope between the man and woman.  I added a small Tim Holtz post card and "envelope" with an airmail sticker and airplane postage stamp from Tim Holtz' Tiny Things stamp set.  The butterfly has a air mail tag added to his wing using Tim Holtz' Ball Chain and the stamp, stamped with Coffee Archival Ink is from Tim Holtz' Remnants stamp set.


The dashing gentleman on the right is also surrounded with the elegant corners and another smaller Memory Box Butterfly (Vivienne) done in the same manner as the larger butterfly.  Only this butterfly is colored with Treasure Gold's Aquamarine Guilding Wax instead of Florentine.  See the difference?  I like to think that this envelope contains a love letter that the butterfly is winging his way to deliver....AIRMAIL!

Thanks so much for stopping by my blog.  I hope that my altered envelope has inspired you to enter our Simon Says Stamp and Show's Monday Challenge by creating something airmail themed.   

You could be the lucky winner of our random weekly 


 $50.00 credit voucher.  You could also be chosen as one of our very special artists of the week to be featured in our new feature ...


I can't wait to see what you create!

Here are all of the products used in creating this altered envelope.


Sunday, July 28, 2013

ODE TO SUMMER!!

What a great Monday morning!  

It's summertime and the sun is shining!  It's just the perfect day for  
 Simon Says Stamp and Show's Monday Challenge 
this week themed "Ode To Sunshine!"

 
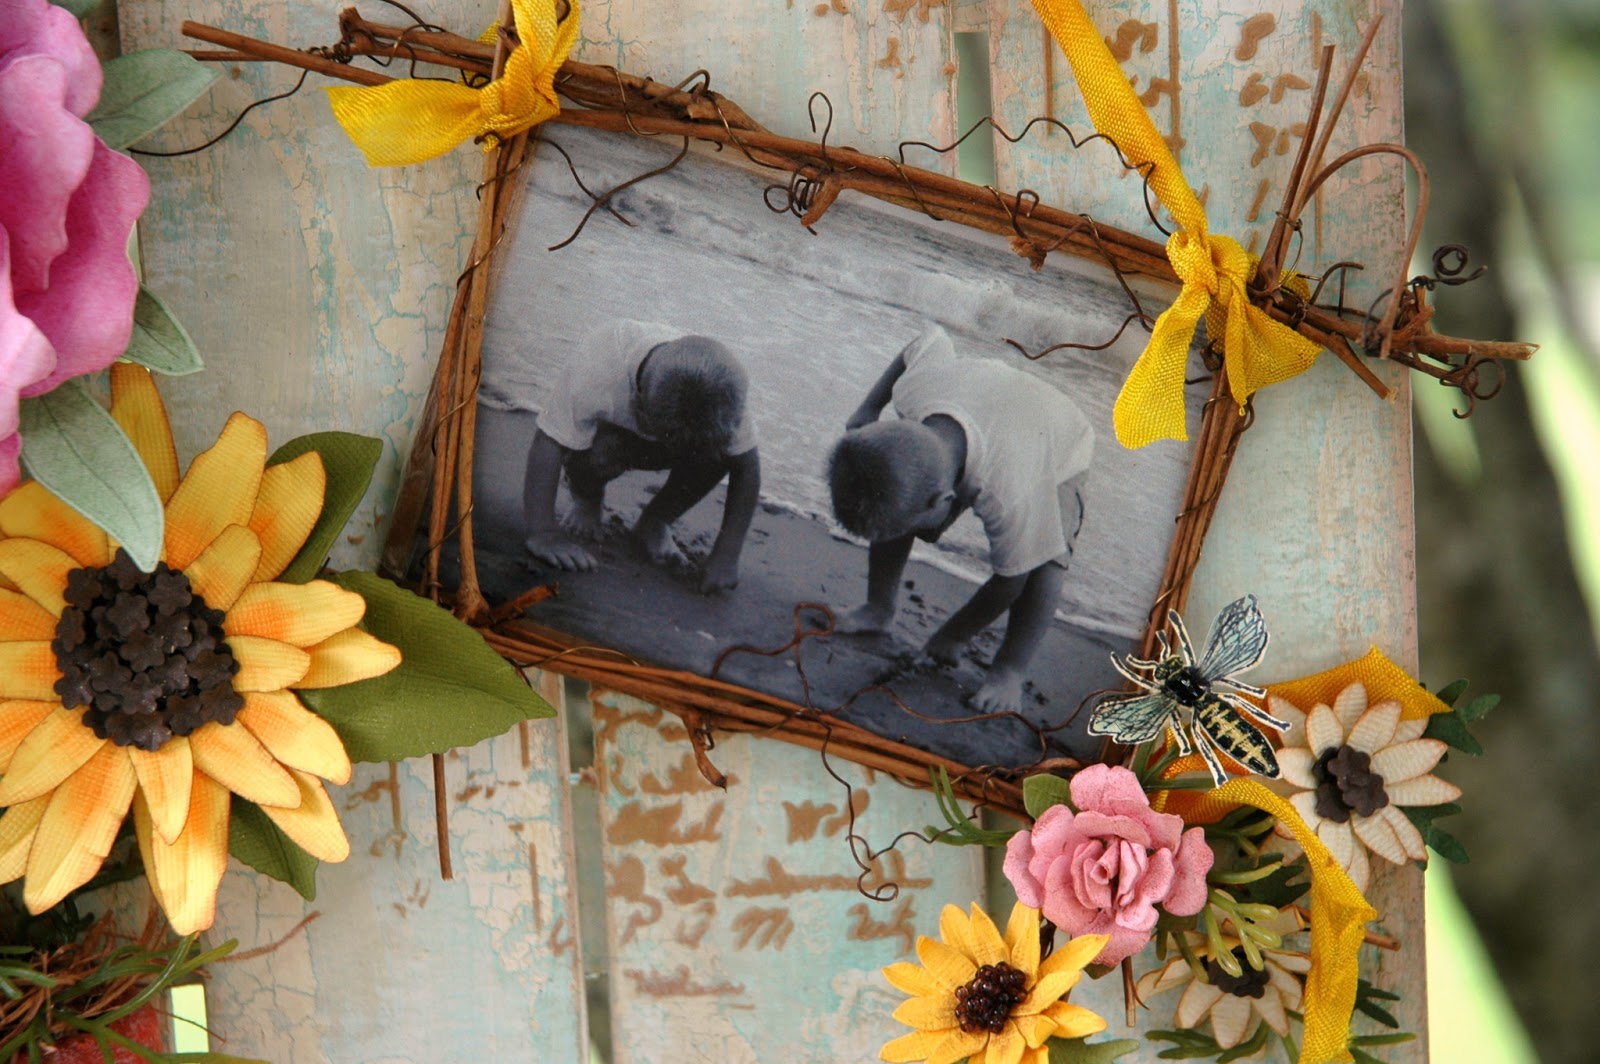
I created this little wall hanging and decorated it with all sorts of things that remind me of summer; including a picture of my twin grandsons at Myrtle Beach last summer.

Want to make something like this for yourself?  Here is how I did it ...


1. Begin with eight pieces of chipboard cut into 10" x 2" strips.  Cut the corners with a CropADile Chomper 1/2" corner radius. Glue the strips together to create 4 strips.  This gives them more thickness and makes for a prettier project.  Cut two 1" by 8 1/2" strips of chipboard to create the back "rails" that will hold your fence piece together.


2. Paint all of the pieces with white gesso. Let dry or heat set. Also, my pieces are not put together yet.  I am just showing you in this photograph how they will line up. (You may not want to do this gesso step, but I wanted a white base to start with so that my colors would be truer).


3. Paint a base coat of Fresco Finish Mermaid and either heat set or let air dry.  Then follow with a layer of Fresco Finish Crackle Glaze where ever you want the fence to crackle.


4. Add a top layer of Fresco Finish Snowflake and let dry.  Then distress the edges with Gathered Twigs Distress Ink.


5. Add the supporting "rails" to the back side of the fence by spacing the upright fence pieces evenly on the 8 1/2" rail.  Use your Tim Holtz Design Ruler and measure 2" up from the bottom and down from the top and draw a line across the fence pieces.  Add 1/2" Scor Tape to each fence piece.  Make sure the fence pieces are even and straight then add the rail across the tape.


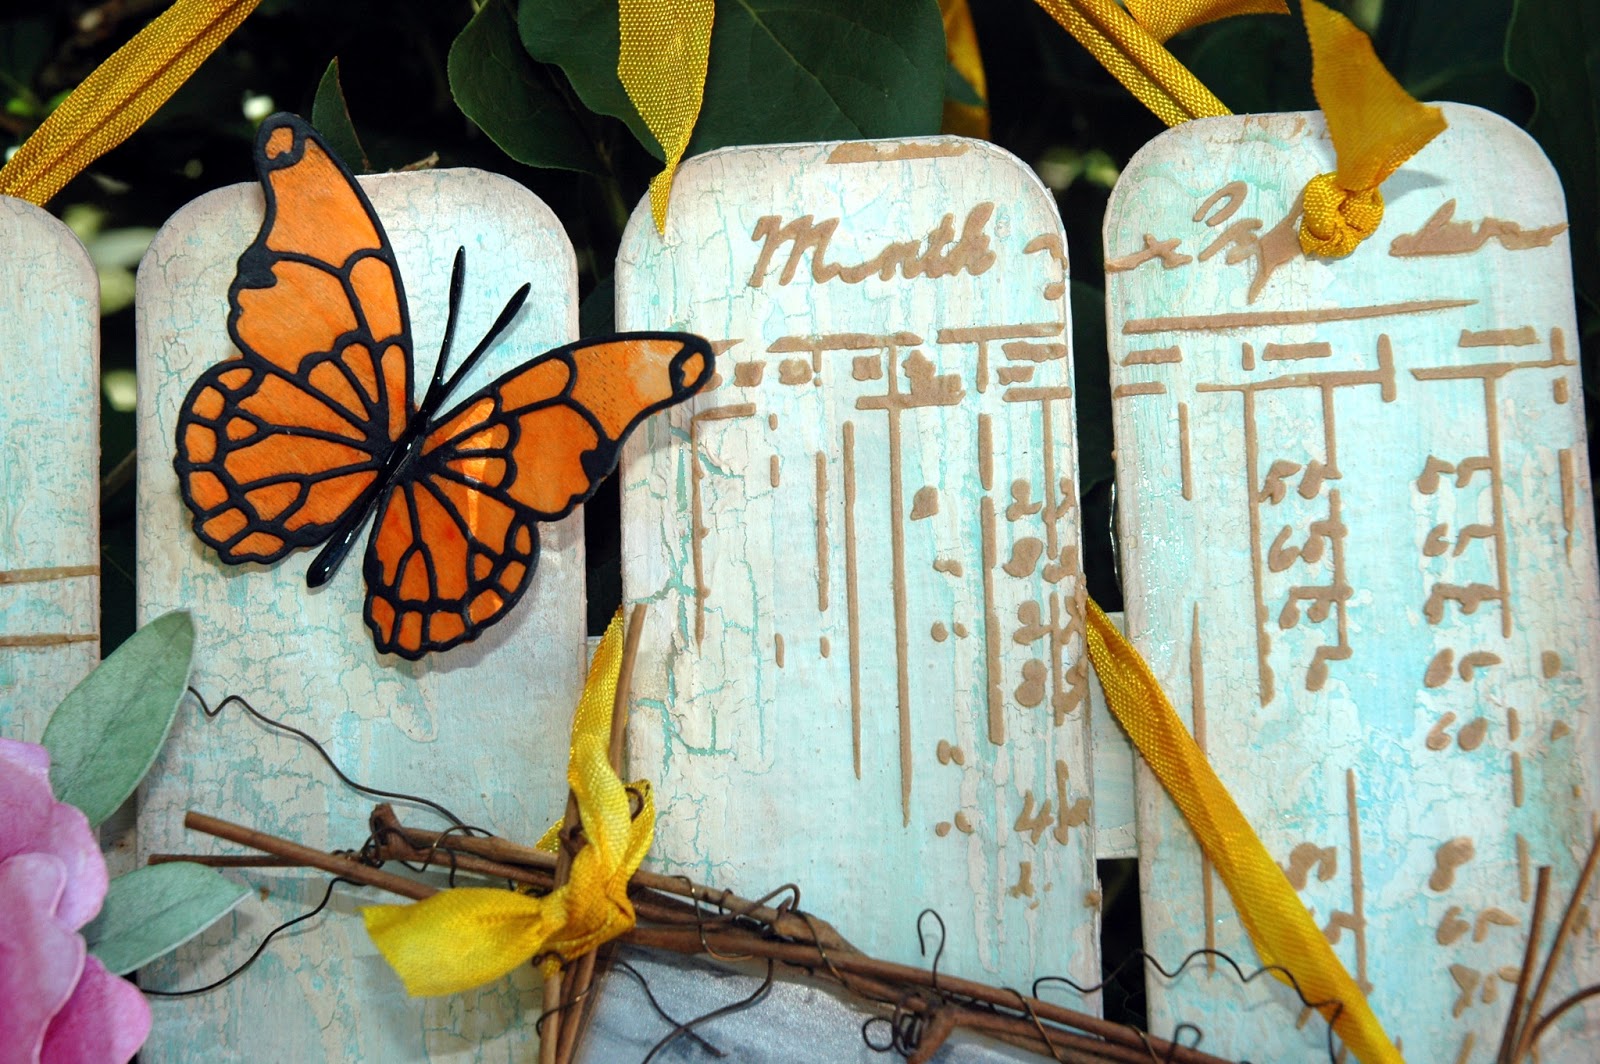
6. Mix Gathered Twigs Reinker with a little bit of Wendy Vecchi's White Embossing Paste.  Randomly place the Crafter's Workshop Mini Ledger Stencil on the fence front and scrape the colored paste through areas of the stencil.  Heat set or air dry.

Making the wooden frame around the picture: 


7. I first created a black and white photograph out of a color photograph of my twin grandsons on the beach.  I then sized the photograph 2 3/4" x 3 3/4".  Then I glued it onto a piece of kraft cardstock and cut it out, leaving a little edge that I could glue my sticks onto.


8. I gathered a few twigs together and began wrapping them with a dark colored wire.  Then simply lay some 1/4" Scor Tape or hot glue onto the kraft edge around the photograph and glue the sticks in place.  I glued down the top and bottom pieces first and then added the two side pieces.  

Making the flower pot and flowers:


9. I needed a half flat flower pot so I used a little clay pot that I had as a mold and using Paperclay, I created a little half pot.  Mold the clay in place with just a little water on your fingers and then let it completely dry.  When dry, I painted the pot with (appropriately enough) Adirondak Terra Cotta Paint.  I then dry brushed a little white Gesso onto the pot to soften the bright color.


10. To create the big pink peony, I first shaded some white card stock using Permanent Red Tint, Magenta and White Pan Pastels.  For the leaves, I used Chrom. Oxide Green Pan Pastel.  Then, using Sizzix Susan's Garden Peony, I die cut all of the pieces.


Here you can see all of the pieces used to create the peony with the Pan Pastels added to make the flower look more lifelike.


Susan's tool kit is so important when making the Susan's Garden flowers. Everything you will need is in the kit.  Here, I am creating depth on each of the petals on a foam mat and one of the tools.  All of the instructions are included with each flower and you can also go to the Sizzix website and download the PDF files and view "how to" videos for each flower.  I also made a big sunflower that is included in the pot.  I simply die cut the sunflower out of golden colored cardstock and added a few highlights with Pan Pastels before putting the flower together.  (Use a spray sealer to seal the chalk onto the petals before putting the flowers together).


11. To create the bright yellow-ish custom colored ribbon that I wanted to use on my piece, I used simply cut some of Tim Holtz' White Crinkle Ribbon and laid it onto my non stick craft sheet.  Then I used primarily Mustard Seed Distress Ink by laying it, pad side down directly onto the craft sheet and pulled the ribbon underneath it, adding the color.  Then I randomly added some Wild Honey Distress Ink onto the ribbon, sprited it with water, wadded it up and heat set it.  Wah-lah!  Instant golden yellow ribbon! 

Creating the die cut butterfly:

I discovered something that makes a really cool effect for a die cut butterfly.


12.  Take some white tissue paper and spritz whatever color of ink spray you want on it.  Then gently raise up the tissue paper and heat set it.  Add more spray if you want deeper color.  Set aside.  Then die cut your butterfly.  In this case, I decided to create what resembles a Monarch butterfly.  So, I used the Memory Box Vivienne butterfly die cut twice using black cardstock.  


Use Glossy Accents lightly on the underside of the die cut and lay it onto the colored tissue paper. Cut around the outside edges of the butterfly. Then add Glossy Accents to the underneath side of the die cut butterfly on all of the die cut areas. Take the other die cut butterfly and stick it directly behind the first one, sandwiching the tissue paper in between the wings.


Glue on the body/antenna and cover with Glossy Accents and let dry.

Now put it all together and create your Ode To Summer masterpiece!


The top half of the fence with the Embossing Paste detail and the sweet Monarch Butterfly. 


The half "terra cotta" flower pot with the beautiful peony and large sunflower.  (I added a piece of styrofoam and a little excelsior grass and plastic greenery along with the yellow bow to the pot).  The pot and styrofoam were hot glued onto the fence.  


Closer picture of the flowers.  So fun to make!!!


The bottom of the fence with "Post Card" heat embossed using Antiquities Rust Embossing Powder.  This place looked sort of bare and sometimes something as simple as a stamp can fill up the space beautifully.


And finally...the wired twig frame with my sweet grandsons.  I added a little piece of yellow ribbon to the frame and hung it in place, draped over one of the pickets in the fence.  I also added some smaller daisies and a mini rose that I had left over from my "Good To Be Green" project.  I also made a little bee from Wendy Vecchi's  Busy Making Art stamp set. I stamped him onto Specialty Stamping Paper and colored him with a Detailer Water Brush and Scattered Straw Distress Ink on the body and Broken China Distress Ink on the wings. I added some acetate wings with Glossy Accents and glued him into place.


Crop a couple of holes at the top, tie it up with ribbon, add a shabby bow and you're all set!  I hope you have enjoyed this tutorial on making this dimensional ode to Summer!

Now it's YOUR turn to create something summery and join the fun on our challenge at Simon Says Stamp and Show's Monday Challenge.  

You could be the lucky winner of our weekly random 


$50.00 credit voucher.  We also love sharing our favorite projects with you on a new feature called ...

 All of the Design Team votes on our favorite pieces and why we love them so much.  Then, the top vote getters are featured.  You never know...YOU might end up in the spotlight!

Here are all of the products available at Simon Says Stamp that were used in this project: