Hello everyone and welcome to my blog.
Fall has finally arrived and so have the cooler temperatures! I love it!
It's a wonderful time to hang out in my art studio and CREATE!
This week at Simon Says Stamp Monday Challenge, the theme is "Nautical Nonsense". From mermaids to sea critters or the emerald and aqua blue colors of the ocean; whatever inspires you to join us this week, dive in and join the fun!

Here is my nonsensical nautical art journal page combining all sorts of Distress Inks, some Distress Paints, various stamps, a Texture Fade, Treasure Gold Guilding Wax and even some good old boys from Graphic 45's On the Boardwalk collection decided to swim by and check out the funky mermaid.

Speaking of the funky mermaid, she is a concoction of stamps from Prima's Paper Doll With the Ruffled Dress (head and upper body) and Dyan Reaveley's Doodle Parts (her hair and head dress) and Around the Edge (her seaweed shawl).

She (and all of
her assembled parts) was stamped onto Specialty Stamping Paper with Jet
Black Archival Ink. Then all of the pieces were cut out after being colored. The seaweed shawl (from Around the Edge) is colored
using a Detailer Water Brush and Fresh Lime and Dirty Martini Dylusions
Ink Sprays. The headdress (from Doodle Parts) is painted with a
Detailer Water Brush and Bubblegum Pink, Calypso Teal, Fresh Lime and
Pure Sunshine Dylusions Ink Sprays. I also added some "bling" and sat
it right on top of the Bubblegum Pink headband on the original Paper
Doll. The hair is also from Doodle Parts and is water brushed using Mustard Seed and Wild Honey Distress Inks. I cut it apart and
fashioned it to look like a mermaid's long blonde hair freely flowing in the ocean waves. The
hair on the original paper doll is also colored with Mustard Seed and
Wild Honey. The little bra and the two pearls on the mermaid's upper
body are painted using Picked Raspberry Distress Paint (because I needed something more opaque to cover the Specialty Stamping paper and the pearls than the Dylsuions Ink Sprays could provide). I free handed
the belly button, bra and the doodling around it.

I have to say that I love her scaly tail. I wanted to create something that had some dimension and an almost realistic scale look yet keep it whimsical. I think I achieved that with the help of Tim Holtz' Bubbles Texture Fade. Here is how I made it:
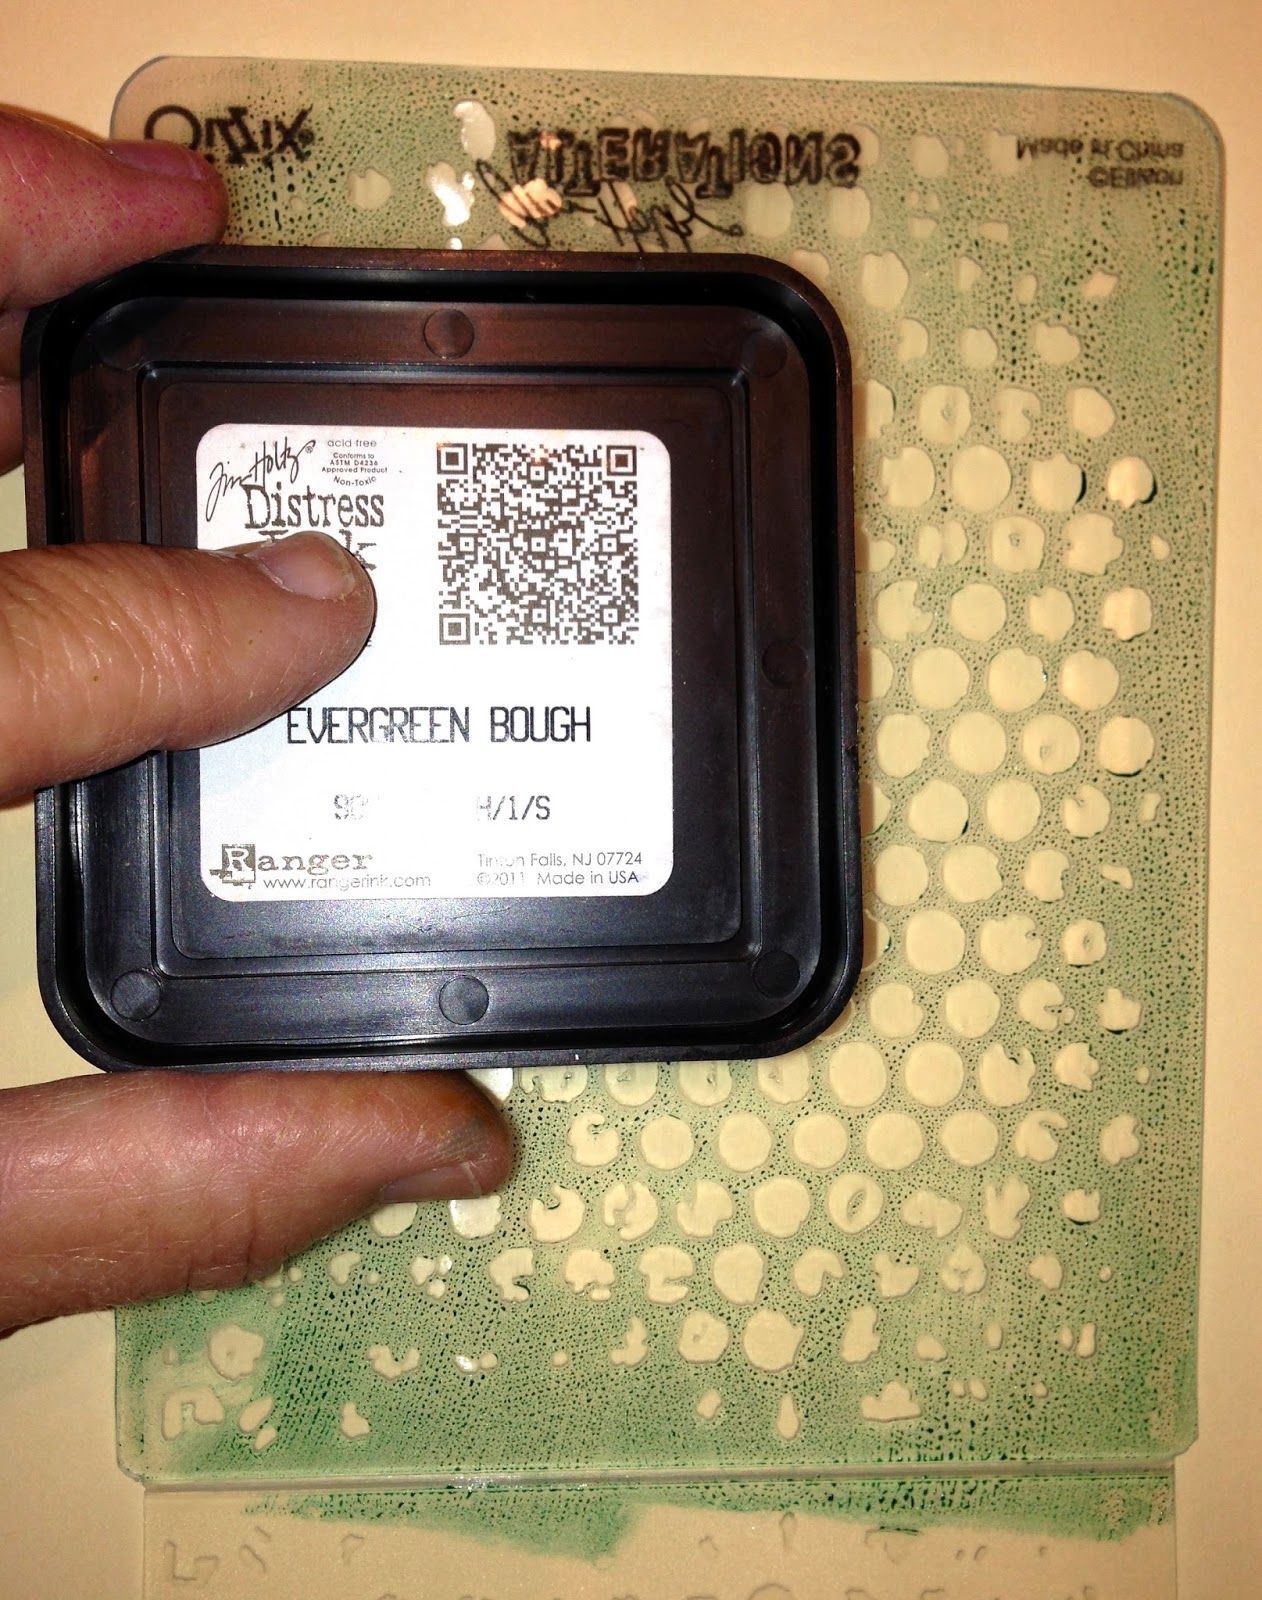
Step 1: Rub the Evergreen Bough Distress Ink Pad across the front of the Bubble Texture Fade. Slip a piece of Manila Cardstock in between the Texture Fade and run through a Vagabond or embossing machine. I repeated this process using a Tumbled Glass Distress Ink Pad so that I could get varying shades of scales.

Step 2: Add shimmer to the scales by adding Perfect Pearls Mists to the embossed Manila Cardstock. In this case, I used Mint and Turquoise Mists on the Evergreen Bough scales and Sunflower Sparkle on all (including the Mint and Turquoise misted scales).
**Note - Perfect Pearls Mists are not like most mist sprays. They do not add a lot of color. They are more about adding iridescent shimmer.

Step 4: Cut the scales into strips, scalloping the bottom edge and using about two rows of bubbles (or "scales") on each strip. Add Renaissance Treasure Gold Guilding Wax to the scalloped bottom of each strip and then lightly rub the remaining wax on your finger over the "scales". Then add a strip of 1/4" Scor Tape across the back of each strip.

Step 5: Begin at the bottom and overlap the rows of scales, attaching them to a piece of Manila Cardstock that will serve as the base for the tail. Alternate the lighter and darker colors of the strips. Repeat this until you have enough strips to fashion a tail.

Step 6: Lay a piece of paper on top of the Prima Paper Doll and create a mermaid tail that is proportionally correct for the size of the doll's upper body. Cut it out and lay it on the scale strips. Tape in place and cut out. Then ink a piece of Manila Cardstock with Evergreen and Tumbled Glass, spray it with Sunflower Sparkle and cut out the fin of the Mermaid Tail onto it.

Step 7: Glue the fin underneath the end of the mermaid's tale and distress the edges with the Treasure Gold Guilding Wax. Gently wipe your finger over the surface of the fin and add touches of Sepia Black Cats Eye Ink Pad on the fin. (I added a piece of gold Dresden trim to the waist of the mermaid's tail right before I snapped the final photos of the art journal page.)
Step 8: Glue the mermaid tail onto the upper Prima Paper Doll body that has already been assembled.

My mermaid needed some friends so I stamped these three little fisheys from Under the Sea and colored them in the same manner as the mermaid. The two smaller fish are colored with Pink Bubblegum. The larger is colored with Mustard Seed and Rusty Hinge Distress Ink fins. Their eyes are then coated with Glossy Accents.

I actually created the background for this art journal page before I started on the mermaid. I wanted to create an underwater scene so I sprayed a piece of Bristol paper with Dylusions London Blue, Calypso Teal and Fresh Lime Ink Sprays. Then I heat set those and added the Sunflower Sparkle Misted chevron pattern from The Crafter's Workshop 12 x 12 Chevron stencil that was laid over the sprayed paper and then lightly misted with Sunflower Sparkle.
Next I added the white "bubbles" using Picket Fence Distress Paint (because it is more opaque than just a spray). The bubbles were created by randomly stenciling them into place using The Crafter's Workshop Mini Messy Circles stencil.
Then I began stamping more images on top of the sprayed paper so that I could add more detail. Above, you see the leaves from Further Round The Edge. I am coloring them in with the Detailer Water Brush and Dirty Martini Dylusions Ink Spray. So easy...and fun!

And at the bottom of the page, I added seaweed and coral that was stamped in place after masking the seawood. I then colored the seaweed using Dirty Martini and Fresh Lime Dylusions Ink Sprays. I also added a little Sour Apple Perfect Pearls painted on with the Detailer Water Brush for some extra shimmer. The coral is painted using Post Box Red Dylusions Ink Spray.

And here is the background right before I started adding all of my elements to make this page turn into nautical nonsense!

As I was thumbing through my Dylusions Stamps for THE PERFECT sentiment for this nonsensical art page, I came across this one ... "Boys will be boys and so will a lot of middle aged men!" Well, THAT got the wheels to turning and I remembered these guys ...

From the Graphic 45's On The Boardwalk 12 x 12 paper pad. So, I cut them out and popped them into the ocean! I love them and I think they are perfect for the sentiment and this page!

See what I mean?
And now ... they will forever be at the bottom of the deep blue sea with my mermaid and ...

Right next to these characters that I did for an earlier Simon Says Stamp and Show challenge titled "Water". They look perfect together! Gotta LOVE Dyan Reaveley's stamps and sentiments!
And now it's YOUR turn to do some Nautical Nonsense and join our challenge. You could be the lucky winner of our random weekly of a

$50.00 gift voucher to shop Simon Says Stamp.
You might also be selected to be one our top entries of the week in a feature we call

It's a wonderful way to recognize and thank our wonderful entries and inspiration we receive from YOU each week!
Now GET CRAZY and have some fun with this one!
Here are all of the products available at Simon Say Stamp that were used in creating this Nautical Nonsense art journal page:
 |  |  |  |  |
 |  |  |  |  |
 |  |  |  |  |
 |  |  |  |  |
 |  |  |  |  |
 |  |  |  |  |
 |  |  | |  |
 |  |  |  |  |
 |  |


