Good Monday morning friends! Isn't it a great day for paper crafting? Simon Says Stamp and Show's Challenge this week is all about being "krafty"....using a kraft type paper that is!
For this challenge I decided to use Tim Holtz' Kraft Resist Paper Stash to create a very cute and very easy to make mini book/gift card holder. This definitely is a "krafty piece" made from Tim's paper stash for all of the covering and embellishing and kraft cardstock for the three little hinges that hold the coin envelopes in place. I added some of Tim's Tissue Tape as a little embellishment.
My friend, Jim The Gentleman Crafter did this little book as a make and take a couple of months ago. I thought the idea was so cute that I wanted to try my hand at it. I like working with kraft paper. It sets the tone for a real vintage feeling.


Here is my finished book. Made with chipboard, less than a sheet of paper, 3 1/2 x 2 1/2 coin envelopes and 1/4" Scor Tape, you can put one of these little books together in a matter of minutes. Then embellish away to give your little book some real character.
As I said, I started with Tim Holtz' Kraft Resist Paper Stash. I used a couple of different sheets out of it to create my book covers and also to cover each of the coin envelopes. But, you could complete this entire project with one sheet of paper if you needed to. You don't have to cover the envelopes, but I think the book looks much more finished when you do.
Here is what you'll need to create this little book:
2 - 2 1/2" X 3 3/4" pieces of chipboard
2 - 1/2" x 2 1/2" pieces of chipboard
1 - 1" x 2 1/2" piece of chipboard
1 - 3 1/2 x 11" patterned piece of cardstock for the exterior of the book
1 - 2 2/3" x 9 5/8" contrasting cardstock for the interior of the book
3 - 1" x 2 1/4" strips of kraft paper (or leftover cardstock) scored lengthwise at the 1/2" line to make hinges
A Ranger Craft Stick, Scor Tape or a glue of your preference to glue everything together
Tim Holtz' Design Ruler - THE HANDIEST RULER EVER! You will see why I say that in the instructions below
Bone Folder
3 1/2" x 2 1/2" Coin Envelopes - I used three in this project but you can add more or less
Putting your book together:
Lay your exterior cardstock piece face down on your work space. Draw a 1/2" line across the bottom and the left side of your cardstock. These lines will be your guides for placing your chipboard to keep it straight. You will start at the left side and work towards the other side.

Glue the back of all of your chipboard pieces as you are putting them in place on the cardstock. Start with a 2 1/2" x 3 3/4" piece of chipboard and place it on the 1/2" lines that you made on the left side of the paper. Use your Tim Holtz Design Ruler (which just happens to be 1/8" wide) next to the edge of the chipboard that you glued in place. The ruler will serve as your spacer between pieces of chipboard (so that the book will later fold perfectly). Next glue and add a piece of 1/2" chipboard. Line up the bottom on the 1/2" line and the side next to the ruler. Next glue the other 2 1/2" x 3 3/4" piece of chipboard. Using the ruler, line up the chipboard across the bottom 1/2" line and the edge of the ruler. Next glue the other 1/2" piece of chipboard in the same manner. Finally, glue and add the 1" piece of chipboard in place.
Now miter the corners of the cardstock. To do this, use Tim's ruler and lay it (fat flat edge down) angled against each corner of the cardstock. Use a Tonic Craft Knife to slice remove the excess cardstock. Be sure that you have a cutting mat underneath the cardstock. You can just eyeball the angle. Do this for all four corners.

Apply 1/4" Scor Tape down the outside edges of the chipboard. Also run a piece down the center of each each of the 1/2" pieces of chipboard and two pieces of tape down the 1" piece of chipboard. Remove the outside tape backing. Fold the cardstock on the long sides first and glue the ends of the cardstock in place.

Then use your
bone folder to gently tuck in any possible excess edges of paper that
might not want to lay down like they should when you fold the remaining cardstock
over the edges of the chipboard. Then fold and glue the short ends in place.

Ink the edges of your interior paper that will line your book. Tape the outside edges of the back of the cardstock and run one piece down the center of the cardstock. Remove the backing of the tape and press the interior cardstock in place. Burnish all of the paper using a bone folder. Then gently work the joints of the book so that it folds nicely.
Now to create the pages for your book using coin envelopes and hinges.


Take one of the three hinges that you have created from a 1" piece of cardstock that is scored down the center at the 1/2" line and tape both sides with a 1/4" piece of Scor Tape on either side of that center scored line. You can either cover your envelopes now or wait until after you put all of the envelopes together (if you're covering the envelopes). I did not want the hinges to show, so I decided to wait until after I hinged the envelopes together before covering them.
Be sure that your envelopes are all facing the same direction; the open fold on the back is either up or down. I chose to put all of mine down. Remove the tape backing and adhere the first hinge on the backside of the envelope, along the straight folded edge of the envelope. Then line up the next envelope and adhere the other side of the hinge in place on the front side of that envelope. Repeat this process until all of the envelopes you choose to use are in place. You will have one half of a hinge remaining on the back envelope. That hinge will adhere to the back side of the cover, holding the pages in place.
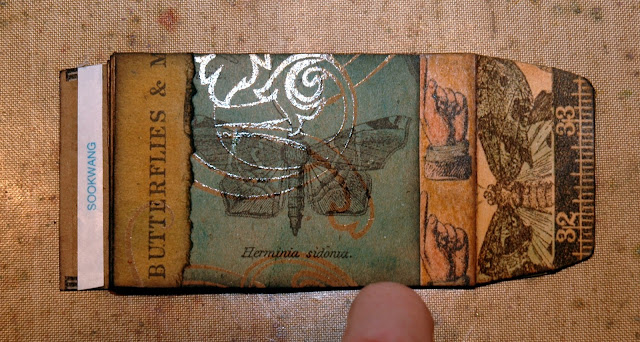


BEFORE I adhered the pages to the book, I covered each of the coin envelopes with different pieces of paper from Tim's Kraft Resist Paper Stash. I colorized the pages with Wild Honey and Peacock Feathers and a touch of Broken China Distress Inks. I inked the backgrounds using my Ink Applicator. I did the detail work using my Tim Holtz Detailer Water Brush. I added bits of Tim's Tissue Wrap on the envelope flap front because I liked the way it looked. I covered the backs of the flaps with various butterfly images from Tim's Kraft Resist Paper Stash.
Here are photos of the interior pages. I have coated all of the butterflies with Rock Candy Distress Crackle Paint. That added a little dimension to the butterflies but yet the pages can close flat inside of the book.

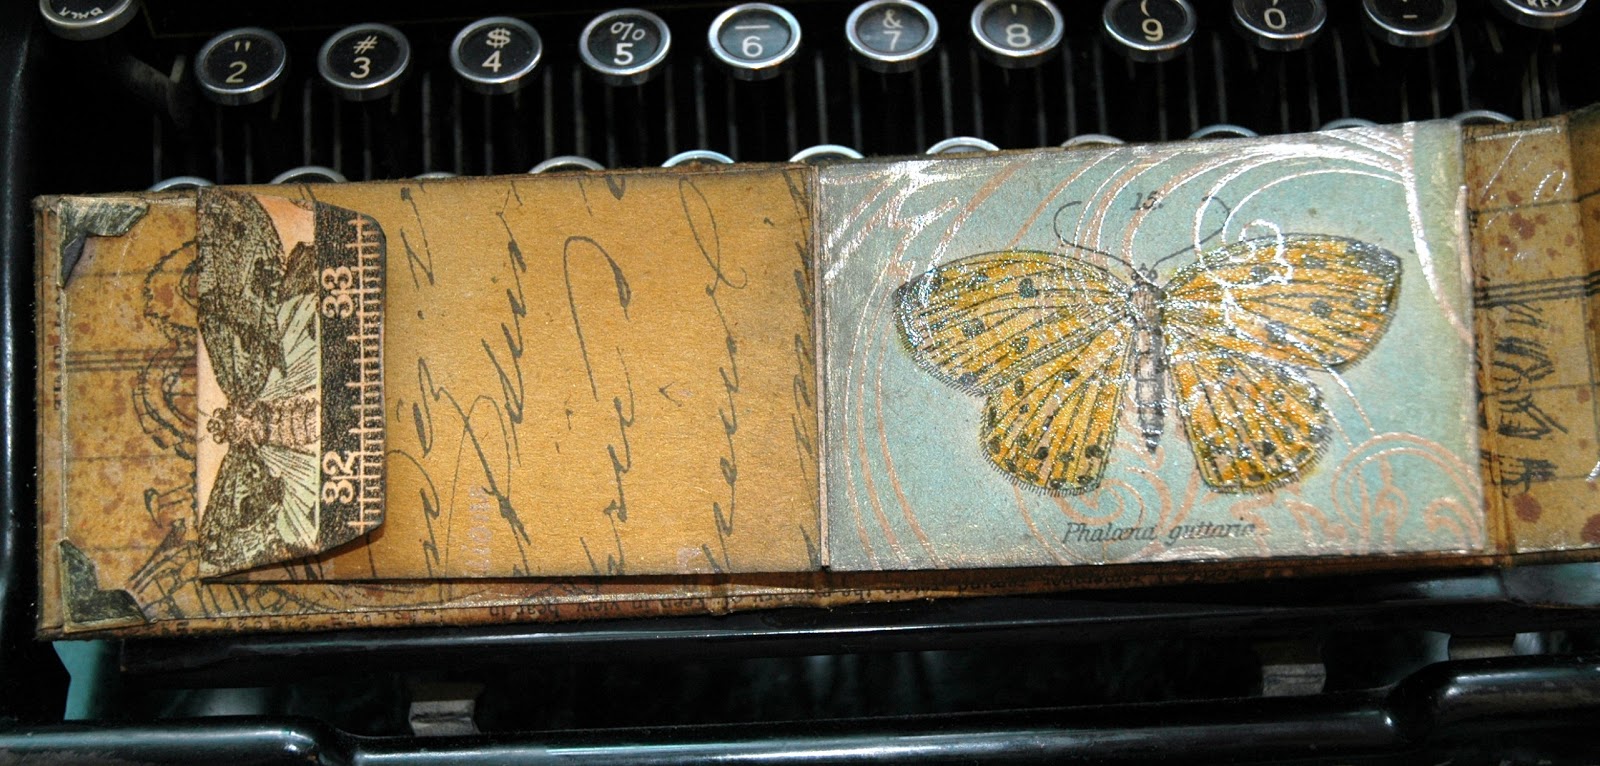
Then flip to Page 2.

Closeup of Page 2.

Then flip to Page 3.


Then the back side of page 3 and the back cover.

The interior of the book was spotched by using Vintage Photo Distress Stain that I had converted into a 2 oz. Mister Bottle rather than using it in it's original container. I really like the spotchy areas that I got from spraying the Distress Stain. I also added a touch of Gold Paint Dabber along the edges and to the black photo corners that I added to the cardstock before I glued it into place on the chipboard. Then I stamped the gears from Tim Holtz' Time Travelers stamp set on both the front and back interior covers.

For the exterior cover, I first added a couple of little rub ons from Tim Holtz' new Elements Rubons. Love them! Then I stamped the clock face from Tim Holtz' Elements Of Time stamp set on the front. I added a beautiful butterfly from Tim Holtz' Papillon stamp set by first stamping with Jet Black Archival Ink onto Specialty Stamping Paper and then coloring in the wings with Broken China Distress Ink and a Detailer Water Brush. Then I stamped another butterfly onto acetate and gently heat set it. I added Broken China Distress Ink to the underside of the wings, cut it out and glued it on top of the other butterfly using Glossy Accents. I added the wire antenna underneath the butterfly and set it aside to add as the very last embellishment.
Next, I decided that I wanted to add a bit of "umph" to the exterior covers. First I masked the clock face and added the smaller of the flourishes from Tim Holtz Fabulous Flourishes stamp set. I liked that pop of gold and decided that the cover needed more of that. So, I randomly heat embossed some Queen's Gold Embossing Powder along the edges. I love the way the light catches the gold.

Then I stamped "The Impossible Is Often The Untried" from Tim Holtz' Words for Thought stamp set on the back cover.

I added my dimensional butterfly to the center of the clock face on the front using Glossy Accents. He was stamped onto Specialty Stamping Paper using Jet Black Archival Ink and then colorized using Broken China Distress Ink and Tim Holtz' Detailer Water Brush. I then stamped the butterfly again onto acetate using Jet Black Archival and gently heat set it. (Most acetate is not heat resistant ~ so be careful!) I cut out the wings and using Glossy Accents, attached them to the paper butterfly at the body. After it dried, you can lift the wings to make it look more like the butterfly is fluttering.
Finally, I added a thin but very effective Velcro strip to the interior of the opening flap and my mini book was finished! Love it and what a great gift it would make!

I hope that you like my little mini book. Leave a comment. I love reading them. And, if you still need some inspiration for this week's Simon Says Stamp and Show Challenge, head over to the blog and check out the beautiful projects my Design Teammates have created just for you. Then, take that inspiration and create something fun with kraft papers. Enter our challenge. You could be the lucky winner of our most generous sponsor's

$50.00 credit voucher. You might also be named one of our TOP THREE artists for the week. That is very high praise, considering the beautiful and unique creations we see every week! Good luck. I can't wait to see your "kraftiness".
Here are the products available at Simon Says Stamp that were used in creating this fun and easy mini book:


