Hello friends and welcome to my blog! This week's Simon Says Stamp and Show Challenge was a bit of a challenge for me!
The theme is "What I'm known for ... ". You would think that might be easy but when you really stop to think about it, it's kind of tough to define yourself. I would like to think that, at least in the art community, I'm known as someone who tries to be different all the time; not defining myself by one particular style. I love all things vintage. I love Tim Holtz' style. I love dimensional pieces and I love lots of detail. So, I guess that defines me better than anything. But, as I said, I also try to create things that are different and share not only what I did but how I did it with you. That is why, when I came up with my piece for this week, I even surprised myself. I attempted an easel card with a drawer! My first EVER!

I am not a card maker. I think I have made one or two cards my entire life. I love cards and I have seen some of THE MOST beautiful cards I've ever seen made by people posting to the challenges at Simon Says Stamp and Show. But, for some reason, I think I'm intimated by cards! (smile)
Anyway, in the interest of staying true to being different, doing vintage, having dimension and lots of detail, I decided to be totally different and create this easel card with a drawer!
I was inspired by one of our challenge posts a few weeks ago....Shea Marshall's entry that was a easel card with a drawer. Check out her blog and there is a video link to show you the basic construction of this easel card with a drawer.
See, you guys inspire ME as much as I hope that I inspire YOU!

I began with papers from Pink Paislee's beautiful London Market 12"x12" paper pad.
1. Begin with a 6x6 square out of solid cardstock (I used the dark brown patterned paper) for the basic drawer.
2. Score it at 1" on each side, using the Martha Stewart Score Board. Then cut along one of the score lines on each side (to tuck that tab inside when creating the corners for the drawer).
3. Use 1/4" Scor Tape or glue to glue the corner tabs to the inside of the drawer.
4. Using patterned paper, cut eight strips measuring 3/4" x 4". Then cut two pieces 4"x4". These pieces are used to decorate the outside and inside of the drawer. Ink all of the edges of all of the cut paper with Gathered Twigs Distress Ink. Decorate the outside of the drawer now.
5. Cut a handle measuring 1/2"x4" out of plain cardstock. Score each end at 1/2". (I also lightly swiped the brown cardstock with a Gold Paint Dabber for a metallic look.)
6. Punch a hole in either end of the handle.
7. Measure in 1/2" from either end of the drawer front and punch a small hold.
8. Line up the hole on the drawer front with the hole in the handle and put in place using a brad.
9. Now decorate the interior of the drawer with the remaining cut patterned paper.
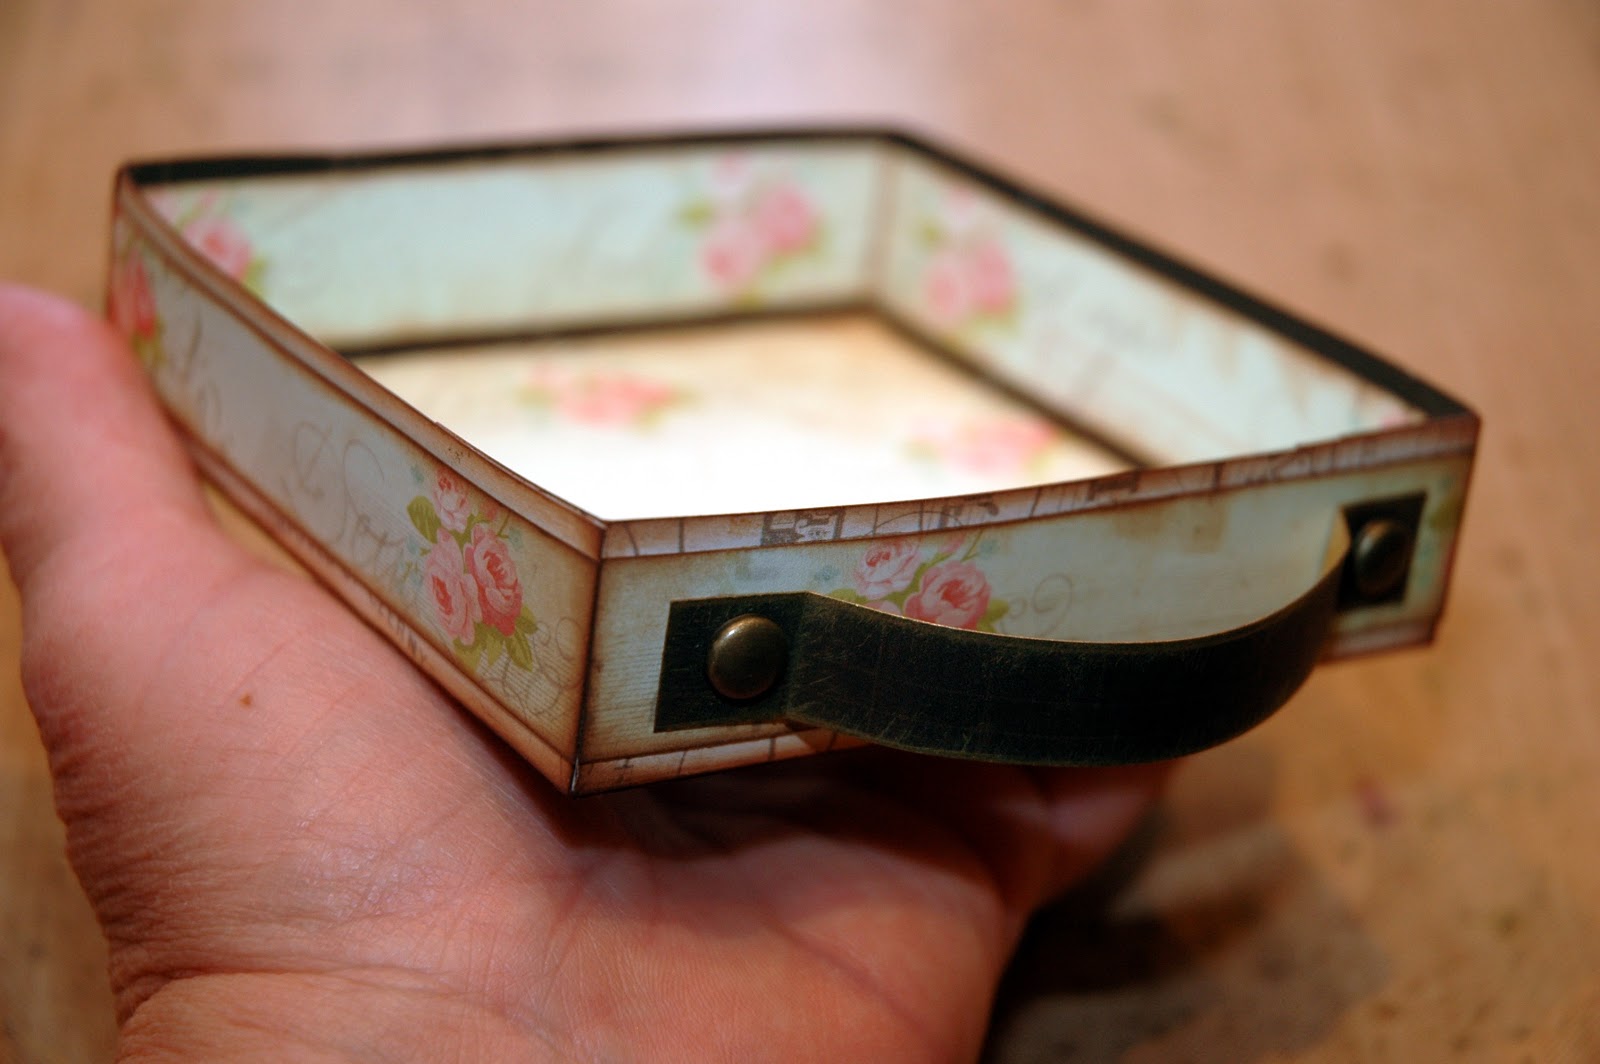
Here is the finished drawer....

The cardstock used to decorate the drawer not only is pretty but it adds strength to the drawer.

Next you are going to create the band that the drawer will slide into. This will also be the base for the easel card.
1. Cut a piece of solid cardstock 4 1/8" x 11". Score the band at 1 1/8", 5 1/4", 6 3/8" and 10 1/2".
2. Cut two pieces of patterned papers 4 1/8" x 4 1/8". These will go on the two outer sides of the band. Be sure to ink all of the edges with Gathered Twigs. I also stamped "DREAM" and the butterflies on either side of the side panels. DREAM is from Tim Holtz' Stuff to Say Stamp set and the top butterfly in the row of four butterflies from Attic Treasures. I used Coffee Archival Ink.
3. Decorate each panel of the band.
4. Glue or Scor Tape the band together. The drawer will slide into the band.

This is the finished base and drawer assembly.

Now you will create the easel portion of the card.
1. Cut a piece of 4 1/8" x 8 1/4" out of plain cardstock. Score this piece at 4 1/8" and 6 1/4". The 4 1/8" square will glue to the top of the drawer. The other end will create the easel.
2. Cut a piece of patterned paper 4 1/8" x 4 1/8". Glue this square to the inside of the top flap that was created from the scoring.
3. Cut pieces of patterned paper to decorate the easel portion of the card, both back and front sides.

Now your easel card should look like this ...
Then embellish your card and it is finished!

I began my embellishing by die cutting these pieces from the dark brown patterned paper that I used to create my basic card. I swiped the pieces with both Gold and Juniper Paint Dabbers to create a shabby metallic appearance. These die cuts are Spellbinders Fleur De Lis Accents. I added some bling to the flourish corners.
I also embellished the medallion pieces...one with a sentiment from Tim Holtz and the other with a metal gold frame and a metal butterfly than has been touched with the Juniper Paint Dabber.

Here is the medallion on the top of the card, popped over a partial distressed doily and a paper strip from the London Market papers. Next to the medallion is another butterfly. It is from Tim Holtz' Mini Blueprints 2 stamp set. It is stamped on an almost kraft cardstock and colorized with a Detailer Water Brush and Tattered Rose and Bundled Sage Distress Inks. I hot glued a little dimensional copper crown with bling at the top. The butterfly flutters among a Tattered Rose colored ribbon and trailing Prima Avon Roses.

Here is my easel card top.

My cardstock medallion on the bottom of the card is backed with Melissa Frances' cream tulle ribbon. I love all of her stuff...so vintage and shabby!

Here is the bottom of my easel card....flourish bling in the corner, beautiful sentiment medallion, little copper butterly popped on the upper corner and the Avon Roses trailing onto the bottom of the card.

Really fun vintage style project! Fill the drawer will little candies, a gift card; whatever your heart desires...that will fit in the drawer! (smile)
Now it's YOUR turn to create something that defines YOU and enter it to our challenge. You could be the lucky winner of Simon Says Stamp's

$50.00 credit voucher! A very nice prize! And...you could be named as one of the TOP THREE PICKS for this week's challenge. Good luck! I can't wait to see what you're known for!
Here are the products available at Simon Says Stamp that were used on this project:


