Bonjour mes amis! (Hello my friends!)
This week's Simon Says Stamp and Show is all about some French Inspiration. If you've not already seen them, check out the tres belle (very beautiful) projects that my Design Teammates have created for you this week on our challenge blog...very inspiring!
I have created a little French shabby chic matchbox dresser for you this week. I had seen this idea on Laura Carson's Artfully Musing blog and was fascinated with it. So, of course,
I had to make one! There is a video and PDF available on the link to Laura's blog for all of the instructions.

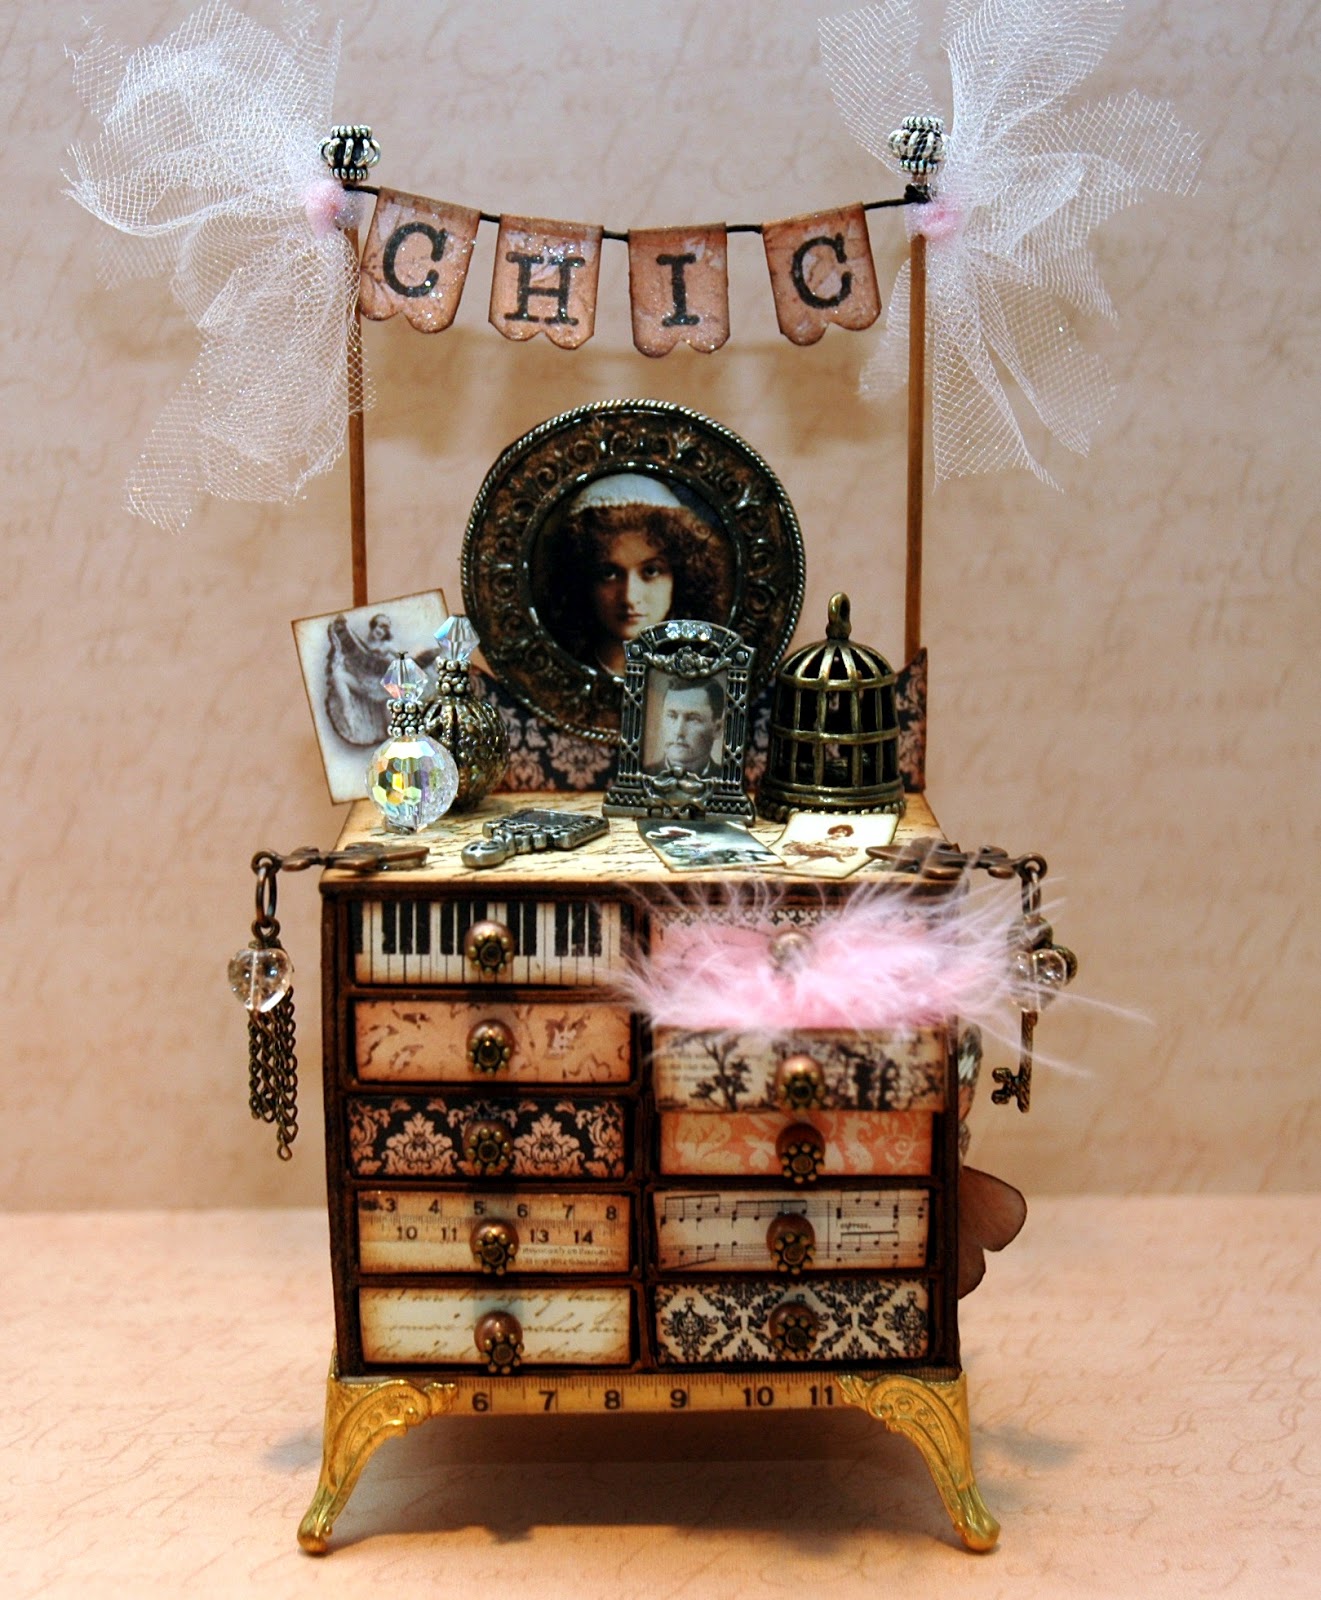
Here is my little creation...a 10 drawer dresser made out of small matchboxes, some chipboard and covered in cardstock. As you can see, it is very "chic" and belongs to a beautiful girl (in the "mirror") who earned her living as a can can girl in Paris. How's THAT for French inspiration and imagination?
The basic dresser is made out of 10 matchbooks. They usually come bundled in sets of 10. I bought mine at a dollar store for yep, you guessed it...$1.00. The chipboard I used was pretty much scraps from other projects. The cardstock that I used is from Prima's Almanac 6x6 paper pad. Love that pad! So many beautiful images and colors. Perfect for this little shabby chic project.


Here is a closer view of the dresser top; with all of the "girly" things on top: a little mirror (charm), pictures of friends (found on the internet and sized to fit this dresser top), a little antique brass bird cage, a metal picture frame with her boyfriend's picture, two perfume bottles (that I made from beads, crystals and bali silver), Fleur De Lis hangers dangling little vintage keys, hearts and tassles.

I love the "mirror" on the chest. I had a round metallic silver frame that was perfect for the round mirror that I wanted to attach to the back of my chest. But it was silver and everything else is either antique copper or gold. So, I altered the silver into an antique bronze-ish finish first with gold acrylic paint and then rubbing some raw umber acrylic paint on it. I sized my photograph of my lovely lady to fit the circle and then cut a backing out of black chipboard.

Here is my finished "mirror". I love it! It was easily attached to the chest by hot gluing it in place on the extra piece I added to the back of the chest (more about that in a minute...)


I love the "mirror" on the chest. I had a round metallic silver frame that was perfect for the round mirror that I wanted to attach to the back of my chest. But it was silver and everything else is either antique copper or gold. So, I altered the silver into an antique bronze-ish finish first with gold acrylic paint and then rubbing some raw umber acrylic paint on it. I sized my photograph of my lovely lady to fit the circle and then cut a backing out of black chipboard.

Here is my finished "mirror". I love it! It was easily attached to the chest by hot gluing it in place on the extra piece I added to the back of the chest (more about that in a minute...)
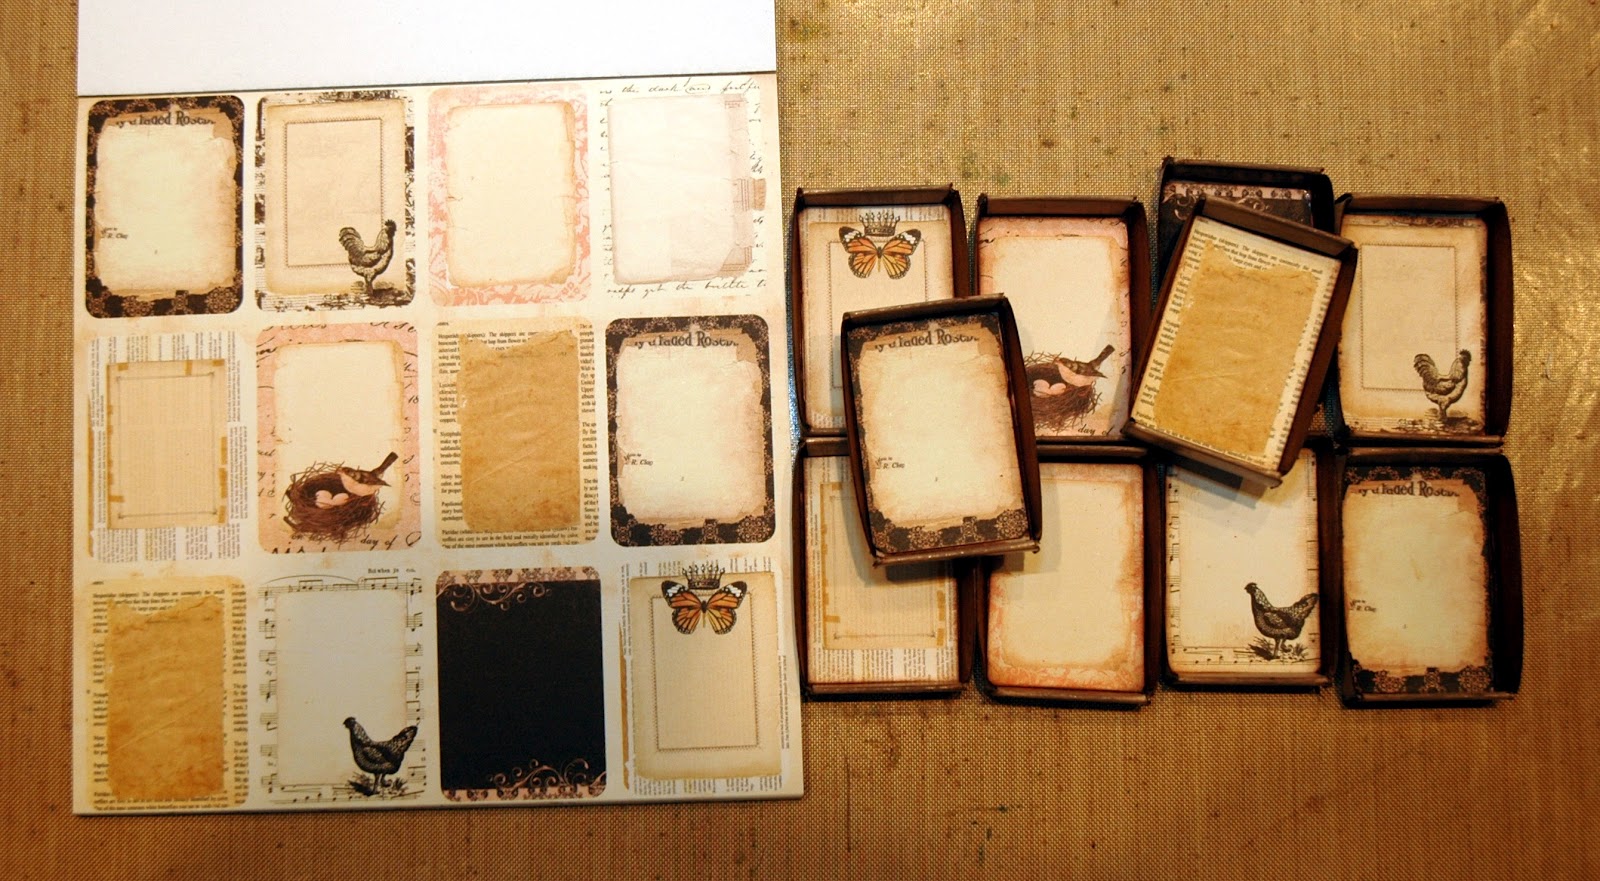
The drawers of this little dresser actually will slide in and out. The Almanac paper pad actually has sheets of paper that are almost the perfect size to line the interiors of the drawers. Yes, each drawer is lined!

Each drawer front is covered with a different portion of a paper from the Almanac Paper Pad. Then I made a template the size of the drawer front to be sure when I poked the holes in the center of the drawer, all of my drawer knobs would line up.

The little "knobs" are copper beads and flower spacers threaded on a head pin. I bent the head pin to one side and used a touch of Glossy Accents to hold it in place.

Here is a picture of the finished drawers. I have a little feathery boa coming out of one of them, so you can see that they actually do open and close! So fun!


Each drawer front is covered with a different portion of a paper from the Almanac Paper Pad. Then I made a template the size of the drawer front to be sure when I poked the holes in the center of the drawer, all of my drawer knobs would line up.

The little "knobs" are copper beads and flower spacers threaded on a head pin. I bent the head pin to one side and used a touch of Glossy Accents to hold it in place.

Here is a picture of the finished drawers. I have a little feathery boa coming out of one of them, so you can see that they actually do open and close! So fun!

The right side features dimensional butterflies taken from the Almanac Paper Pad and covered in Rock Candy Stickles for an extra vintage-ish texture and sparkle.

The left side features Tim Holtz' ATC size collage of the Eiffel Tower, Mona Lisa and Carte Postale. That has been heat embossed using my Ranger Heat It Craft Tool and Black Embossing Powder and a touch of Copper Embossing Powder added in. Very French!


I added a piece of Grungeboard to the back of the dresser using Tim Holtz' Brackets On The Edge die cut. Then I added a bead of hot glue along the base of the die cut as well as attaching it to the chest with a piece of Tyvek, using Scor Tape to hold it in place. Then I covered the entire of the back with a piece of cardstock and embellished it.

The back of the dresser features Moulin Rouge posters, pictures of can can girls and the French flag hanging from the antique brass oval frame. All of the posters have been coated with Rock Candy Stickles for an extra sparkle and texture.


The back of the dresser features Moulin Rouge posters, pictures of can can girls and the French flag hanging from the antique brass oval frame. All of the posters have been coated with Rock Candy Stickles for an extra sparkle and texture.

The "CHIC" bunting is created from Tim Holtz' Mini Scallops On The Edge Die Cut that has been cut into sections. I stamped the letters with Jet Black Archival Ink and folded the paper over a black cord then glued the sides together with Glossy Accents. I stretched the cording from dresser pole to dresser pole and accented the poles with some pink tulle that has been tied on and ripped to make it look more vintage. The bunting has been covered in Rock Candy Stickles to pop the colors of the pennants and give them that vintage texture and sparkle.
Now it's YOUR turn to see what YOU "can can" come up with for a French theme! Then post it to Simon Says Stamp and Show's challenge. You could win our generous sponsor's

$50.00 credit voucher! You could also be recognized as one of our TOP THREE entries for the week! Good luck!!
Here are the products available at Simon Says Stamp that I used in this piece:

Now it's YOUR turn to see what YOU "can can" come up with for a French theme! Then post it to Simon Says Stamp and Show's challenge. You could win our generous sponsor's
$50.00 credit voucher! You could also be recognized as one of our TOP THREE entries for the week! Good luck!!
Here are the products available at Simon Says Stamp that I used in this piece:
 |  |  |  |
 |  |  |  |
 |  |  |  |
 |  |  |  |
 |  |  |

