Stamp your passport for A VINTAGE JOURNEY into Tag Friday.

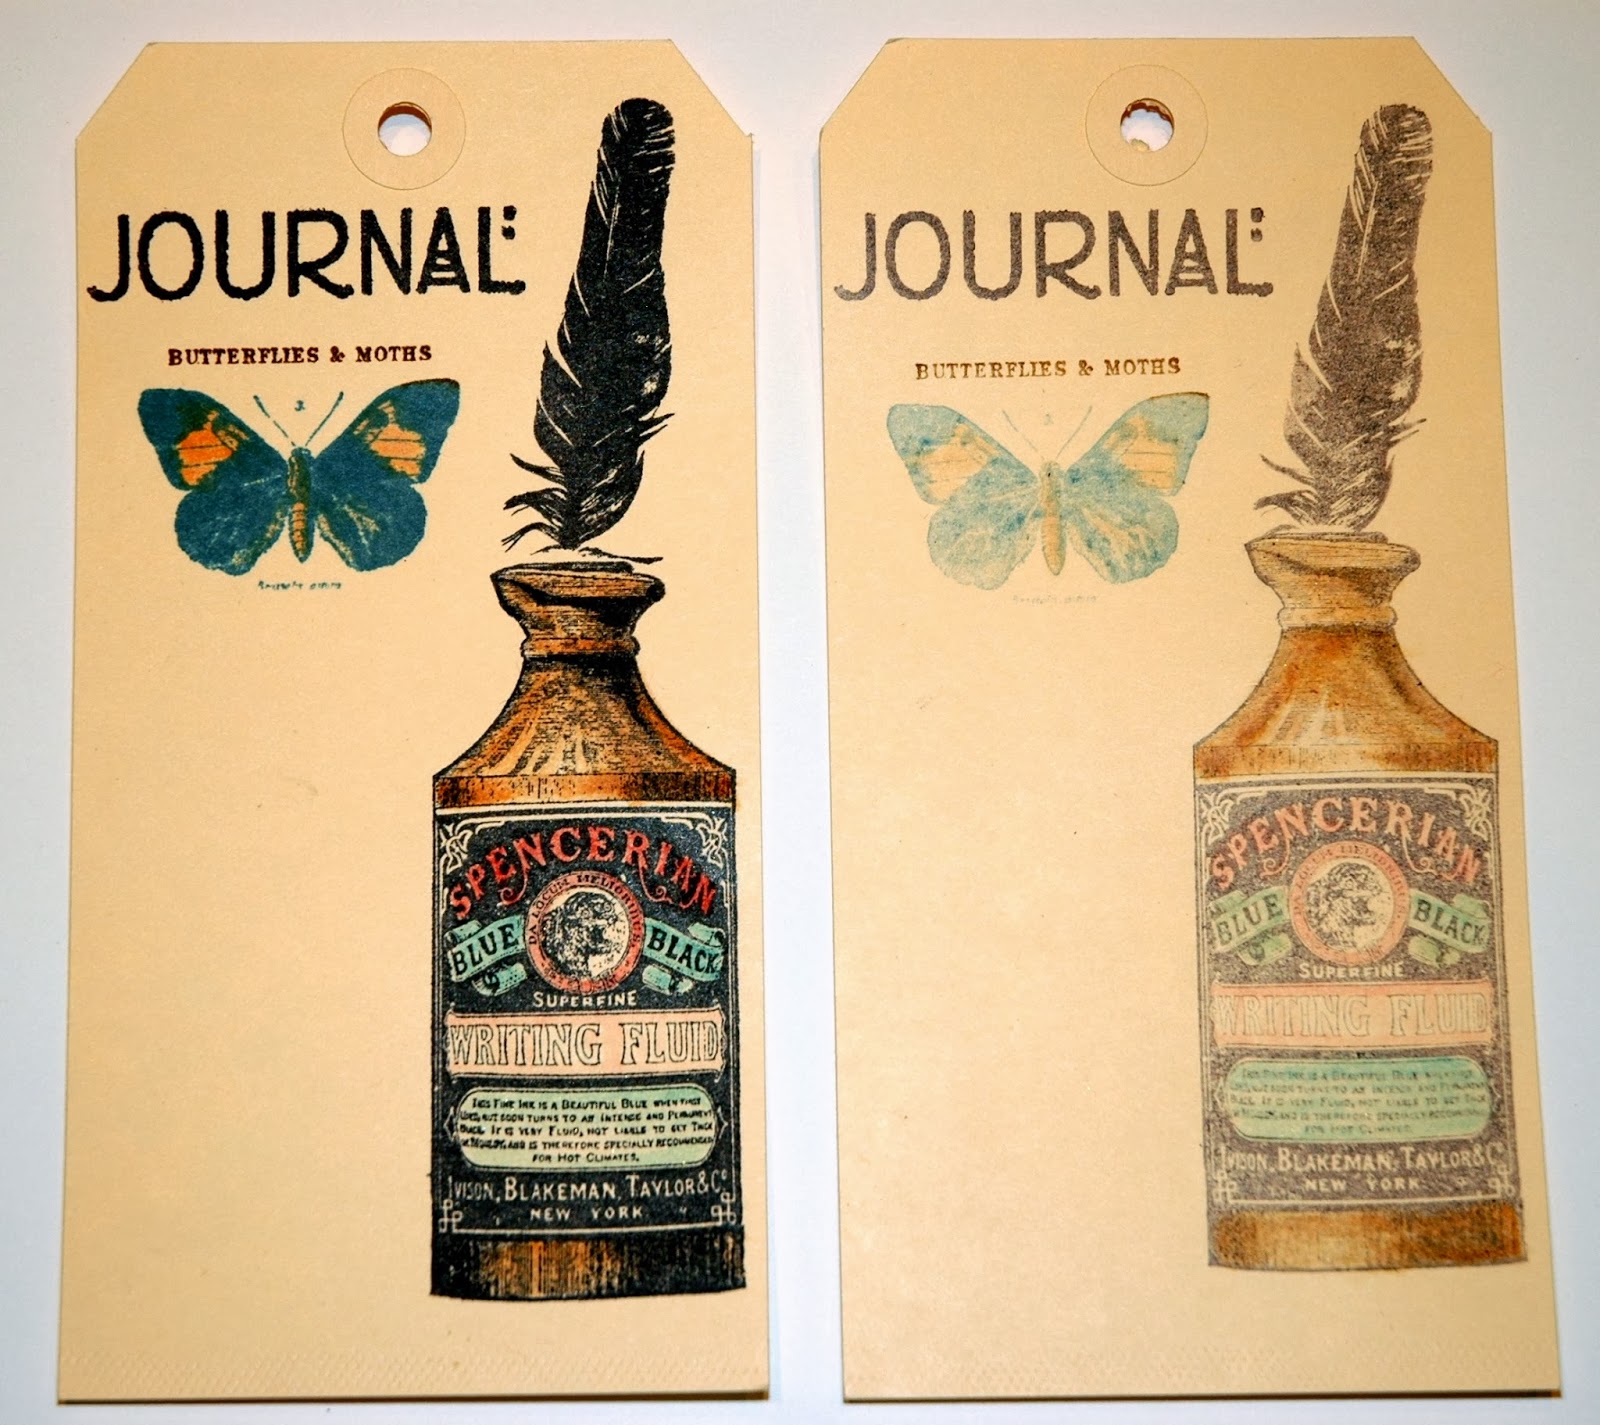
(Original tag on the left, smudged tag on the right)
I literally just received more of Tim Holtz' brand new stamp sets and couldn't wait to play with them. I also wanted to join in on his March 2014 tag technique and challenge.
This month, it's the smudge technique. Check out his challenge for all
of the details and to link up your creation to his challenge.

I began with two #8 Manila Tags.
The coating on these tags allows you to do all sorts of fun things
using inks and paints that some other "manila" paper may not. I stamped
the ink bottle from Tim's Typography stamp set onto the tags using Jet Black Archival Ink. It is a wonderful permanent black ink. Again, check out Tim's blog for the "smudging" technique.

I
added a feather from Tim's Nature Walk stamp set to create a quill pen
effect coming out of the ink bottle. Since the feather is much longer
than I needed, I simply masked the bottle right at the top and stamped
my feather. The left bottle has been stamped. I am in the process of
adding the feather to the top of the bottle on the right. You can see
the feather stamp attached to my Grid Block and a scrap tag placed along
the edge of the bottle to protect it from the part of the feather stamp
that I do not want included.
I
did a couple of my steps in creating my tags different than what Tim
shows on his blog, but it really didn't make any difference. So,
whatever floats your boat! Here I have added "JOURNAL" - a partial
stamp from Classics #1 stamp set (stamped in Jet Black Archival) and the top butterfly on the vertical collage of butterflies from Tim's Papillon stamp set. I used Wendy Vecchi's Cornflower Blue Archival Ink to stamp the butterfly and added the Rusty Hinge Distress Ink accents to is using Detailer Water Brush. The bottle has also been colored in using the Detailer Water Brush. The bottle colored first with Tea Dye and then highlights of Rusty Hinge. I wanted it to have sort of an amber glass feeling. Next the label was colored using Fired Brick and Broken China.

Next I blended lighter colors of Distress Inks in the background to pull everything together; first Pumice Stone then Scattered Straw followed by Broken China Distress Ink colors. I then added some darker Distress Inks; Gathered Twigs followed by a touch of Black Soot around the edges to warm everything up, give more of a vintage look and give the edges some distinction.

To add a very cool background effect, I laid my new Latticework Stencil on top of my tags and using a Stormy Sky Distress Marker and my new Tim Holtz Marker Spritzer,
I created a dimensional patterned background that is subtly there but
adds so much! (See Tim's blog for a video of how the Marker Spritzer
works. It is SO EASY!)

Next I wanted to add a little more dimension to my tag so I stamped the butterfly image from Papillon again on to Wendy Vecchi's Clearly For Art Modelling Film using Stazon Jet Black Solvent Ink. Then I gently heat set it, cut out the butterflies, heated them up again and molded their wings to bend slightly forward. I added some Cornflower Blue behind them and glued them (using Glossy Accents) on top of my butterfly on the tag. The slight lift of their wings adds some nice interest.

I also added some pens that I made from clipping a small dowel rod into two pieces, coloring them with Gathered Twigs Distress Paint followed by some Rusty Hinge Distress Ink. The Pen Nibs were altered by dabbing the metal with a Gold Paint Dabber and a little Pitch Black Paint
on the tip area. I loosened the prongs on the back side of the Pen
Nibs with some needle nose pliers, added a little Glossy Accents to the
top of the dowel rods and slipped them into place inside of the prongs.
Then I closed the prongs. I added the string around the bottom of the
pen nibs to create a better transition from wood to metal and added the Type Charm. BUT ... instead of using the letters that come with the Type Charms, I used the larger of the circle images from Tim's Custom Fasteners. They are the same size as the Type Charms! Coincidence? Probably not. But I love how they look on the pens!

I wanted to add something really fun to the bottom of my tag so I cut two Pediments out of Grungeboard.
I first painted them with Wendy Vecchi's Crackled Texture Paste and let
that dry. Once dry, I added some Scattered Straw followed by Antique Linen Distress Ink. At the edges, I added some Gathered Twigs followed by Black Soot just on the edges. Then I turned the Pediments upside down and added the telegram stamp from Tim's Mercantile stamp set. The are set in place with 1/4" Scor Tape (double sided tape).

I
added the "fine rubber stamps" image from Tim's Mercantile and pop
dotted them on top of the pen that was glued onto the tag using Glossy
Accents. They were stamped with Jet Black Archival on top of manila
cardstock that was lightly distressed with Gathered Twigs. The edges
were inked with Black Soot after being cut out. Finally, I added some
black "smudges" of my own to the top of the tag using my finger and a
bit of Pitch Black Paint. I also added a bit of black ribbon to both
tags. All done!
I
will be linking these up to Tim's 12 Tags of 2014 Challenge. I invite
you to play along with his challenge as well as experiment with his
smudge technique. It is easy and fun!
Thanks
for stopping by my blog today. I hope that you have checked out the
other examples of Tim style tags that your other Creative Guides have
prepared just for you over at A Vintage Journey!
Have a wonderful weekend!

