Hello everyone! Welcome back.
I hope that you are finding time to be creative, experiment and try new things.
I would like to share some art journal pages I made recently. These were done through a really inspiring new series of weekly online classes throughout 2016 called Wanderlust 2016. Besides the weekly classes, there are all sorts of additional informative videos and challenges you can take part in. One of the things I am really finding fascinating and fun are the biweekly word prompts to create your own art journal throughout the year. There is no tutorial or required products, just the prompt. The rest is up to you and your imagination. If you've not signed up, you might want to check it out.
The prompt for these pages was "Today I am feeling ...". With a new year just beginning, I was feeling very "reflective" of the events of the past year and all of the lessons I had learned. So from that, emerged these pages.

I will gladly share the products I used with you and the steps in creating this pages.
Supplies
used:
- DecoArt Media Matte Medium
- DecoArt Media White Gesso
- DecoArt Media Fluid Acrylics Titan Buff
- DecoArt Media Fluid Acrylics Carbon Black
- DecoArt Media Fluid Acrylics Paynes Grey
- DecoArt Media Fluid Acrylics Quinacridone Gold
- DecoArt Media Fluid Acrylics Yellow Oxide
- DecoArt Media Fluid Acrylics Primary Magenta
- DecoArt Media Fluid Acrylics Titanium White
- DecoArt Media Fluid Acrylics Cobalt Teal Hue
- DecoArt Media Fluid Acrylics Transparent Yellow Iron Oxide
- DecoArt Media Antiquing Crème Raw Umber
- DecoArt Media Mister-Orange
- DecoArt Acrylic Flesh Tone
- Water in mister bottle
- Archival Ink Jet Black Refill
- Archival Ink Jet Black Ink Pad
- Yvonne Blair Inky Art Journal-6” x 8”
- Sized and inkjet printed picture of girl in mirror on Premium Presentation Paper
- Paint Brushes
- Water Brush
- Baby wipes
- Dictionary page
- Metal Calligraphy type pen nib and holder
- Tonic Craft Scratcher Tool
- Micron Permanent Black Pen 02
- Micron Permanent Black Pen 2-Chisel Point
- Pen Nibs
- Distress Inks – Tattered Rose, Rusty Hinge, Hickory Smoke, Stormy Sky, Peacock Feathers, Worn Lipstick (for colorizing the girl in the mirror)
- Tim Holtz Mirrored Ideaology Sheet
- Seth Apter Stamp set Solar System
- An Old Toothbrush

Size the image of the vintage girl standing
in front of the mirror. She is 6 ½” tall
by 3” wide (including the mirror). Print out a couple of copies
on Premium Presentation Paper or a quality paper. Brush DecoArt Media Matte
Medium over the entire printed image with a fairly heavy coat. Smooth out brush strokes. Set aside to dry.

Tear a dictionary page and using DecoArt
Media Matte Medium, adhere the dictionary page to the center area of the Inky
Journal (or whatever art journal you decide to use). Then brush over the top of the dictionary
page to seal it. Let dry or gently heat
set.
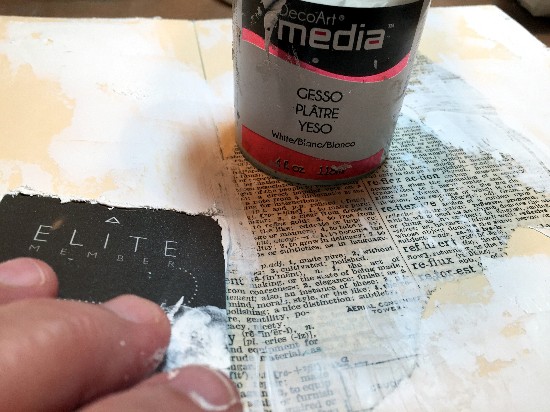
Randomly add some DecoArt Media White Gesso
to the pages using a scraper or a flat edge to give texture to the pages. Air dry or gently heat set.

Using
DecoArt’s Media Fluid Acrylics Titan Buff, Yellow Oxide followed by Cobalt Teal
Hue; add color to the pages. First brush
Titan Buff randomly over the pages, covering most of the surface but leaving
areas of the dictionary text uncovered. Next using a baby wipe, add Yellow
Oxide to the pages and randomly create lighter and darker areas on the pages. Gently
heat set.

Here is what the pages will look like at this
point.

To add a contrasting color, smear Cobalt Teal
Hue onto the pages using your fingers and a baby wipe for a different look and
texture. Gently heat set.

Using a fairly stiff brush and/or your
fingers, add a bit more DecoArt Media White Gesso randomly on the pages. If using the brush, pounce the brush on the
pages to produce a stippled effect thus adding more texture. Gently heat set.

Using a baby wipe, gently add some DecoArt
Media Transparent Yellow Iron Oxide to the pages to “warm them up” and meld all
of the colors together. Gently heat set.

Using some sort of scratcher device, scratch
the surface of the paint to distress the background even further.

Gently shake DecoArt Orange Media Mister and
gently spot randomly onto a journal page.
Spritz with water, hold the art journal upright and allow the spray to
run down the book. If you want a more
concentrated burst, simply hold the mister close to the pages and gently spritz
a specific area. Heat set to dry.

You can also use the wooden handle end of a
paint brush dipped into the mister bottler to manipulate the color on the
pages. Gently heat set to dry.

This is what the background now looks like
after adding the DecoArt Media Orange Spray.

Brush a fairly heavy amount of DecoArt Media
Crackle Glaze randomly over the pages or even more texture. Let air dry.

Brush DecoArt Media Raw Umber Antiquing Cream
over the crackled areas and let dry. Use
a baby wipe or a damp cloth to remove the excess Antiquing Cream. Gently heat set.

Cut out the printed image of the girl looking
in the mirror and lay her in place on the left page of the art journal
layout.

Use DecoArt Media Matte Medium
to adhere her in place on the page. You
may want to brush over her with more Matte Medium as a sealer but it is not
necessary, since you have already sealed her.
Let air dry or gently heat set.

To colorize the girl, I used DecoArt
Fleshtone paint mixed with a little water to dilute the opaqueness of the paint
and painted the girl’s arms and face using a water brush. After that dried (or can gently heat set), I
added DecoArt Fluid Acrylic Transparent Yellow Iron Oxide to warm up her skin
tone. I repeated this procedure on the
mirrored side image as well onlyl made it a little lighter.

Colorize the top of the girls outfit using
DecoArt Media Fluid Acrylics Primary Magenta mixed with Titanium White and a
touch of water to dilute the paint. This
was brushed on the top using a water brush.
For the rest of the image, I used pen nibs and Distress Inks. Because she is sealed with DecoArt Media
Matte Medium, the colors glide over the paper without soaking in, making it
easy to color and shade the image. I
used Peacock Feathers on the skirt and hat, Rusty Hinge on the circles of the
skirt, Tattered Rose for blush on her cheeks, Worn Lipstick on her lips and
Stormy Sky on the frame of the mirror.

Create a “dirty wash” from a mixture of
Paynes Grey, Quinacridone Gold and water.
Tint according to how dark you want the color to be. This wash was used around the girl and the
mirror to provide depth and shadowing.
Use a paint brush and your fingers to smooth the color and remove any
excess. Repeat adding color until you
achieve your desired results. Gently
heat set.

Here is a photo of the girl and mirror after
she has been colorized and the “dirty wash” has been added. I also added a line behind the girl and the
mirror to “ground” them better onto the pages and not leave her floating
around. This line was added using a
Permanent Black Marker.

I love Seth Apter and his new line or products. These circles are from his wonderful Solar System stamps. You can find them and many other sets through Impression Obesssion. I
randomly stamped two circular images or portions of those images onto the pages
using Archival Jet Black Permanent Ink.
Gently heat set.

Create a wash using DecoArt Media Fluid
Acrylics Carbon Black and water. Cut out
the other image of the girl and the mirror you originally printed and lightly
tape it over the image glued onto the art journal page. This will mask the image. Using an old toothbrush, load it with the
black wash. Hold the tooth brush head
over the pages, pull back on the head of the toothbrush allowing the black wash
to randomly splatter on the pages.
Gently heat set.

I chose to write my word onto the page in
pencil before trying it in permanent ink.
Then using a metal calligraphy type of pen nib and holder, I filled in
the letters using Archival Jet Black Ink refill since I did not have any black
India Ink. It worked just fine. Let air dry or gently heat set.

Using a scrap from a Ideaology Mirrored
Sheet, cut various little shapes that will be glued onto the pages. The symbolism here is that the mirror has
shattered thus allowing what lies ahead to come forth.

Glue the pieces in place across the two pages
to tie them together. I used PVA glue on
the backside of the shapes even though they are supposedly self adhesive. Once in place and dry, I used my fingernail
to peel off the protective covering over the mirrored surface.

Using a Permanent Black Marker, begin
journaling around the outside edge of the pages and wherever else you choose on
the pages. Gently heat set. Finally, add a bit of DecoArt Media Fluid
Acrylics Carbon Black paint around the edges of your pages to frame them and
pull everything together.
I used some things that I have not used before on these pages and found that to be a lot of fun. The more you play and experiment, the more you will get out of your comfort zone and broaden your artistic horizons.
I hope you'll take some time out for yourself to experiment and play with all sorts of mediums, colors and combinations. It's so much fun!!!


