Sunday, September 15, 2013

GELLI PLATE AND PACKING TAPE ... WHAT A FUN COMBINATION!

Hello and welcome to my blog on this beautiful Monday morning. 


continues at Simon Says Stamp for all of the month of September as we celebrate stamping with some really fun challenges and some exciting new products. 

This week, at the Simon Says Stamp Monday Challenge, we want you to stretch your imagination just a bit and stamp on something other than plain white cardstock!

I recently saw a very cool video on Julie Fei-Fan Balzer's blog working with a Gelli Plate and packing tape.  It looked like so much fun that I decided to give that technique a try and stamp right onto the Gelli Plate using stamps and other items with shape and texture.


Here is my finished tag, using the backgrounds I made on the Gelli Plate and transferred to the packing tape. If you don't have a Gelli Plate, you seriously need to think about getting one! They are so much fun to play with! Here is the step by step of how I created this fun tag:


1. Begin by placing a few piece of torn paper strips onto your Gelli Plate.  (I was using an 8x10 Gelli Plate but a 6x6 one works great, too.) Choose a couple of contrasting acrylic paint colors and spread the colors over your Gelli Plate, using a soft rubber brayer.  Don't mix the colors too much or they may become muddy.  Just lightly blend them with the brayer and move on to the next step.


2. Remove the paper strips and create some interesting patterns on the paint.  I used a little rake to create wavy lines.


I also used a Q-Tip to create polka dots.  Let the paint dry before going on to the next step.


3. Stamp with paint instead of ink directly onto the Gelli Plate! Spread a little paint out onto a palette pad or a sheet of paper and then run the brayer over a stamp.  Then randomly stamp the pattern onto the Gelli Plate.  This plaid background stamp is from Wendy Vecchi's Sunshine And Art stamp set.


I even used a round plastic canvas piece that I had brayered paint onto.  In the picture above, you can see the wavy lines, the polka dots, the plaid paint, this plastic canvas being stamped and also a honeycomb stamp from Wendy Vecchi's Art For You stamp set that was stamped using a gold paint.


4.  Then go back over the clear polka dots with yet another color of paint and fill in the dots.


5. Finally, I used a jar lid that I had dabbed into black acrylic paint and randomly stamped it onto the Gelli Plate.  The design you see is the design you will get when you add the packing tape and transfer the design!  Let the paint dry completely before adding the packing tape over it!


6.  When the paint is dry, lay strips of packing tape side by side over the entire Gelli Plate surface.  Burnish the packing tape to the Gelli Plate using a bone folder or a used hotel key ... something with a flat edge.  Slowly begin peeling one end of the tape away from the Gelli Plate.  If a little of the paint stays on the Gelli Plate, just lay the tape back down, rub over it and lift it again.  This is a great way to remove the paint from your Gelli Plate, too! Remove all of the strips from the Gelli Plate in the same manner.  The photo above shows the different strips that are transparent; particularly in the areas where the torn strips of paper were originally placed.


7. Use aluminum foil, Perfect Pearls Powders (for these strips, I used Sunflower Sparkle and Blue Raspberry Perfect Pearls Powders) or Gold Leafing on the sticky side of the packing tape to create really unusual areas of metallic and shimmering color to the tape.  (I also added a white paper underneath the strips that I did not back with aluminum foil so that the colors were even more vivid). It's THAT SIMPLE and look at the really cool design strips that you've created and can use on all sorts of things!


 I cut some of my packing tape strips into smaller strips and mounted them onto a #10 Black Tag.


Next, using Specialty Stamping Paper, I stamped this adorable Prima Doll With Ruffle Dress Paper Doll using Jet Black Archival Ink.  I then stamped just the dress and hairband portion of the stamp again onto a piece of scrap cardstock and cut it out.  I colorized my doll using a Detailer Water Brush and Scattered Straw and Tattered Rose Distress Inks for the skin tones.  Her hair was first colored with Scattered Straw and then I added a little Tea Dye Distress Ink to it. Then I hot glued a sweet little cream colored bow and rose to the waist of her dress.


She is so cute but she really needed to be mounted on black cardstock to give her a nice contrast when I placed her on top of the brightly colored and patterned background of the large tag.


In this photo, you can see more of the closeup details of the background colors, patterns and metallics added to the underside of the packing tape strips. And you can see how much better the girl looks with that small black matting around her.  Instead of just stamping the word "CREATE" onto Specialty Stamping Paper, I decided to emboss the letters.  The shiny finish of the letters goes nicely with the shiny finish of the packing tape.  The letters are from Tim Holtz' Worn Text stamp set and are embossed with Black Embossing Powder.  I cut out the letters and mounted them onto black cardstock. They are popped into place using black pop dots.


In this photograph, you can see the wavy lines made by the little rake and how they are filled in with Perfect Pearls Powders to give a special shimmer effect.  Much more effective than just leaving them transparent.  You can also see the Gold Leafing running across the strip where the torn paper strip once was.


So, there it is ... my stamping on something besides plain white cardstock creation!  Come join us at Simon Says Stamp Monday Challenge and enter your stamped creation!  You could be the lucky winner of our weekly random drawing of a 

$50.00 credit voucher to Simon Says Stamp.  You could also be selected as one of our featured artists in our ...

a very nice honor indeed! 

Good luck!  I can't wait to see how you get your stamp on!

Here are all of the products available at Simon Says Stamp that were used in creating this Gelli Plate tag:


Wednesday, September 11, 2013

FAUX BATIK SCARF TUTORIAL

Hello everyone!  Welcome to my blog!  I hope you're having a good week.

As promised ... over at Simon Says Stamp's Monday Challenge, I am sharing the 
FAUX BATIK technique to create this lovely scarf ...


This fun project is really not difficult at all and can be done on silk or sheer fabrics as well as paper!  Just imagine the paper embellishments you could add to your cards or paper crafting projects!  Think of the accessory pieces you can make for your wardrobe or the lovely patterned fabrics you can create to add to your home decor using this technique! 

Create these and more simply using Embossing Ink, Stamps, Clear Embossing Powder and some Color Wash sprays.

 So, hop on over to Simon Says Stamp's Monday Challenge for my tutorial and check it out! 
You will be amazed at how easy this technique is. 

And of course ... the fun continues at Simon Says Stamp during our 


Stamptember celebration! Lots of stuff happening this month; Including the introduction of new products that are now available!  Keep checking with our blog as we have some exciting things coming your way soon!

And, of course, be sure to enter our challenge so you can share your wonderful art and also be eligible for our 
weekly drawing for a $50.00 gift voucher.

If your art is outstanding, you could also be voted to have your work showcased in our 

Designer Spotlight ... a very nice way of being recognized for all of your hard 
and creative work! 

Thanks for stopping by and I hope that you like the FAUX BATIK tutorial over at 
Simon Says Stamp Monday Challenge.

Sunday, September 8, 2013

FAUX BATIK SILK SCARF TUTORIAL

Hello bloggers!  It's Monday and time for another Simon Says Stamp Monday Challenge.  

This week, our challenge is all about EMBOSSING.  
Be sure to check out all of the wonderful examples of all sorts of embossing techniques and projects from my very talented and inspiring Design Team.  
 

Then be sure to check back with the challenge on Thursday when I will be sharing a special embossing technique called "Faux Batik" using  sheer fabric (but you can also do this same technique with paper), Embossing Ink, Clear Embossing Powder, Foam Stamps, a Heat Tool, Non Stick Craft Sheet and Color Wash Sprays.  It is a really fun and easy technique that will allow you to create one of a kind pieces from paper crafts to wearable art!

And of course .... 

 activities continue all this month at Simon Says Stamp! 

Play along with our Monday Challenge by entering your project.  You could be the lucky winner of our random weekly drawing of a ... 


to be use at Simon Says Stamp.  And ... if your embossed project is voted as one of the best entries of the week, you will receive special recognition in our 


Good luck! I can't wait to see your entries!


Monday, September 2, 2013

THE MOUNTAINS ARE CALLING SO I MUST GO!

Hello my blogging friends!

I have some exciting news to share with all of you!  

I will be heading to Estes Park, Colorado to be a part of the Fall Festival of events at 
Rocky Mountain Memories from September 18th through the 21st. 

My dear friend, owner of Rocky Mountain Memories and fellow Ranger U grad, Cheryl Grisby is hosting this event for her customers and she has lined up some really talented ladies to teach all sorts of unique classes using different products and techniques.  I met Cheryl at Ranger U.  We sat next to each other and immediately became fast friends. Over the years, our friendship has deepened into an even greater love and admiration; like a sisterhood and I am so blessed to know her.


I had the privilege of being in Estes Park last month and got to spend some time with Cheryl in her fabulous store.  This is the type of store that everyone wishes they had in their hometown.  The second you walk in the door, you have that feeling of being WELCOME and appreciated as a customer.  

 
Cheryl's store is so quaint; right on the river and a true Colorado feeling about it.  She carries such a wonderful variety of products and when you walk around her store, the way she has everything displayed just makes "sense".  Things are easy to find and if you need help understanding how to use something, Cheryl is right there to demonstrate.  She is such a warm and caring person.  I wish you all had the opportunity to know her as I do.  She is such a special lady.  And ... she totally blew me away by asking me to be a part of her Fall Festival Celebration.  It took me about two seconds to say "YES!"

I am thrilled to be a part of her wonderful teaching team for this event.  Cheryl is so talented and will be teaching on Wednesday along with Susan Mostek who is a fabulous card maker and regular teacher at RMM.  Susan's work is gorgeous and she specializes in one of my favorite stamp lines, B Line Designs.  Ronda Palazzari will be teaching a beautiful technique tag booklet on Friday.  I have never met Ronda and I can't wait for that opportunity!  She is uber talented.

I will be teaching classes on Thursday and Saturday.  Here are the projects that I will be teaching:


Vintage Postcards featuring B Line stamps on Thursday morning


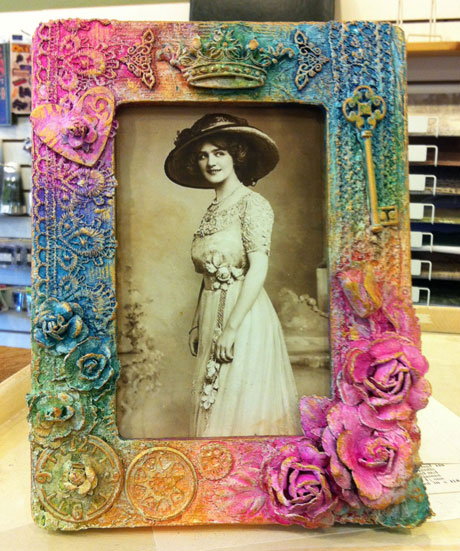
Dimensional Frame on Thursday afternoon


And a technique rich mini book using Prima Lyrics papers on Saturday.

If you're going to be in the Estes Park, Colorado area over the Fall Festival, call Rocky Mountain Memories and sign up for the classes.  It will be a fun weekend!

Sunday, September 1, 2013

STAMPING ALL STARS

Happy Monday everyone!  It's that time of year again ... 
at SIMON SAYS STAMP MONDAY CHALLENGE! 

This week, we're asking you to join us with your favorite stamp; be it a background stamp or that "go to" stamp that you always seem to find yourself using.  Or maybe you have a favorite ink pad that you just cannot do without.  Whatever it is, create something wonderful and enter our challenge.  We'd love to see your work!

As for me, when Tim Holtz released his line of stamps at January's CHA, my bank account took a big hit!  (smile) His vintage London and Paris themed stamps and papers just spoke to me ... especially that sweet little old gentleman.  And my favorite set of background and accessory stamps has got to be Tim's Artful Tools.  So, I have combined those stamp sets to create this ...


A Tim Holtz Pocket Envelope.  This little envelope is so fun because it makes a wonderful gift card holder or an added vintage pocket in art journals or mini books.

I began with a piece of manila card stock and die cut my pocket envelope on my Vagabond.  Then I distressed it using Wild Honey and Rusty Hinge Distress Inks.  I love their warm, rich tones.  I also did Tim's spritz and flick method of adding water to further distress the pocket envelope with water splotches.  But, my "go to" inks when doing vintage pieces that require stamping is a tie between Jet Black Archival and Coffee Archival ... or in this case; both used at the same time!

I stamped the measuring tape background from Artful Tools onto the distressed pocket envelope.  But I used both Jet Black Archival and Coffee to ink up the background stamp.  I did the same thing on the two sides where I partially stamped the paint brush images.  I love how those two colors combined really compliment each other; giving warm tones yet not quite such a defined image or edge.  

Next I added a little Coffee and Jet Black Archival to all of the edges to make them look more worn and defined.  Next I created the images used on the front: my favorite little gentleman, the Union Jack, a bitty postage stamp and the top of Big Ben all from either Tim's Paris To London or London Sights stamp sets.  All were stamped onto Specialty Stamping Paper.  I also lightly applied Antique Linen with an Ink Applicator after coloring all of the images to soften them and give them a more vintage appearance.

I stamped the little man in both Jet Black and Coffee Archival to see which one I would like the best. I settled on the Coffee Archival one.  I colorized him with a Detailer Water Brush and various Distress Inks:  Weathered Wood for his coat, Scattered Straw for his vest and edging aroundd him, Broken China for his shirt, Barn Door for his tie and Pumice for his shoes and mustache.  After he was cut out, he was pop dotted onto the pocket front.

The Union Jack was done a bit differently.  I used Distress Markers and applied the color directly to the stamp.  Faded Jeans and Barn Door provided the color and I added just a touch of Coffee Archival Ink here and there.  And ... because they are Distress Inks, cleanup was a snap.  I just let the stream of water from the faucet hit it, wiped it off with a paper towel and it was all clean! (Yes, I am one of those people who actually DO clean their stamps!) I tore the one edge of the flag and applied Coffee Archival to the torn edge. I added a small stick rubbed with Coffee Archival to serve as a flag pole.  I also worked the paper a little so that the flag was curved and almost like it is waving from the flagpole a little.  It is glued to the flagpole but other than that, the flag is free to proudly wave. 

Big Ben was lightly colored with Antique Linen and the shading and roofs were colored with Tea Dye Distress Ink.  The clock faces were given a coat of Glossy Accents for dimension and also to resemble glass covering the clock faces.  I bent Big Ben at the "corner" and attached it to the envelope with pop dots; giving it some dimension.  The bitty stamp was colored with Peeled Paint and pop dotted as well.

After I assembled the cover of the pocket envelope, I turned it over and added the two little circle closures.  These were easy to add and the instructions are included in the die cut.  Finally, I used some of Tim Holtz' Paper String to close the pocket envelope.

I think this turned out really cute and even better ... I completed this project in less than two hours!  Don't you just love it when the stars all align and a project comes together so easily?  
Happy Stamptember everybody!  Get in on all of the fun now at Simon Says Stamp Monday Challenge.  

You could be the lucky winner of our random weekly 

 $50.00 credit voucher to spend at Simon Says Stamp!

And ... your work could also be showcased in our 

This is quite an honor as we receive so many beautiful works of art each week.

Good luck!  I can't wait to see what are your "All Star" Stamping products!

Here are all of the products available at Simon Says Stamp that were used in creating this vintage pocket envelope: