Happy Monday to you all! Thanks for taking the time to stop by my blog.
This week ... "You've Got Airmail!"
I decided to try to do something different than using the obvious airplane stamps, or doing something strictly with post cards. So, I decided to take an envelope ... something that could be airmailed and alter it into something vintage. While thinking of "AIRMAIL", I thought about wings; which made me thing of butterflies; which made me want to add one to my altered envelope. So ... without further adieu ... here is my finished project.

It began as really plain and not very attractive brownish-grayish envelope measuring 4 1/4" x 9 1/2". I covered the body of the envelope with Matte Multi Medium and then text from an Austrian book that was recently given to me by a friend and someone who's work I truly admire, Claudia of Von Pappe II.
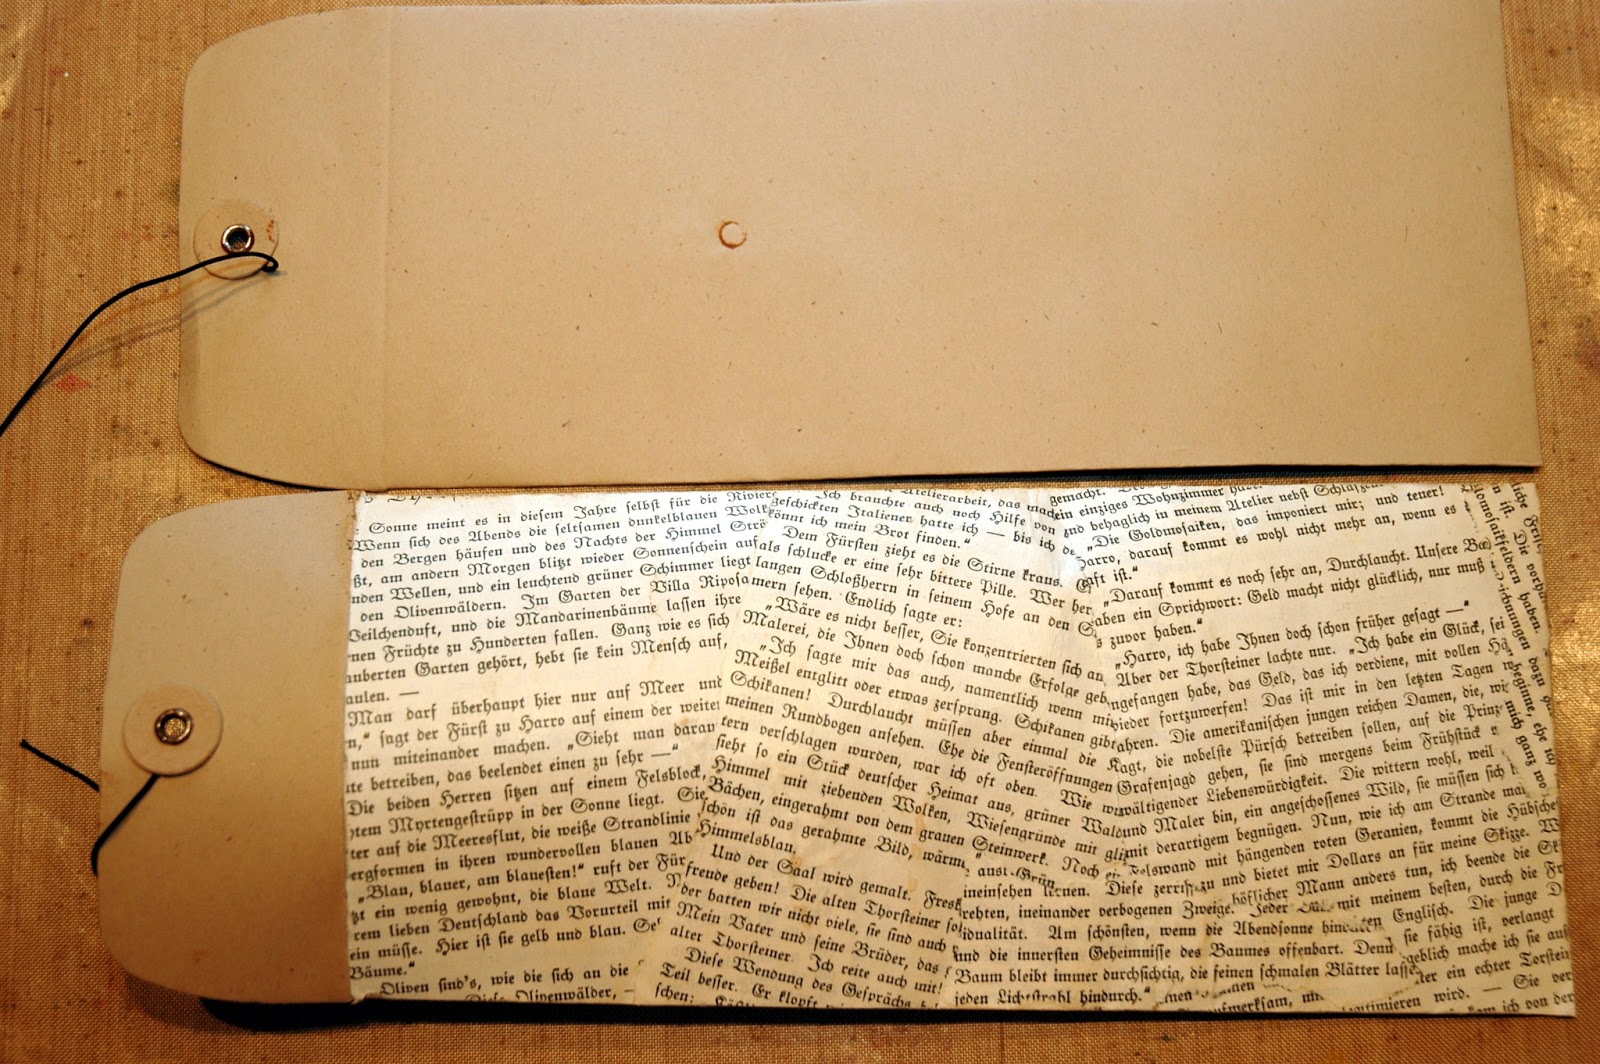

I had sealed the book text with the Matte Medium so when I sprayed the rest of the envelope with Calypso Teal Dylusions Ink Spray, it only penetrated some of the areas of the text. But, I liked the look.
Making "Skins" of photographs.
I love this technique. It's not transferring images but making what I like to call a "skin" of an image. Using this technique, you can create all sorts of semi opaque images and then just adhere them over book text or whatever background with Matte Multi Medium. You have the image and some of the background is visible underneath it. It gives a very cool "ghosty", nostalgic feeling to vintage pieces.
I selected two vintage images; a man and a woman and sized them to fit on opposite sides of the envelope. I then edited the photos to be in an oval shape. They measure 3 1/4" x 2 1/2". I printed them out onto cheap printer paper.

Then I began with
one coat of Matte Multi Medium brushed over each image. Let it dry.
Then brush another layer of Matte Multi Medium over the images, only
this time, instead of going up and down, brush across the image. Let it
dry. Then brush another layer of Matte Multi Medium over the images
going back up and down again, rather than across-creating a crosshatch
appearance. Let it dry.

Then begin removing the paper by thoroughly wetting the paper and lightly rubbing your thumb over image to remove the paper pulp. Keep rubbing the paper until the image is clear. (As it dries, some paper "fuzz" will reappear. You can repeat adding water and lightly rubbing off the remnants of paper or you can just add the picture to your piece and brush Matte Medium over it to seal it. That will seal the image and the paper fuzz will not be seen.

I created four "corners" to add a real vintage feeling to the altered envelope by die cutting these sweet little ornate pieces from Simon Says Stamp's own collection of die cuts. This one is Allegro Corner. I die cut it on white cardstock and sprayed it with Vintage Photo Distress Stain that I transferred from the original container into a 2 oz. Mister Bottle. Works great! I heat set the stain and then I added Treasure Gold Copper Guilding Wax. The one of the left has the Guilding Wax applied. The one on the right has just the Vintage Photo Distress Stain.

I repeated this same technique to create the beautiful iridescent almost stained glass effect butterfly in the center of the envelope. This is Memory Box's Chloe butterfly. She's lacy and gorgeous! I first die cut her onto white cardstock and then sprayed her with Vintage Photo Distress Stain. I then lightly spritzed her with Biscotti. But, honestly, I decided to do something different with her, so the Biscotti won't even show up.

I sprayed a piece of text cardstock with Perfect Pearls Turquoise Mist. Perfect Pearls is not like Glimmer Mist or Ink Sprays. It is almost transparent, adding more shimmer than color. So, I sprayed and dried and sprayed and dried until I got a nice iridescent glow. Then I die cut two butterflies, gluing one on top of the misted text paper (using Glossy Accents on all of the die cut areas on the underside of the butterfly. Then I started to wipe (using my fingertips) some Treasure Gold Florentine Guilding Wax. Love the rich, deep antique color! Finally, I added some of the Guilding Wax right onto the wings, producing a very aged appearance.

Here is the left side of the envelope. I stamped some Post Card images from Tim Holtz' Postcards stamp set onto the flap using gold pigment ink. The vintage photograph was added on top of the envelope using Matte Multi Medium. Then I brushed over it to seal it. Then I added the delicate corners. I added sweet little Melissa Frances pearls. Finally, I added the little roses sprayed with Vintage Pink, Vanilla Breeze and Lemon Zest Glimmer Mists.

Here is a better photograph of the iridescent butterfly popped onto the center of the envelope between the man and woman. I added a small Tim Holtz post card and "envelope" with an airmail sticker and airplane postage stamp from Tim Holtz' Tiny Things stamp set. The butterfly has a air mail tag added to his wing using Tim Holtz' Ball Chain and the stamp, stamped with Coffee Archival Ink is from Tim Holtz' Remnants stamp set.

The dashing gentleman on the right is also surrounded with the elegant corners and another smaller Memory Box Butterfly (Vivienne) done in the same manner as the larger butterfly. Only this butterfly is colored with Treasure Gold's Aquamarine Guilding Wax instead of Florentine. See the difference? I like to think that this envelope contains a love letter that the butterfly is winging his way to deliver....AIRMAIL!
Thanks so much for stopping by my blog. I hope that my altered envelope has inspired you to enter our Simon Says Stamp and Show's Monday Challenge by creating something airmail themed.
You could be the lucky winner of our random weekly

$50.00 credit voucher. You could also be chosen as one of our very special artists of the week to be featured in our new feature ...

I can't wait to see what you create!
Here are all of the products used in creating this altered envelope.
 |  |  |  | |
 |  |  |  | |
 |  |  |  |  |
 |  |  |  |  |
 |  |  | | |
| |
CAndy your projects in style "vintage" are always absolutely fabulous, always with ideas totally original and instructive! What I have to learn!!!!! Thank you for always sharing your beautiful tutorial! This summer my business Crafter is a little slow because my two sons are on vacation! Take up to participate in the challenge of Simon says definitely in september! Hugs BArbarayaya
ReplyDeleteYou always delight with your amazing creations Candy and this one is no exception. I love the idea that the butterfly is carrying this gorgeous envelope - the butterflies themselves are stunning. That technique you showed for the photos is one I must try out - so clever. You really do have the most wonderfully creative ideas - love this piece! Hugs, Anne x
ReplyDeleteAn incredible alteration Candy, such a great shaped envelope to use. I love your photo skins they are a perfect addition and the glimmer butterfly is beautiful. Wonderfully inspirational as always.
ReplyDeleteHugs Brenda xox
Oh wow Candy, another totally stunning project!! So many clever ideas! Love the "skin" technique, what a fab way of creating images and that butterfly is just out of this world!!! Even the idea of putting stains in a mister, - so clever! Thanks for the inspiration yet again!!
ReplyDeleteBeautiful project Candy! Love how you transferred the vintage images onto your project! Those butterflies are so elegant and I love all the distressing! Thanks for the inspiration!
ReplyDeleteAbsolutly amazing. Love the vintage feel you've created and thanks so much for sharing your ideas. Never thought about a picture transfer this way.(:o)
ReplyDeleteOh... Candy, your creation is gorgeous as always! Love the beautiful background you made and those pretty flowers and butterfly die cuts. All the details are just wonderful! :)
ReplyDeleteThat butterfly is just magical. I rarely read a blog in its entirety, I skim and stop when something catches my eye. But your blog is one of the few where I read every single word. You share so much good information in a way that is totally accessible. And this envelope is just so transformed. Thank you, Candy, for all the love you put into everything you make. On the photo technique...did you use a laser printer or ink jet? I've been told you can't do this transfer technique with ink jet images, so I'd love to know. thanks!
ReplyDeleteLovely vintage goodness! Love the images and that butterfly looks like a brass framed butterfly. Beautiful!
ReplyDeleteSo the photo skin is just art printed out of an inkjet printer onto regular copy paper or is the photo printed by a toner printer? Whatever, the effect of the whole envelope is just stunning!
ReplyDeleteWow Candy! Another wonderful project! Love the image skins/tranfers and the text background is gorgeous. Love the butterflies too and the whole idea behind this project.
ReplyDeleteSo beautifully vintage, Candy... and amazing use of those delicate die-cuts. I'm completely in love with your butterflies - that wonderful old text and then such fantastic colour and patina you achieved on them. Great make!
ReplyDeleteAlison x
Dear Candy, again an incredible unique masterpiece, gorgeous stamped, colored and decorated. Thanks for all the inspiring photos.
ReplyDeleteHugs Anja
Hi Candy, wonderful vintage piece and what a transformation, you would never know this started life as a simple brown envelope. I love the technique with the multi-matt medium and your vintage images. The butterfly is a very eye catching addition. As always you have created a unique well thought out piece, beautifully executed. Tracy x x
ReplyDeleteNeat envelope, Candy! I like how you distressed and embellished...very cool!
ReplyDelete*mwah*
Steph
Simon Says Stamp!
Candy, that is simply gorgeous!
ReplyDeleteYou are so smart and talented :)
ReplyDeleteCandy! How can one project have so many dang cool elements? I didn't think it was possible to cram that much beauty and technique into one piece of art, but you did it! I truly love everything about this piece! Yay for you because this is incredible!
ReplyDeleteWhat a fun take on the challenge. Really beautiful project. I never seen the transfer technique with Multi Medium like you did it. Didn't know that was also possible. Thanks for sharing. Hugs, Sandra
ReplyDeleteI really love your altered envelope, so many lovely elements but I must say I love the way you have treated those butterflies, and thank you for sharing the skins technique x
ReplyDeleteTo die for ... totally adorable. Suzanne
ReplyDeleteThis really looks like an old love letter that you found at the bottom of a love chest. Blessings!
ReplyDeleteI love this challenge! The size of your envelope and the vintage feeling is fabulous! The images and especially the butterfly are fabulous! Hope you are doing great!
ReplyDeleteCandy, you are amazing! You've created a true treasure.I love your take on "air mail". So clever! And those butterflies...gorgeous! I love visiting your blog. It's always a pleasure seeing what you've been creating. :)
ReplyDeleteI just love this, Candy! So gorgeous!!!
ReplyDelete