Showing posts with label Heather Hudson Collage Sheets. Show all posts

Monday, November 3, 2014

BE THANKFUL BLOG HOP AND TUTORIAL

Hello there!  How is your week going?

I am pleased to be a part of a joint Blog Hop for Craft Hoarders Anonymous and My Artistic Adventures. The theme for this blog hop is "THANKS" ... very appropriate for this time of year, don't you think?  Now, your project doesn't necessarily have to be about Thanksgiving, but "THANKS" needs to be included somewhere.

This will not be a blog hop where you have to go from one blog to another to get the next link.  Each of us are listing all of the designers participating and you can visit whoever, whenever. So let's get started with all of the gals participating ...

Heather Hudson of My Artistic Adventures ~ Host & Sponsor 
Gloria Stengel of Craft Hoarders Anonymous ~ Sponsor
Amber Milone of Pink Chic
Christy Butters of Creating With The Girls
 Debbie Seyer of A Peek Into My Stamping Room
 Donna Idlet of Creative Lady
Ginny Nemchak of Polly's Paper
Glenda Brooks of Magpie's Corner
Helene of 2amScrapper
Shawn of Poetry In A Pot Of Tea
Carol of Scrappy Daze
Lizette of MrsBeez
Sandi of Scrapbookin' With G
And myself...but you're already here!!

Have fun as you hop from blog to blog seeing everyone's "take" on this challenge theme.  In keeping in the spirit of using "hoarded" items to create for the Craft Hoarders challenges, everything except Heather's collage sheet images was made from stuff I have proudly hoarded and forget that I have from time to time.  (smile)

Heather Hudson of My Artistic Adventures is not only co-hosting this event but 
she is also sponsoring it with a
 $25.00 gift certificate to her Etsy Store.  

And ... she is also hosting her own sponsored challenge at her My Artistic Adventures Blog with another $25.00 gift certificate! So be sure to check out her blog for all of the details and enter it as well as this challenge!

Now...onto the "THANKS" challenge!

I will gladly share with you what I created and how I did it.

I have chosen three different collage sheets from Heather's vast array of fun images to create my little "thanks" scene that could be used in several different ways.


Here is my finished project featuring Heather's images, a Tim Holtz Postage Stamp Die cut frame, and several other die cuts from Simon Says Stamp and Memory Box die cuts.  This could be mounted on a canvas background to be used as a wall hanging, pieced as card fronts or as I have chosen to do here; create a little scene that can be free standing on a table. 


Here are several parts of the parts I have used in my piece. The Bingo Card, the little girl sitting next to the pumpkin and the harvest man in the moon are all Heather Hudson designs and are available in her ETSY shop.


The picket fence, postage stamp frame are Tim Holtz and the banners and tree are either Simon Says or Memory Box die cuts.

The picket fence is cut on a piece of plain grungeboard and crackled using Picket Fence Distress Paint and Gathered Twigs distressing. 


I began by die cutting three frames using Tim's Postage Stamp and middle Sized Rectangle die cut out of black chipboard.  I glued them together then I coated them with Distress Embossing Ink.  Next I sprinkled Vintage Photo Distress Embossing Powder randomly over the black inked frame and wiped away some of it with my finger, creating a random pattern of powder with black showing through.  Then I repeated this step using Tea Dye Distress Embossing Powder and heat set them to the chipboard. I absolutely LOVE the grainy texture of the frame and the almost rusted appearance of it.


I ran my finger with some gold paint from Paint Dabber over the edges of the frame to highlight the edges and give a more distinct appearance. 


Next I used Tim's smaller ray Texture Fade on my vintage Bingo card. I then highlighted the rays with the Gold Paint Dabber followed by a light topping of White Fire Treasure Gold Guilding Wax.  I also added some White Fire to the man in the moon to give him that warm, harvest glow.  I glued the Bingo card in place on the back side of the frame, pop dotted my man in the moon in place and laid my frame to the side.


Next it was time to make some little autumn leaves for my tree die cut out of brown cardstock, distressed with Walnut Stain Distress Ink and given a "moon glow" with the Gold Paint Dabber.


I sprayed some manila cardstock with Dylusions Pure Sunshine, Tangerine Dream and Postbox Red.  I also dabbed some of the punched leaves with Pine Needles Distress Ink to give them a greenish cast.


Once the leaves were punched out,  I began gluing them to the tree and the picket fence with Glossy Accents.


I decided on this banner for my "THANKS".  I cut it down to the size I needed it to be and transformed it from plain manila cardstock to flags colored with Scattered Straw topped with a touch of Rusty Hinge and the "string" is Vintage Photo Distress Marker.  I wrote "THANKS" on the flags using a small Brown Permanent Marker then covered the flags with Rock Candy Distress Crackle Paint.  I also added Rock Candy to the pumpkin sitting by the little girl.


I decided to take a small battery operated tea light and add it to my scene. I painted the top of the light with Gathered Twigs Distress Paint. 


I added Tim's Tissue Tape all around the outside edge and then distressed it with Rusty Hinge.  Finally, I added some more leaves using Glossy Accents.


Once all of the elements were complete, I simply needed to glue, pop dot and put everything together.  Here is a closeup of the frame portion of my scene with the man in the moon shining his rays of light onto the tree.


Here is a photo of the tree portion of my scene, catching the moonlight as the little vintage girl sits quietly underneath resting against her pumpkin and gathering the falling leaves


And here is a photo of the finished piece without the tea light.

"THANKS" for checking out my blog and I hope that I've inspired you to join in on the fun of Heather's Blog Hop in conjunction with Craft Hoarders Anonymous' Challenge and also Heather's challenge at My Artistic Adventures.

I hope you have fun hopping around from blog to blog and that you get all sorts of "THANKS" ideas from everyone you visit!

HAVE FUN!!


Sunday, February 16, 2014

VINTAGE CHRISTMAS CANVAS AND TUTORIAL FOR MY ARTISTIC ADVENTURES

Hello friends!  Welcome to my blog.

Once again, I am honored to be a guest designer for the lovely and talented Heather Hudson of My Artistic Adventures. The theme of this week's challenge is "On the second day of Christmas my true love gave to me ... TWO ..."  emphasis being on Christmas and on the number TWO.


I love Christmas any time of year and making this vintage Christmas canvas for Heather's challenge using her lovely collage sheet was a lot of fun!

I have been working on a project using papers from the Twelve Days of Christmas, so that song has already been revolving around in my head for over a week. So when Heather told me the theme for this challenge, I immediately thought of "two turtle doves".  While the birds I used on my Christmas canvas are not turtle doves, I could not resist the two gorgeous blue birds on Heather's Shabby Vintage Chic Victorian Blue Birds/Music Tags.

http://www.etsy.com/listing/122204939/shabby-vintage-chic-victorian-christmas?ref=shop_home_active_2
(Click on the photo to see this collage sheet at Heather's Etsy Store)

Wouldn't this collage sheet make the most gorgeous Christmas gift tags?  In this tutorial, you will see how to create the tag I used on this canvas as well as the embossed canvas that it is attached to.  So, sit back, relax and enjoy!


1. Place Tim Holtz' Holly Bough Stencil on the right side of a 5x7 canvas. Using something like a hotel room key or an art spatula, wipe Wendy Vecchi's White Embossing Paste (love this stuff) onto the canvas.  Remove the stencil and immediately rinse it and the spatula off.  Gently heat set the embossing paste and repeat the process on the other side of the canvas.


The canvas will then look like this.  Pretty, huh?


2. Paint over the entire canvas using an acrylic brown paint of your choice and mixing it with a little water to dilute the paint just a little bit. I used DecoArt Americana Light Cinnamon. (I did this because I wanted the base of my canvas to be brown).


4. Next add 1/4" Scor Tape to all of the sides of the canvas and then top it with one of the rolls from Tim Holtz' Seasonal Tidings Tissue Tape.  (I used the Scor Tape to help assure that the Tissue Tape would hold.) Then lightly brush a bit of brown paint/water mix on top of the Tissue Tape.


5. Paint Wendy Vecchi's Crackle Texture Paste (love this stuff even more!) over the canvas.  The heavier the coat, the heavier the crackle. Some areas of this canvas are painted heavier than others.  Let dry.


See the gorgeous crackling effect from the texture paste?  The brown will show underneath the crackling.  I also dabbed some of the crackle paste with a paper towel to remove bits of it as I was brushing it on.  To the far lower left, all of the tiny crackles are where I dabbed away some of the crackle paste with a paper towel.  Fun to experiment!


6. Spray the textured and crackled canvas first with Dylusions Vibrant Turquoise and dab off excess with a paper towel.  Repeat until the desired hue is achieved. Then spray Dylusions Melted Chocolate in random areas of the canvas.  Dab off the excess spray.  Repeat if needed.  Heat set the ink spray. Lightly spritz the canvas with Sunflower Sparkle Perfect Pearls Mist.  This will also reactivate the Ink Sprays so heat set quickly.


7.  Using your most sensitive finger (mine is my middle finger) lightly add Florentine Treasure Gold Guilding Wax over primarily the raised areas of the holly and branches.  But also gently add some wax in the low areas of the canvas for added interest.  Also rub some wax on the sides of the canvas.  Then add some Aquamarine Treasure Gold Guilding Wax on the canvas to bring out more of a goldish teal in certain areas of the canvas and sides. 
** Note - if you do not have Treasure Gold Guilding Wax, Rub 'N Buff or even a very light coating of an acrylic paint close to the wax colors would work.  Add some distressing at the edges using Walnut Stain Distress Ink and a touch of Black Soot.


In this photo, you can see the detail of the raised embossed holly and branches, the brown showing through those gorgeous crackled areas and the lovely highlights that the guilding wax provides.


9. Spray a piece of kraft paper with some Melted Chocolate to create a darker background for the sheet music tag to be mounted to.  Here you can see the ink spray on the left side of the kraft paper behind the tag. Dab the excess ink spray and heat set.  (I distressed the sheet music tag with Tea Dye Distress Ink and distressed the edges with a Chestnut Roan Cats Eye Ink Pad.  When I had finished dabbing up the excess Melted Chocolate spray, I lightly wiped the paper towel over the tag and added a bit more brown to it).


10. Die cut a piece of Tim Holtz' Vintage Lace from a piece of plain kraft cardstock.  Rub over it with a Gold Paint Dabber.  Heat set.  Then lightly go over the painted cardstock with Mercury Glass Stickles.  In the photo above, you can see the progression of this step: the far right is plain cardstock, the center has been rubbed with a Gold Paint Dabber and the left side has been stickled with Mercury Glass Stickles.  Let dry.


11. Place the darkened kraft paper behind the sheet music tag and cut out around it, leaving a visible edge.  Using a Tonic Paper Distresser (or scissor edge) distress the edges of all of the two tags and the blue birds post card.  Distress the edges of the kraft tag the heaviest, a little lighter on the sheet music tag and very little on the blue bird post card.  Then distress ink all of the edges using Gathered Twigs or Walnut Stain Distress Ink (or a Chestnut Roan Cats Eye Ink Pad) followed with random areas of Black Soot.  Gently crumple up all of the tags to give a more aged appearance. (That was not done on the kraft tag or the blue birds postcard in this picture).  Add a piece of vintage lace to the bottom of the sheet music tag using 1/4" Scor Tape.  Leave enough lace to turn under on the sides of the tag when they are all put together.


12. Find a piece of paper to create a rosette. In this case, it is a scrap from Graphic 45's Communique papers.  I sprayed over it with a mix of Gold Paint Dabber and water in a mister bottle and heat set.  Then I die cut the largest rosette from Tim Holtz' Mini Paper Rosettes. Use Glossy Accents to glue the two ends together and let dry.  When dry, form the rosette and hot glue the center to the backside of the rosette to hold it in place. Lightly ink the edges of the rosette with a Chestnut Roan Cats Eye Ink Pad and then lightly add Mercury Glass Stickles to the raised folds and the outside edges of the rosette.  Hot glue a little gold tinsel trim to the center and then add the top of the middle of the rosette.  Dab a Gold Paint Dabber over the Tim Holtz Mini Numerals "25" and heat set.  Hot glue in place in the center of the rosette and lightly add Mercury Glass Stickles.  Let dry.

 **Note - after cutting the rosette, add a strip of Scotch Tape on the BACKSIDE of the rosette strip. This will give it more strength on the perforated lines so that the strip won't rip apart when you accordion fold the rosette. 


13. Put the tag together by adding 1/4" Scor Tape to the underside of the sheet music tag and pressing it in place on top of the crumpled kraft tag.  Be sure NOT to flatten the tags.  Just add the Scor Tape around the outside under edges of the tag.  Add the distressed vintage blue bird post card to the top of the tag in the same manner. Turn the Vintage Lace die cut and the vintage lace to the underside of the kraft tag and hold in place with a little piece of 1/4" Scor Tape.  Lightly add Mercury Glass Stickles highlights to the postcard and finish off by adding Xmas Red Stickles to the three holly berries to the left. Let dry.  When dry, punch a hole in the center and add a vintage tinsel tie at the top.  I also added a vintage bell and a small gold jingle bell that I then added Mercury Glass Stickles to. (You can see those in the final project). 

**Note - this would make a lovely gift tag for a Christmas present.  You could also make a pocket tag out of this by only adding Scor Tape to the bottom and sides of the tag or the blue bird post card when stacking it onto the kraft paper tag.  


  14. Add a Tim Holtz Seasonal Word Stick to the bottom of the canvas using twine.  Before I added the word stick, I used a very small amount of Florentine and Aquamarine Treasure Gold to colorize the antiqued silver word stick into more of a gold-ish with a hint of teal metal piece.

15.  Then arrange all of the remaining pieces on the canvas and glue in place.  


First I hot glued the tag in place by gluing the bottom left and top right sections to the canvas; leaving the tag to be raised and crumpled.  Aren't those two blue birds just beautiful?  They are my "surrogate two turtle doves".  


Next I hot glued the rosette in place in the upper right corner. 


Finally, I thought my canvas needed something to the right of the tag, so I die cut these branches from Tim Holtz' Bird Branch die cut onto kraft paper, painted them with a Gold Paint Dabber and then added Mercury Glass Stickles.  (The branches to the left are complete).  Let dry.  


When dry, I cut them into small branches and hot glued them underneath the tag.  I think they add an "airy-ness" to the canvas and delicately fill up that space.

So, did you enjoy my Christmas canvas and tutorial today?  I hope that maybe you learned something about my creative thought process or perhaps a technique or two.  I'm wishing you a happy, healthy week and some time to PLAY! Remember...it's SOUL FOOD! 

Be sure to check out Heather's My Artistic Adventures Challenge and see if you'd like to play long.  Her Etsy store has all sorts of beautiful collage sheets.

I am also linking this piece up to Craft Hoarder's Anonymous Challenge Blog where they are having their first challenge ... Your Style.   There is some awful pretty stuff over there!

Until next time ....


Sunday, February 2, 2014

VINTAGE VALENTINE DECOR PIECES AND TUTORIALS TO SHARE

Hello my friends in art! I'm baaaack! 

I don't know how the weather is where you are but here, it's COLD!  Our average snowfall for an entire winter is around 16 inches and we've already close to 23 inches.  We are expecting two more "waves of winter blasts" (as the weatherman is calling it) to come through...what is now sounding like a smaller one on Tuesday and a bigger blast that sounds like it could dump quite a bit of snow on Thursday or Friday.

I don't know about you but I'm sick of winter already and our typical "snowy" month is just now starting.  Yikes!

Anyway....

I am so excited to share some projects with you that I have been working on.  I was recently asked to be a guest designer for My Artistic Adventures by Heather Hudson.

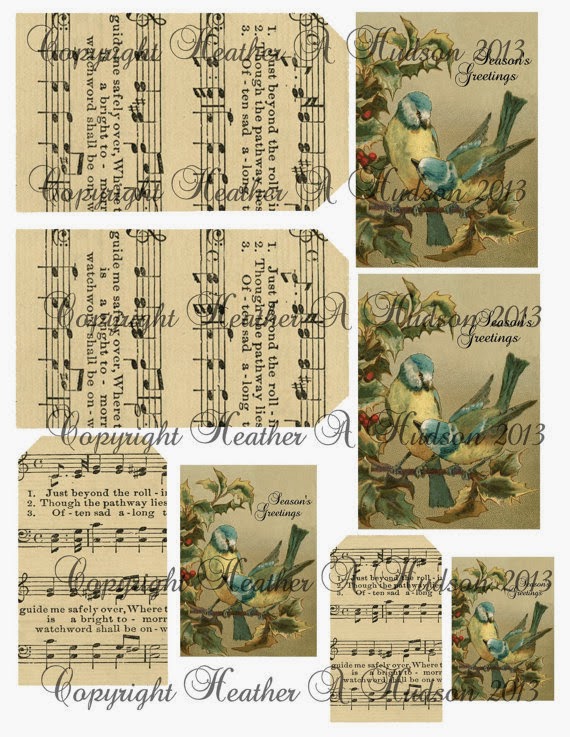
I met Heather through her beautiful challenge entries at Simon Says Stamp Monday Challenge when I was on their design team. Heather has some really fun holiday collage sheets in her Etsy store and she asked if I would want to have a play with a few of them and see what I could come up with.


 Since Valentine's Day is fast approaching, I chose a couple of her Valentine collage sheets, pulled out lots of different art supplies and just had the best time playing and creating these two very different vintage Valentine home decor pieces.  

First let's talk about the fan ...


I chose her Romantic Focals Collage Sheet because of the elongated hearts.  They are perfect for the base of this fan.  These would also make a cute little Valentine banner or make a complete circle out of them for a vintage Valentine style "quilt" doily.  I also chose the Vintage Shabby Chic Valentine Cupid sheet for my sweet little circle medallion at the center of my fan.  There are three sizes of medallions; the smallest one being the perfect size for this fan that ends up being approximately 12" across.


I started by cutting out the elongated hearts and the medallion. See what I mean about the hearts creating a perfect fan shape? I set the hearts to the side and concentrated on making a layered and vintage/shabby chic medallion.  And I will say this now, I inked ALL of my cut edges with a Prima Branch Bark ink edger.  It doesn't matter what type of ink you use on the edges: Prima, Color Box Cats Eye Ink Pads, Ranger's Ink Applicator, Tim's Distress Markers, etc.  What IS important is to not leave white paper edges when doing vintage work!


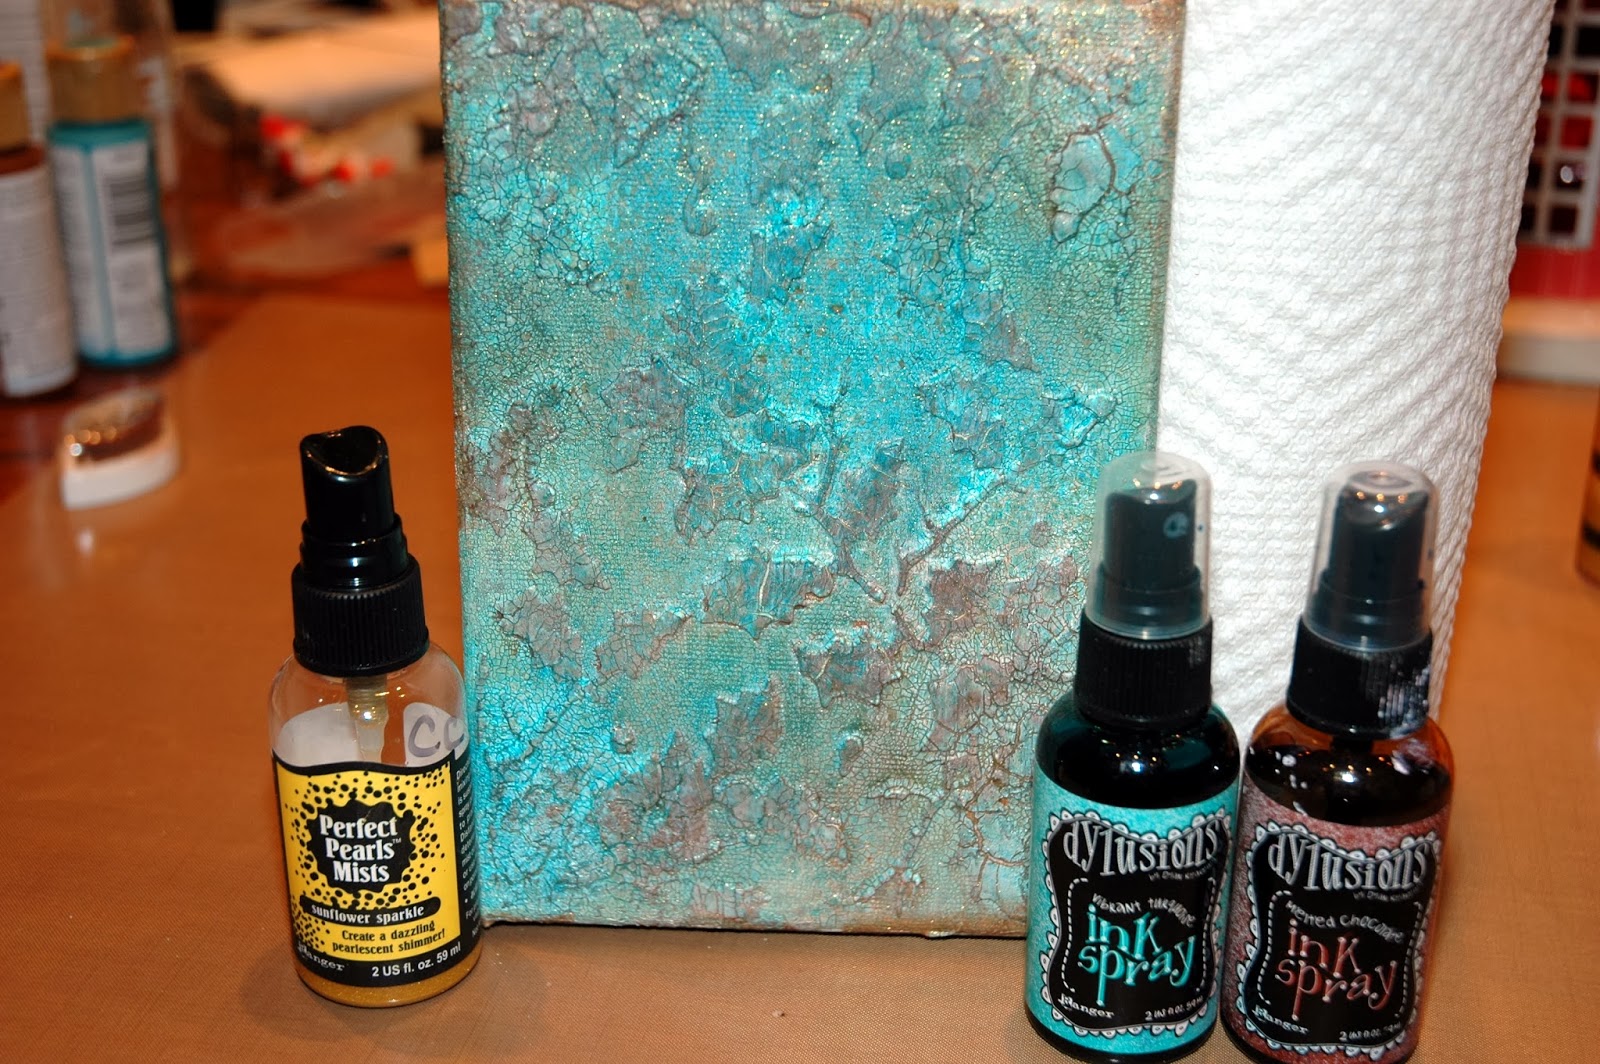
I began with some cream flat crepe paper that I sprayed with some Honey Stain to instantly age it. Then I folded the paper in half and gathered it with a running stitch.  This would create a gathered ruffle around the edge of my medallion  I also found a piece of lace with little hearts (appropriately enough) on it.  So, I lightly sprayed it with Heidi Swapp Primrose Color Shine and water.  I blotted the lace and then added a light spritz of Perfect Pearls Sunflower Sparkle to add a touch of glitz.


I added Scor Tape to the back side of my medallion and then added the pink-ish lace as my first layer.  Next I added more Scor Tape and added the gathered crepe paper.


Here you can begin to see the layers added to the medallion; the pink lace first followed by the gathered crepe paper.  Stickles are such an easy way to vintage up any project.  They add bits of sparkle but are not gaudy.  Only half of the medallion has been stickled so you can see the subtle difference that they make in defining edges and adding sparkle.  

I lightly went around the scalloped edge of the paper medallion with a pink Cotton Candy Stickles.  Next I added my favorite vintage Stickles color, Mercury Glass as an edging around the gathered edges of the crepe paper and the outside edge of the red and white polka dot circle in the medallion.  Mercury Glass is one of those chameleon Stickles colors that can be an antique goldish or silverish color, depending on the colors around it. Here, I have applied the Mercury Glass Stickles around half of the medallion so you can see the definition that Stickles give to any piece.  I also added a clear Stardust Stickles on top of the red and white polka dot circle to really pop those colors.  I added a soft blue Waterfall Stickles to the cherub's wings and the garland she is carrying.  Finally I added a pink-ish Fruit Punch Stickles over the rosebuds.


I decided that I wanted to run a piece of 1/4" ribbon through the fan for interest and also to help hold the hearts together.  So, I measured up 4 3/4" from the bottom point of the heart and in 1/4" from the side.  I drew a straight line a little over 1/4" long on both sides of each heart.


Then with a Tonic Craft Knife, I made a slit along the line I had drawn.


Next, beginning behind the heart and pulling the ribbon up through the slit I began to join the hearts together.  You could also do this technique for creating a little banner but I wanted to make a fan shape, so I made sure that the heart points all met at the bottom.


So here is my fan with all of the hearts gathered together by the ribbon.  I played with the ribbon on top of the fan to have just a small amount of "give" between each of the hearts.  Also notice the definition that the Prima Branch Bark ink edger gives to each of the hearts.  I also lightly spritzed over the hearts with Sunflower Sparkle Perfect Pearls Mist to give it a subtle golden sheen.


I had never made a fan like this before so I just started figuring out ways to connect the hearts.  Here I simply added some tape to the back of each one and I would later cover the back with cardstock hearts that I cut out using one of the hearts as a pattern.


Now that the fan was taking shape, I started thinking about ways to make it look even more vintage and shabby chic.  I had some little 4" white doilies.  I sprayed them with Honey Stain and cut them in half.  Then I sprayed them again with some Gold Paint from a Paint Dabber mixed with water in a spray bottle.  I topped that off with a spritz of Sunflower Sparkle Perfect Pearls Spray and dried them with a heat gun.  They would make a perfect border behind my hearts of my fan and further define the rounded edges of the hearts by the contrast of the beautiful colored hearts against the cream-ish doily background.


Here is the backside of the fan after I had added the half doilies. Working from the front side of the fan, I centered each doily behind the heart and then stuck it down onto some glue I had added to the back of the hearts.
**Note - I added the cardstock backing onto the hearts before I thought to add the doilies as a border.  So, I cut out more hearts from the script cardstock and later added them over these hearts to give the fan a finished look.  Like I said, I'd not made one of these before...trial and error.  (smile)


Next I wanted to add some dimension to the front of my fan.  Since this is a Valentine's Day fan, I decided to continue with the heart theme.  I cut three of the shorter hearts from Tim Holtz' Mini Hearts Set using Inky Antics Cream Honeycomb Paper.  Then I cut the heart in half so that when each outer half of the heart was glued down to the fan, a full little honeycomb heart would be sticking up.


Here is a closeup look at the honeycomb hearts on the finished fan.  I lightly ran my finger with some Mercury Glass Stickles over parts of the honeycomb surface to give them a bit of a shimmer and blend them into the other parts of the fan that are outlined in Mercury Glass Stickles. Don't you LOVE the colors in Heather's hearts? They contrast so beautifully with the cream honeycomb hearts and lacy doily edging.  I also applied Mercury Glass Stickles around all of the edges of the fan and the outer edges of the lacy doilies.  Again, it just adds so much definition, a bit of sparkle and a vintage festive feeling to this fan.


Finally I wanted to add a romantic bow with some little roses onto the medallion that would be glued onto the lower center of my fan.  So, I took more of the gold ribbon that I had used to gather the fan and a piece of pink organza ribbon and created little bows and tails. I glued the bow on top of the Melissa Frances Cream Tulle trim that I glued into a circle shape.  I also tucked in a remaining piece of the pink heart lace I'd put around the medallion in with the ribbon tails. I glued those in place and then hot glued the sweet little rose buds amongst the shabby bow.


Here is a picture of the medallion and bow assemblage.  After I hot glued the medallion and bow in place, I added one more complete doily (colored in the same manner as the lacy edging) to the backside of the fan.  This hid the unfinished backside of the medallion and also gave an added lacy edging to the underside of the medallion.  Cute, huh; with a shabby chic/vintage feel. 

Moving on to the Valentine box ... 

  
I chose Heather's Primitive Folk Art Valentine Clown on a Bingo Card for this project.  The second I saw this little clown, I loved her.  I especially love the colors; the golds, blacks and reds...definitely not traditional Valentine colors but I loved working with them.


I began by painting a plain paper mache 6" square box with Paper Artsy's Little Black Dress Fresco Finish Paint.  It's a wonderful matte finish black with a hint of a chalky feel to it.  Next I added a layer of Fresco Finish Crackle Glaze because I wanted my box to appear aged and old.  By painting the first layer in black, that color will appear through the crackled top coat. After that was almost dry, I applied a top layer of Caramel Fresco Finish Paint. What a great rich, goldish yellow color!  Then I lightly and randomly distressed the some of the edges of the box with Black Soot Distress Ink. 


Here is the box after the crackling has taken place.  Once you begin to apply the top coat, the crackling begins to take effect almost immediately. I'm an instant gratification kind of girl!


I found a heck of a deal on some metal trims (in various sizes) at a local craft store and bought tons of them for a dollar a roll.  I wanted to use one of the pieces on the sides of my box so I added 1/2" Scor Tape (twice) all the way around the sides of my lid.


This trim was originally silver.  I merely painted over it with Little Black Dress and let it dry.  Isn't it just too cool?  Then I stuck in in place going around the lid of my box.  I love it's almost art deco look.  


 Next it was time to start working on the embellishments for my newly crackled box.  Here is the basic Vintage Bingo card from the collage sheet.  There are several sizes included in the collage sheet from an ATC side to this large one.  I could see all sorts of possibilities for getting some dimension on this little clown.


I began by printing out another of the cards so that I could cut out an extra head, pocket and arm.  Next, I gathered two ruffles of red crepe paper to replace the collar around the clown's neck.  (Remember from the fan, I love incorporating crepe paper on vintage pieces!)


I used 1/8" Scor Tape to hold the stacked crepe paper ruffles in place over where the original color is printed. Next I pop dotted another head directly on top of the original.  That gives dimension and also hides the edges of my now dimensional color.  Instead of the flat heart that the clown is holding, I cut out my own honeycomb (half of a) heart to the appropriate size and using the same technique I did on the fan above, I glued it right over the flat printed heart.  I also made my own little black bows out of some cotton black ribbon that I had and glued then in place on the honeycomb heart and also on the clown's hat. (I'll talk about the pocket and the frame later).


I added some Glossy Accents to the "HEART" letters and the heart at the top of the bingo card.  Glossy Accents is a glue dries clear but it also can be used to simply add dimension to flat images.  I also added some Glossy Accents to the clown's shoes and red bands on her hat to give them a raised shine.  Next I added some little black pom poms to her jumpsuit and also on top of her hat.  Finally I glued another arm (at the shoulder area) right over the top of the first one so that I could lift the arm off of the paper.  I later inserted a resin frame under the hand. Talk about dimension!  


The Bingo card was almost finished but it needed something to pop it against the Caramel crackled box top.  So, I found a scrap piece of Graphic 45 harlequin paper (perfect with a clown, right?).  I cut it to size and added some Barn Door Distress Ink around the perimeter to pull in the red from the clown and hearts. Amazing how a little ink can really change something's appearance!


The box lid is a 6" square and the Bingo Card is 4 1/2" across.  So, I had an obvious blank space on my lid.  What to do??  Easy solution!  I used my BRAND NEW TIM HOLTZ HONEYCOMB die cut that I was lucky enough to receive at CHA at the Sizzix booth.  (Thank you Tim Holtz and Sizzix!) 

I cut the honeycomb pattern out of Plain Grungeboard and painted it with Little Black Dress.  I found a bunch of little scrap images and papers and using the centers from the honeycomb as a pattern, I cut out an image for each of the holes in the honeycomb.  I glued them in place on the back using Glossy Accents.


 Here is the box lid now, after adding some Black Diamond Stickles around the perimeter of the Bingo card and harlequin cardstock.  I am loving it but it still needs something. I lightly added some Black Diamond Stickles to the top of the honeycomb for just a very subtle shimmer but it still needed more.


I looked around my craft room and came across this sweet little Melissa Frances Resin Frame that was originally stark white.  I painted it with Little Black Dress and added some Gold Paint Dabber (using my finger) highlights, found a sweet picture of a loving couple on my many saved image files on my computer, sized it to fit in the little frame and put it all together....


Looks way different than when I started out with just a little stark little white frame!  Isn't it amazing what a little paint will do?  The image and the colors are perfect for my vintage Valentine box!  I added a little folded "love letter" to the pocket of my clown and glued it in place on her jumpsuit.  The I lifted her hand and added the frame.


Here is a look at the top of the box when it was all finished.  I probably could have still added more to top but I wanted the clown to be the focal point.  So, as a finishing touch, I simply added a little plaid ribbon bow at the bottom.  I love that ribbon and how it pulls all of the colors and patterns together.


I love the gold highlights so much on the little picture frame that I decided to add them to the ornate metal band I had run around the lid of my box.  Here you can see the difference before and after adding the gold highlights. I love the dramatic effect that the gold gives.


As a final touch, I added a piece of metallic Dresden trim to the bottom of my box.  It was gold so I covered it with Little Black Dress (using my finger) then heat set it.  I added a strip of 1/4" Scor Tape around the bottom edge of my box and added the trim all the way around. 

I finished off the interior of the box by painting the lid black and covering the bottom with more scrap harlequin Graphic 45 paper.  I gave all of the creases inside a light "wash" with Little Black Dress mixed with water, blotted the excess, heat set it and my box was complete!

  Thanks for stopping by today.  I hope that my two little Valentine projects using Heather's beautiful collage sheets have inspired you to create something fun!
February has only begun.  You've still got time to create some beautiful Valentine decor pieces to give as special gifts to someone you love or to liven up the holiday in your home. 


I wish you a very Happy Valentine's Day to share with those you love!  'Til next time ...
Take some time to play! It's good for the soul!