This is an exciting week at Simon Says Stamp and Show! Our fabulous sponsor, Simon Says Stamp is celebrating ...

... and we are helping kick off STAMPtember ™ festivities with a
Design Team Blog Hop!
You have a chance along the way to win a $25 gift certificate for hopping onto my blog, leaving a comment and entering our challenge. Winners will be announced at
8AM September 12.
Please hop to my teammates' blogs as well. Each of them has a special handmade work of art to share with you and also MORE PRIZES along the way! Enter the "Read All About It!" Challenge. Be sure to put a STAMP on it and you could be the lucky winner of our
GRAND PRIZE $100 Simon Shopping Spree!
... and we are helping kick off STAMPtember ™ festivities with a
Design Team Blog Hop!
You have a chance along the way to win a $25 gift certificate for hopping onto my blog, leaving a comment and entering our challenge. Winners will be announced at
8AM September 12.
Please hop to my teammates' blogs as well. Each of them has a special handmade work of art to share with you and also MORE PRIZES along the way! Enter the "Read All About It!" Challenge. Be sure to put a STAMP on it and you could be the lucky winner of our
GRAND PRIZE $100 Simon Shopping Spree!
SIMON SAYS STAMP was founded in 2002 with an interest in exclusively selling rubber
stamps. It didn’t take long until we realized we couldn’t stop there. Over the
past 10 years we celebrate rubber stamping in its full glory by giving access
to people around the world to a one stop shop. Rubber stamps still remain the
heart of our business and we are celebrating by hosting a “STAMPtember” ™ event
intended to inspire, educate, and celebrate the greatness of rubber stamping.
Part of the enticement of rubber stamping is that stamps can be used in
creating or complementing ANYTHING! From stamping dates on bank documents and
postage parcels in the early 18th century, rubber stamping has dramatically
expanded to include card making, scrapbooking, mixed media and many forms of
altering and expressing art.
Whether you're a regular or a first time visitor, WELCOME TO MY BLOG! If you came here from the lovely and talented Ashli Oliver's blog, then you're on the right track for SIMON SAYS STAMP AND SHOW'S STAMPTEMBER BLOG HOP!
This week's challenge theme is titled "READ ALL ABOUT IT". Do you love stamping text or using actual text in your pieces? Well, then this week's challenge should be fun for you! Whether you make a book, alter a book, stamp script or use pages from a book or a newspaper; incorporate something about text and stamping into your challenge piece.
Here is my finished "Read All About It" piece.
Whether you're a regular or a first time visitor, WELCOME TO MY BLOG! If you came here from the lovely and talented Ashli Oliver's blog, then you're on the right track for SIMON SAYS STAMP AND SHOW'S STAMPTEMBER BLOG HOP!
This week's challenge theme is titled "READ ALL ABOUT IT". Do you love stamping text or using actual text in your pieces? Well, then this week's challenge should be fun for you! Whether you make a book, alter a book, stamp script or use pages from a book or a newspaper; incorporate something about text and stamping into your challenge piece.
Here is my finished "Read All About It" piece.
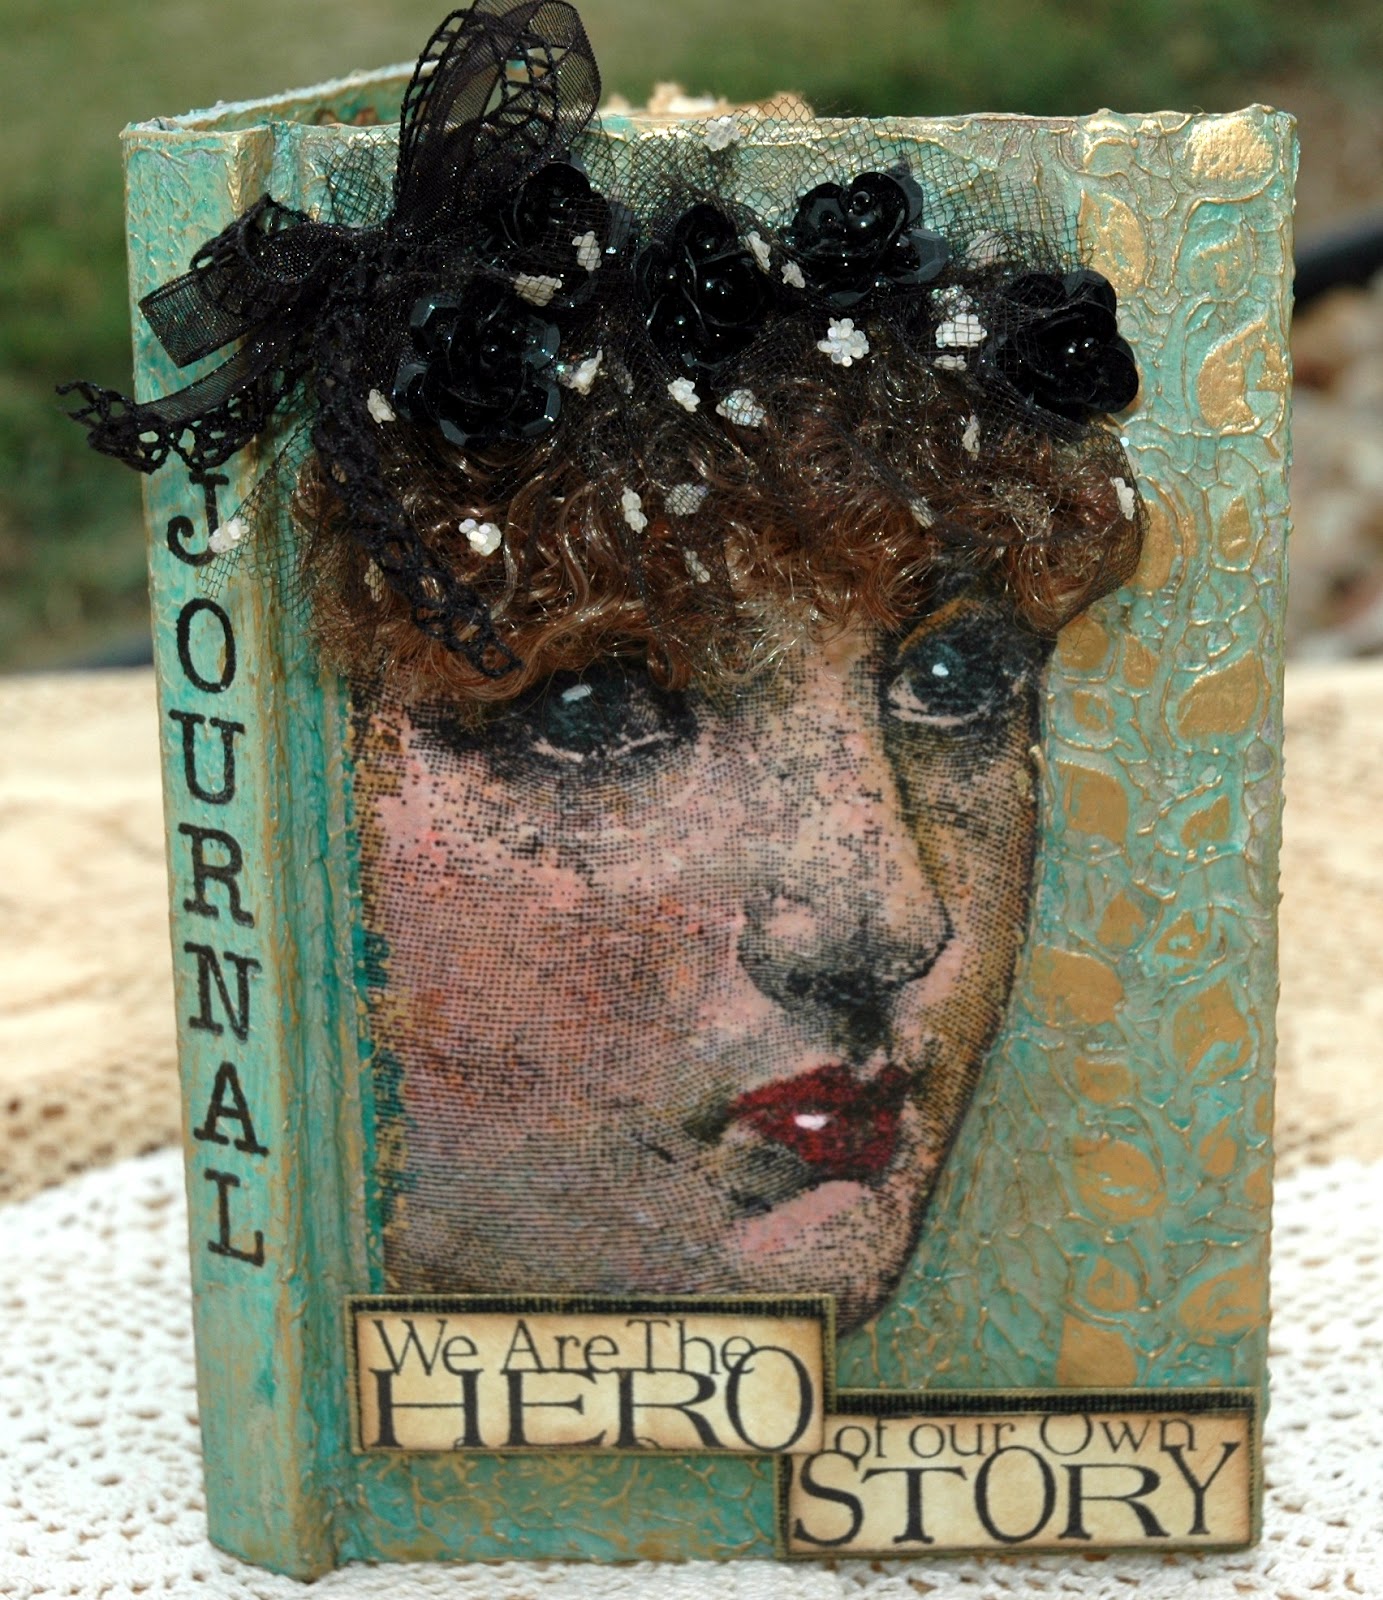
I have completely altered a 4x6 blank book and turned it into a journal.

This is what the book looked like before I started. My daughter had gone to furniture store closing and bought all that they had, fourteen in all, for $.50 a piece! The best part...she gave them all to me!
They are beautifully bound little books with quality linen-ish textured blank pages inside; as you will see in future pictures. When I saw this week's challenge theme, I knew that I wanted to transform this little guy into a beautiful journal.

And...when I saw Tim Holtz' new release of the Classics #5 Stamp Set, I knew that beautiful lady would grace the cover of my new journal! She is so fabulous. In fact, that entire stamp set is just amazing!
If you've got a few minutes, grab a cuppa and I will share with you the step by step in creating this little altered journal. I hope you enjoy it....

I started off by covering the front, spine, edges and just a bit of the inside edges of the front cover with molding paste (a product similar to Gesso). I used a palette knife to smear a light coating of molding paste and then I tapped it with my finger in a random fashion to create more texture. Next I laid Dyan Reaveley's Luscious Leaves Stencil down on the right side edge of the cover. I used a palette knife and scraped more molding paste over the stencil to add the leaves along the edge. Then I gently lifted the stencil and allowed the cover to dry. When the front was dry, I repeated the process (minus the leaves) on the back cover
and let it dry.
Next, I cut out a pattern around the size of the face stencil that I would use on the cover. I laid it on the cover and lightly penciled around it, so I could see the placement of the face.
and let it dry.
Next, I cut out a pattern around the size of the face stencil that I would use on the cover. I laid it on the cover and lightly penciled around it, so I could see the placement of the face.

Since molding paste dries in a semi transparent state, I needed to create an opaque surface. So, I painted the entire cover with a base coat of an off white acrylic paint. I painted the area of the face with a skin tone acrylic paint and let it dry.

Next, I added color to my cover by using Peacock Feathers Distress Ink Refill and a touch of water. I brushed the ink (plus a little water added) onto my cover, working it into all of the high and low areas. Then I dabbed a paper towel over the cover to remove excess ink and add a variation of color. Then I heat set the color.
Because the cover had texture, I knew that I could not stamp directly onto the surface of the journal and get a clear image; especially when working with a stamp with so much detail. So I stamped that beautiful face from Tim's new Classic #5 Stamp Set onto a piece of white tissue paper, using Jet Black Archival Ink. Then I heat set it. I painted Matte Multi Medium on the flesh area of the journal cover and laid the tissue paper stamp directly over the flesh area. Then I painted a layer of Matte Multi Medium over the entire front cover, sealing the tissue paper and also the color of the journal cover. (When dry, I painted the Matte Multi Medium over the spine and back cover to seal the color as well. You need to work quickly when sealing with Multi Medium over the Distress Ink Refill because until sealed, the ink is still water reactive and you will lose a little bit of the color if you keep rubbing over the same place.)

Next, I used my ink applicator and Gathered Twig Distress Ink and distressed the entire cover of the journal. Then I heat set it.
I wanted to add more color to the face. There was already a base of a flesh tone color underneath the tissue paper stamped image but she needed more detail. The additional color was all done with Distress Markers and a water brush (to dilute the color if needed). Antique Linen and Tea Dye provided deeper skin tones. Spun Sugar gave that blush to her cheeks. Worn Lipstick followed by Barn Door provided the color on her lips. Broken China was added on top of the black in her eyes. And a touch of a Sakura White Opaque Pen added that glint in her eyes and shine to her lips.
I wanted to add more color to the face. There was already a base of a flesh tone color underneath the tissue paper stamped image but she needed more detail. The additional color was all done with Distress Markers and a water brush (to dilute the color if needed). Antique Linen and Tea Dye provided deeper skin tones. Spun Sugar gave that blush to her cheeks. Worn Lipstick followed by Barn Door provided the color on her lips. Broken China was added on top of the black in her eyes. And a touch of a Sakura White Opaque Pen added that glint in her eyes and shine to her lips.

Next I introduced some metallic gold from a Gold Paint Dabber by gently rubbing the paint over the high points with my index finger. I did this to the entire cover; working very carefully to add a lot of gold over the leaves; giving them that embossed look.

Here is a picture of the covers after adding the gold highlights. I added a slight wash around the face area using Sable Brown Studio Paint and water. I loved my lady on the cover but I did not like how stark the top of her head looked against the background color. So, I decided to soften that look and add more dimension to the cover by adding hair. But, how would I do THAT?

Then I remembered some curly doll hair that I had bought ages ago. I added 1/8" Scor-Tape double sided tape above her face and began adding the hair. I added two rows of it. Now she had hair but it still looked weird to just have the hair coming out of nowhere. So, I decided to add some vintage black milliner's netting, a few black sequin flowers and a little black ribbon. All of those items were attached with Glossy Accents.

That was just the touch it needed to give her that finished look. (The ribbon was still not added in at this point...it came later).

Now the cover was coming along but it still needed something at the bottom. I loved the sentiments on the Classics #5 Stamp Set and I used both of them in this journal. I think the one I chose for the cover is perfect for a journal..."We are the HERO of our Own STORY."

The sentiment, the way it was on the stamp, would not fit properly on my journal cover, so I decided to cut it in half and separate it. I stamped the image onto cardstock, cut it out, distressed it with Gathered Twig and then edged the cardstock with a black cats eye ink pad. Then I took a piece of Bazzill black cardstock and (using my index finger) rubbed gold paint lightly over the surface to show the raised area on the paper. I pop dotted the sentiment on top of the black cardstock, cut the black cardstock to leave just a matted edge and ran the Gold Paint Dabber over the edges of the black cardstock. I overlapped the sentiment and glued them into place using 1/4" Scor-Tape.

I had some perfect sized letters to stamp "JOURNAL" on the spine of the book using Jet Black Archival Ink. Then I heat set them before moving into the interior of the journal.
Since this challenge was titled "READ ALL ABOUT IT", I wanted to further tie this journal into that theme. So, I created the interior covers by stamping some script text.

To create the interior covers, I started with two 4x6 pieces of cream cardstock. I rubbed Evergreen Bough and Iced Spruce Distress Inks onto a Non Stick Craft Sheet. I then intermittently added a little Picket Fence Distress Stain and spritzed just a bit of water over all of it. Then I dragged the two pieces of cardstock through the inks and heat set them. I tore around the edges of the cardstock. I did this for two reasons. I needed to make them smaller to fit inside the covers and I also wanted those torn, uneven edges to distress and create that old, worn look.
**When you are tearing paper, always tear towards you if you want the pulpy side of the paper to face you. The ink will grab onto the pulpy paper and give you that really worn look. I also like to ink the edges in brown and then lightly touch the edges with a black cats eye ink pad to create a really old, worn ... almost a burned edges effect.)

I did this same edge technique on the sentiment. I stamped it onto manila cardstock and then distressed it with Gathered Twig Distress Ink. I tore the edges, added more Gathered Twig and then a touch of the black cats eye ink pad. I did the same black Bazzill background on this sentiment as I did on the one I did on the cover; only I could leave more of the black highlighted in gold showing on this inside cover. Don't you love that sentiment?

Here you can get a better look at those lovely pages inside of this book. Aren't they awesome? I stamped this decorative image using Jet Black Archival Ink and then I randomly added little dots of Patina Stickles to add a touch of blue green sparkles and to pull the teal from the interior pages. Let the Stickles dry before closing the book cover!
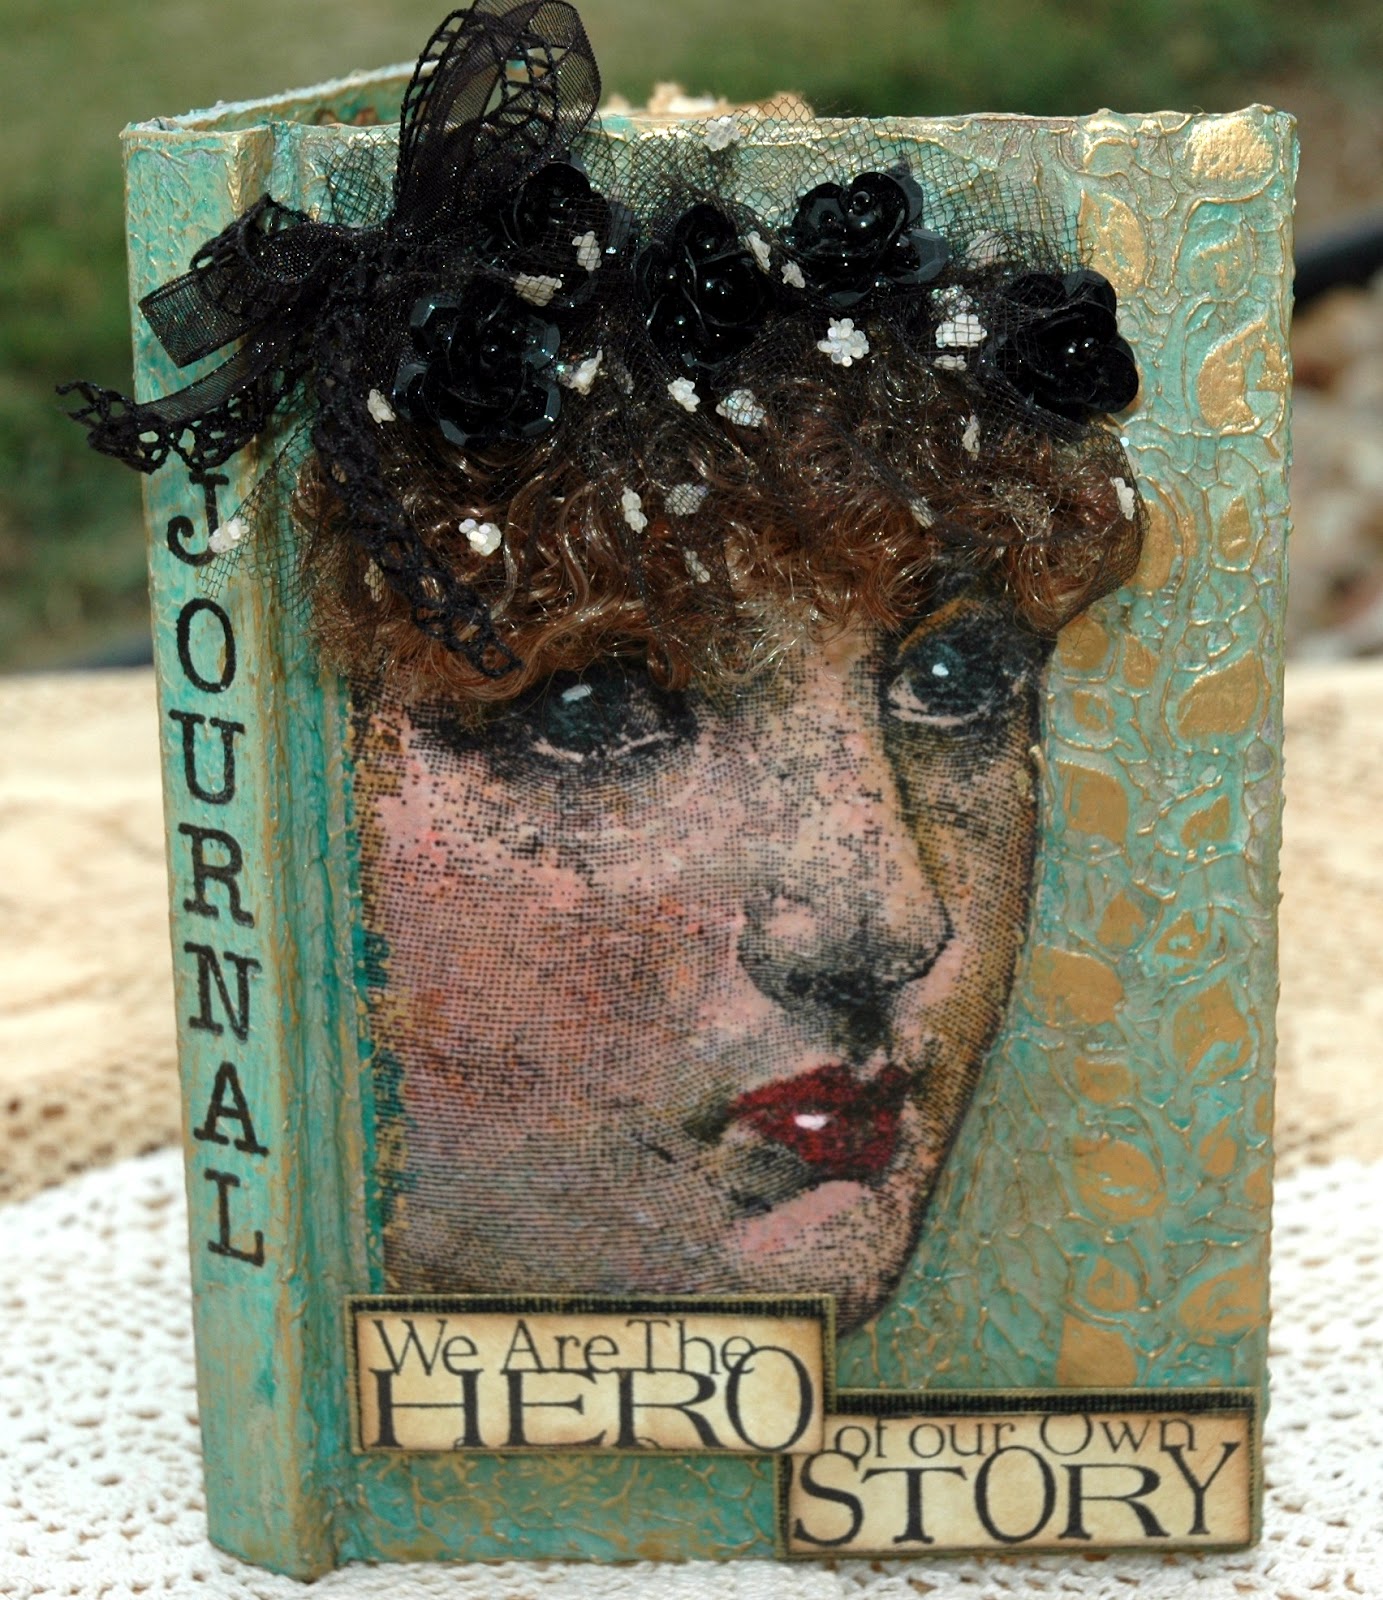
Here is the cover again.

And here is what you will see when you open the cover.
Have you finished that cuppa yet...or possibly had to get a refill before finishing these instructions? (smile)
This was a fun and relatively easy project to do. You just have to be patient and wait for the drying times involved.
Now it's YOUR turn to create something wonderful using our theme.
Be sure to include some stamping! Then enter our challenge!
Grand Prize Drawing of a $100 Shopping Spree at
Simon Says Stamp!
And don't forget the chance to win a $25 gift certificate to Simon Says Stamp and Show on my blog (and all of the Design Team Member's blogs) just by leaving a comment and using at least one stamped image when entering our challenge.
Be sure to include some stamping! Then enter our challenge!
Grand Prize Drawing of a $100 Shopping Spree at
Simon Says Stamp!
And don't forget the chance to win a $25 gift certificate to Simon Says Stamp and Show on my blog (and all of the Design Team Member's blogs) just by leaving a comment and using at least one stamped image when entering our challenge.
Who wouldn't like THAT? And...if you are chosen as one of the TOP THREE entries, you will receive special recognition on our blog. So, have fun with this one! I can't wait to see YOUR creation!
From here....hop on over to our Design Team Leader, May Flaum's blog for more inspiration. If you need to start at the very beginning...click on Anna-Karin Evaldsson's blog and you you'll be on the right path to get your STAMPTEMBER inspirational journey started!
Here are all of the participating Simon Says Stamp and Show Design Team in their correct blog hopping order:
GOOD LUCK!
Here are Simon Says Stamp products used in this piece:

From here....hop on over to our Design Team Leader, May Flaum's blog for more inspiration. If you need to start at the very beginning...click on Anna-Karin Evaldsson's blog and you you'll be on the right path to get your STAMPTEMBER inspirational journey started!
Here are all of the participating Simon Says Stamp and Show Design Team in their correct blog hopping order:
GOOD LUCK!
Here are Simon Says Stamp products used in this piece:
 |  |  |  |
 |  |  |  |
 |  |  | |
 |  |  | |
 |  |


