Hello all and welcome for another Compendium of Curiosities III Challenge technique. The lovely Linda Ledbetter is hosting these challenges at her Studio L3 blog. Check out her blog for the challenge details and come join us on our journey as we learn about Tim Holtz products and techniques based on his Compendium of Curiosities III book.
Most of the Curiosity Crew were able to get together in Anaheim, California for this year's CHA. We had THE MOST amazing time ever! We saw some fabulous new products and samples from all over the show. I will be sharing more of those with you on a future post so you that hopefully you can get just as excited as we are about what lies ahead for 2015 in the way of new products and ideas yet to be conceived!
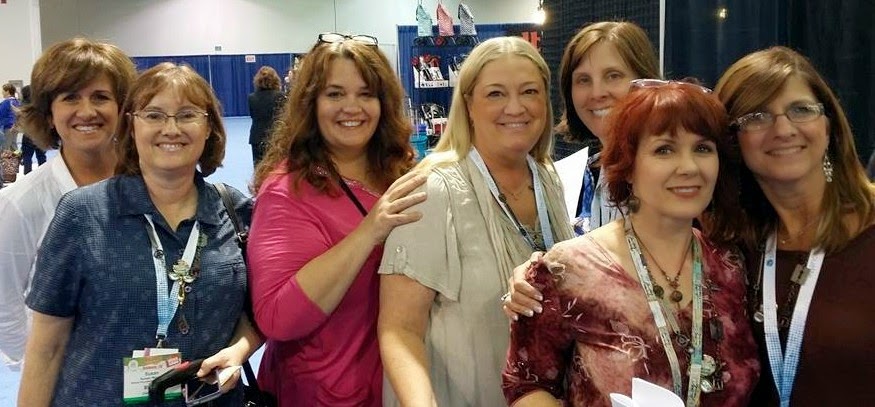
THE CURIOSITY CREW
Left to right: Annette Green, Susan Mostek, Yvonne Blair, Me, Marjie Kemper, Linda Ledbetter, Cheryl Grigsby Missing from the crew this time: Anita Houston and Hels Sheridan
Turn to page 40 in your Compendium of Curiosities III books and check out Distress Watercoloring, Part 2. We did Distress Watercoloring, Part 1 on the fifth challenge back in late June. While I cannot give away the technique, I can share with you the products I used in creating this very fun layered tag.

I have no clue what happened to the earliest pictures of the process in creating this tag. I took them, I promise! But my camera evidently didn't like me during the early stages of my layering the tag and decided NOT to capture the images. So ... I will describe the process and then pick up with the photographs as we proceed.
- I began with a piece of watercolor paper that I cut into the size of a large # 10 Manila tag.
- I stamped the winged girl (from Tim's Winged Things I stamp set) onto the tag using Jet Black Archival Ink. I then stamped her again onto a piece of scrap paper and cut her out, to create a mask. Using re-positionable tape, I covered the stamped girl on the tag with the mask image of her.
- I stamped the BINGO card (from Tim's Game of Life stamp set) in place on the tag as if the girl was sitting on it. I also stamped a duplicate image of the BINGO card onto a piece of scrap paper and cut it out, to create a mask.
- I colored the winged girl and the BINGO card using various Distress Inks and Tim's Fine Detail Waterbrush. The colors used are: Scattered Straw and Tattered Rose for the skin and cheeks, Broken China for the dress and hat, Wild Honey for the wings, Antique Linen for the collar, socks and text boxes, and lighter tones on the BINGO card, Gathered Twigs for the hair and darker tones and shadowing on the BINGO card.
- I covered the winged girl and the BINGO card with their masks and proceeded to add Distress Inks to the white watercolor tag.
- Using Tim's Ink Blending Tools, I first applied Mustard Seed followed by Broken China Distress Inks. I further blended those colors around my masked images by using a little water on a brush to feather out the yellow and soften the edges where it transitioned into the Broken China, creating a beautiful soft green color.
- I used Tim's Latticework stencil in conjunction with Peacock Feathers to randomly add that lacy pattern to my background.
- I added more layering with Tim's Bubble stencil and Rusty Hinge Distress Stain.

Here you can see all of the previous steps above completed on the tag.

For more interest and layers on my background, I chose a random numbers stamp from Tim's Ultimate Grunge stamp set. I used Jet Black Archival ink and partially inked the stamp but I did not use an acrylic block when stamping. This gives a more random look and the black ink will compliment the already stamped images of the winged girl and BINGO card once the masks are removed.

Here the masks are removed and you can see the random stamped black numbers on the layered tag.
Now to add the shadowing effect using Tim's Distress Watercolor, Part 2 technique.

All done! See the difference this technique makes? It gives even more depth and warmth to the stamped images! Love it! I also added Black Soot Distress Ink to the outside edges of the tag to better define the edges of the tag and pull in yet even more black.

One more step in completing the Distress Watercolor, Part 2 technique. I put the mask back in place and added the subtle and lightly sprayed blotches of Black Soot. Again, check out the Compendium of Curiosities III book to see how that was done. But, compare the two pictures above ... you can see the difference that this technique makes; adding even more layers of color and depth to the tag.
Now that the inking was pretty much done, it was time to add all of my embellishments.

I stamped this sentiment from Tim's Game of Life stamp set onto a piece of tea dyed muslin fabric and frayed the edges, taught in our last challenge. I then attached the muslin to a piece of scrap cardstock using Scor Tape. This would later be attached to the bottom of the tag using Scor Tape.

This is a fun technique I learned from a super nice guy and a very talented mixed media artist, Seth Apter. The numbers rubons are from Tim's Numbers Remnant Rubs. Instead of just rubbing them onto the tag, I first scratched off some of the black numbers using my Tim Holtz Craft Knife. THEN I rubbed them in place on the tag ...

The result is a very cool, random distressed look. What a neat and simple way to alter the appearance of any rubon and give them a different look!
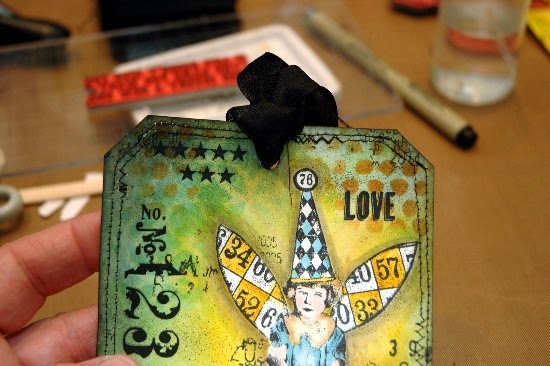
I machine stitched around the tag using black thread and then continued to randomly add some more of Tim's Rubons. The stars are from his Elements Rubons and "LOVE" is from his Botanical Rubons set.

I then added a piece of black seam binding to the bottom of my tag and layered the frayed muslin piece on top of it. Finally I added a shabby black bow with a Tim Holtz Heart Charm attached to the center using a Jump Ring.

Now it's YOUR turn to color a tag using Tim's watercolor technique and then apply Distress Watercoloring, Part 2 to your work. Then enter your art in our challenge where you have TWO opportunities to win some very nice prizes.

Thank you to our wonderful friend and supporter, Linda Coughlin of The Funkie Junkie Boutique for sponsoring every other challenge here at The Compendium of Curiosities III! Her online store carries a vast assortment of unusual and hard to find products as well as the ones we all know and love. This winner for this prize is chosen by the Curiosity Crew.
And of course, Tim and Mario have graciously "kicked in" a huge amount of goodies to be given away at each challenge to a randomly selected winner. So, get your creative thinking caps on and have some fun with this one!
I can't wait to see your entries!
Beautiful make Candy and love the steps you gave in order to achieve. Another cool piece.
ReplyDeleteLove that distressing the rub-ons trick! I'll be trying that one for sure. Your tag has so much depth and movement going on, Candy. Just lovely!
ReplyDeleteAWESOME... one of these days I am going to come and sit next to you whilst you create your masterpieces.. LOVE this very lots Candy x
ReplyDeleteGorgeous!! I absolutely am crazy about your tag, Candy. You make me want every Tim set you use. And I will have them. I will!! That little winged girl is so endearing. Your layering of color an technique is so powerful and interesting. Brilliance here, you artist, you.
ReplyDeleteExtremely GORGEOUS tag Candy!!! LOVE the rub on technique from Seth too! Great use of the the old stamp set too!
ReplyDeleteYour tag is beautiful Candy, gorgeous colours and you created some wonderful layers and the stitching looks great too! That is a really handy tip with the rub-ons, they look amazing.
ReplyDeleteSuch a shame that Hels and Anita could not be at CHA with you but I love the photo! Hugs, Anne xx
Completely Darling tag, Candy!! OK--so, yellow is my favorite color and I just love how this cute little winged thing is glowing!! She's one of my favorite images :) OMG--LOVE that technique you learned and shared with us from Seth Apter!! That's totally cool!! Just love everything about this tag! :) XOXO-Shari T.
ReplyDeleteOh Yeah I almost forgot!! Love the group photo of (almost) all of the Curiosity Crew enjoying the CHA show!! Gorgeous group of talented women!! XOXO-Shari T.
ReplyDeleteYour tag looks gorgeous, Candy! Thanks for sharing the trick how to distress rub-ons. That's a great idea!
ReplyDeleteGaby xox
Hi Candy, great photo of the crew at CHA. This project is amazing, thanks for the step by step guide, I find it really useful. Love the colours and techniques on this tag.
ReplyDeleteJan x
Fabulous tag Candy! I love all the stencils you used the colour palette is dreamy! Cameras do like to play tricks on us, don't they! Silly things! until next time, hugs :)
ReplyDeletegreat tag Candy - love the tips and trips and that it's simple - I feel like I could do it! Thanks for all you do!
ReplyDeleteThanks, Paula!!! WOW...you just made my day with this comment! :)
DeleteLovely to see the lineup of all you ladies! Bet you had a ball. This is a terrific tag Candy, love the fresh hues and those super pops of black. Great tutorial as always too. Nicola x
ReplyDeleteTerrific tag Candy. I love everything about this composition.
ReplyDeleteLOVE this piece, Candy (what else is new) and it was so fun to see such a talented line-up of ladies in the photo! As always, I appreciate the inspiration and your attention to detail is mar-ve-lous! I look forward to each and every project you make and am so grateful that you share your "mad skillz" with the rest of us!
ReplyDeleteOh, the colors! And I love how you "distressed" the rub-on; I am totally gonna steal that idea. Beautiful work and what a nice job on the mask - I am mask challenged and always end up with a halo!
ReplyDeletePerfection. Candy!
ReplyDeleteI Love it, I love it !! ...that winged little girl is one of my favorite stamps ( have yet to get her ... they were always out); love your mask work and the layers; the colors just perfect... love all the cool tips you shared and the sentiment on frayed muslin... and black seam binding just "POP" !!
ReplyDeleteOh my goodness, girl, where do I begin? First off, thanks for posting that awesome picture of the Crew. I am truly honored to know you and the rest of this fine group of women/friends, and to be included with all this amazing talent. I was so glad to get to spend a little one-on-one time with you at the airport after CHA. Now for this fantastic tag! There's so much that you've shared with us and taught us this time, I can't believe it. When I first looked at your tag, I thought it was full of layered items, but as I studied it and read through your steps, I quickly realized it was just the magic of your masterful techniques. Your choice of stamps is perfect and the masking technique is spot-on! When you added the final step of the Watercoloring Part 2, it really made things pop. Wow! I love that you shared with us the technique you learned from Seth. I never would have thought of that, but it's so simple and effective and COOL! I will definitely be trying that one out. Your added background stamping, color choices and stamp choices are all perfectly tied together. I especially loved the stamped tea-dyed muslin. And the stitching around the edges of your tag with black thread grounds everything so well. How cute that you added the bingo piece to the tip of your girl's pointy hat. Clever. And the final touch of black ribbon at the top and the heart charm as an anchor at the bottom are the icing on the cake. This is an example of how to rock a technique challenge, girl. I love it! (Can you tell?) ((Hugs.))
ReplyDeleteThe tag is AMAZING !! The colors , the layers .. the technique ! I love all the tips you share .. I learn so many cool things from everyone on the Curiousity Crew.. you all ROCK !!!
ReplyDeleteI absolutely LOVE this tag, Candy! The watercoloring is amazing and the details are, well, just Wow! I, too, love that little winged girl sitting on the game card which goes with the sentiment so well. Thanks for all the step by steps and the Seth Apter tip.
ReplyDeleteLove the photo of the CC or most of you! I am sure it was one great time. Candy, I love your watercolored gorgeous tag! Love the added stitching and the bingo card. Great details as always! Hugs!
ReplyDeleteWhat a great dimensional tag that is not actually 3-D!
ReplyDeleteWhat a cool way to make your tag appear much more 3-D than it really is! Awesome! And I love the color palette you chose!
ReplyDeleteQuite simply adore what you've done here with this bingo tag Candy and so good to see you with the girls at CHA. Jenny x
ReplyDeleteCandy!!!! Can I possibly say you've outdone yourself? Now that is quite a feat, my lovely lady!
ReplyDeleteFirst off, I am cracked pistachio with envy over your girl time at CHA. If you would like to contribute to my bucket list check-offs, please send an invite to me next time! Ha! Ha! I will have my bags packed! I will guarantee you will never laugh so hard!
Now, back to this tag...yes, you've nailed the technique, for sure! And about a zillion other ones, as well! This is a "home-run" tag without a doubt! Thank you for inspiring, inspiring, INSPIRING me! And that cool tip you learned with the rub-ons is genius, and I'm SO glad you shared! Thanks, again, for all your lovely comments and for sharing your creative genius with us! Hugs!
This is another great tag! MSking is always something I think of too late! And thanks for the tip on scratching the rub-one...it really does give it that little extra umph!
ReplyDeleteI love it! Bright and beautiful. And she's one of my favorite images.
ReplyDeleteGorgeous tag!! Looks like you all had fun meeting up at CHA!
ReplyDeleteGreat photos Candy! Looks like you ladies had a great time! Your tag is fantastic! Love how you colored the sweet image! Thanks for the inspiration!
ReplyDeleteThis is so cute. I love it.
ReplyDeleteOMG! It's so darn brilliant, Candy! Striking design!
ReplyDeleteThanks for sharing the process and your little tricks :-)
I love the transformation of your tag!! And thank you for sharing your steps :)
ReplyDeleteCandy I havent been around to the blogs in so long and I have so much of your fabulous creativity to catch up on. This tag is to die for!!! Must have taken you ages to make. Loved the stamp on the muslin. I loved the mask and over-dye technique - it really does add extra depth and dimension. I have always loved that Winged Girl stamp, I dont have it, its from one of the earlier sets isnt it? - I think its about time that I got it. You are one of my favourite designers always! - HUGS- the other Candy
ReplyDeleteThis is my sort of crafting, love the colours and the layers. Great work.
ReplyDeleteCandy, I just love your whimsical tag. It was great seeing how each layer added so much more depth to the tag. Just wonderful!
ReplyDeleteFabulous tag and technique Candy and what a wonderful piccy of you all at CHA - so jealous! Nikki xx
ReplyDeleteOh this tag just pops! Love it. The layers add so much dimension. Great pic of the Curiosity Crew. Thanks.
ReplyDeleteCandy, this tag is my equally fave of the project Linda l did!! Hers included words of a fave song that makes me cry. Yours is so touchingly whimsical, it makes me want to laugh along with that little one sitting there!! Your techniques just opened up new doors for me- THANK YOU!!! At first, I was thinking "making masks can be more pain than gain"...till I saw the result you got with this! WOWSA!!! The color just keeps on popping as you added the depth to the images. Now you've got me thinking DIMENSIONAL, gurl!!! *high slap & low bump* :D
ReplyDeleteI really like how you used the technique to highlight parts of your tag. Great. Drop shadows...
ReplyDeleteLove the background and the colours of this tag are absolutely my favourite!! Great gorgeous project!!
ReplyDeleteI love this tag Candy!!!
ReplyDeleteAh-mazing! Love this tag so much and appreciate your tips on the distressed rub-ons! I will have to try that. Such a cool tag!
ReplyDeleteLove it Candy. You have combined so many techniques and shared them all in one creation. The winged girl stamp is so sweet. I must check into finding it. Great use of the masking and sharing every step. Then the watercolor really makes her pop. You have outdone yourself. Always love your work.
ReplyDeleteWhat a wonderful tag! Love the depth and dimension. I enjoyed seeing you show your project come to life with distress and the difference the techniques Tim shared in the book makes. I think I need to start adding more black to my projects because it really adds details and looks wonderful here.
ReplyDeleteCandy, its great, I love the little "Fairy" and using watercolor paper to make a tag!
ReplyDeleteFabulous tag Candy, love the way you have layered the images and a great tip from Seth with the scratched rub ons. Toni x
ReplyDeleteAwesome tag Candy!
ReplyDeleteGreat photo and I love your tag - the fairy is so sweet!
ReplyDeleteYour tag just makes me happy! Love the colors and the stamped images are awesome. :)
ReplyDeleteBeautiful work you got so much depth with all of your layering.
ReplyDeleteOh, just look at that - she's so charming perched up there on the Bingo chart. Gorgeous inky watercolouring - just a lovely, lovely tag.
ReplyDeleteAlison xx
Oh, this is fabulous...you do the BEST step outs! I love every beautiful little detail...and I learned a ton from this fabby post. Candy, you are so generous with your talent! Thank you!
ReplyDelete