Hello all and welcome to my blog!
Today, I am honored to have my very much TIM HOLTZ inspired Retro Halloween Box featured on RANGER'S BLOG! Anyone who knows me, knows that I am a huge Tim Holtz fan. I love his products. From his stamps to his Ideaology, I am hooked! I am also a Ranger girl through and through! I love Ranger products because they are affordable, easy to use and you get great results!
So, let me share with you this fun Halloween home decor piece
and how it was put together ...

If you will remember, a couple of weeks ago, I featured a vintage style Halloween box on my blog. The construction of the basic box is the same as that tutorial. But this time, almost the entire box is dripping with spooky die cuts, Ideaology, Seasonal Papers and Tim's unmistakeable Retro Halloween image stamps. The box is covered with papers from Tim's Seasonal Paper Stash featuring Retro Halloween images of Trick or Treat bags. I used Tim's Vintage Lace Die cut to make black "lace" out of black cardstock and place it all around the upper edge of the box. You can see it on the picture below, underneath the crepe paper ruffle of the top.

The Right Side Of The Box
1. Distress
manila cardstock with Vintage Photo, Rusty Hinge and Walnut Stain and Distress
Ink. Heat set. Stamp the witch hazel label onto the
cardstock. Cut the sides straight and
tear the top and the bottom edges.
Distress with more Walnut Stain around the edges, followed by Black Soot
(also on the backside of the torn sections at the top and bottom of the
label). Paint Rock Candy Crackle Paint
over the entire label front. Let
dry.
2. Stamp
the crow from Haunted Mansion onto manila cardstock. Cut out around it, leaving just little manila
edge. Ink the edge with Black Soot
Distress Brush. Lightly distress with
Scattered Straw. Add just a touch of
Black Diamond Stickles for highlights on the crow’s feathers. Let Dry.
3. Add
a Bottle Cap with “31” (from a Bottle Cap Vintage Halloween Images 2) on the interior.
Add a cabochon and let dry. Glue
all into place...pop dotting the crow.

The Left Side Of The Box
1. Stamp
the anatomical drawing of the skeleton from Mini Halloween 2 onto manila
cardstock that has been distressed with Vintage
Photo, Rusty Hinge and Black Soot. Cut
out and tear out as done on the witch hazel label. Paint Rock Candy Crackle Paint over it and
let dry.
2. Stamp
two of the black cat images onto cardstock:
one on orange and one on manila.
Leave an edge of the cardstock when cutting out. Then edge with Black Soot Distress
Marker. Puncture the cat where indicated
with a small hole and add a Long Fastener to join the cats. Lightly add some Black Diamond Stickles to
the top cat to highlight the fur. Set aside to dry.
3. Stamp
the small label from Apothecary out of Rusty Hinge on to manila cardstock. Color around the edge with a Black Soot
Distress Marker and then cut out the label, leaving some of the black edge. Stamp the poison image from Little Labels in
the center of the label. Attach the
label to the small vial using Glossy Accents.
Glue all pieces into place.

The Front Of The Box
1. The
front – Create a double rosette by cutting a rosette twice out of coordinating papers. Scotch tape the backs of each rosette and
then tape them together, leaving about ¼” edge for the second rosette. Put the rosette together as you would a single rosette (with Glossy Accents) and let dry.
2. Stamp
the witch head onto manila cardstock. Colorize her head with Distress Markers
and a Detailer Brush. Start with Shabby
Shutters on the face. Then colorize the
tongue and cheeks with Worn Lipstick. Then use a white opaque marker for the
white of the eyes and the tooth. The hat
is done with Spiced Marmalade and highlighted with Black Diamond Stickles. Cut out the head and leave just an edge of
manila cardstock. Edge with Black Soot
Distress Marker.
3. Cut
a little piece of ruffle out of black crepe paper and tape it onto a scrap
circle approx. 1 ½” across. Trim the
crepe paper and then slit it up to the circle to create “fringe”. Glue the crepe paper on top of the double
rosette. Glue the witch face on top of
the crepe paper. Edge the double rosette
with Paprika Stickles on the inner edge and Black Diamond Stickles outer
edge. Let dry and then glue in place.

The Interior Lid Of The Box
1. Stamp
the skeleton from Retro Halloween onto a piece of white cardstock that has been
doubled and glued together for more stability.
Cut out around the skeleton, leaving an edge of white showing. Distress the edge with a Black Soot Distress Marker. Lightly distress the skeleton with Gathered
Twig.
2. Cut
a little piece of link chain and attach each end to a large Jump Ring. Attach each jump ring around the wrists of
the skeleton to create “handcuffs”.
Punch a small hole in the skull of the skeleton and into the interior
lid of the box using the small hole on a crop a dile. Attach the skeleton to the interior lid of
the box with a Long Fastener.
3. Glue
the larger chipboard finished top of the box directly over the interior lid of
the box that has the ruffled crepe paper exposed. I stamped the spider webs using black embossing powder onto some orange cardstock and glued them onto the interior walls of the box...for added interest. (I inked all of the edges with Black Soot prior to adding them into the box).
The Top Of The Box
1. Place
Wonder Tape all around the exterior edge of the top lid of the box that is
attached to the box.
2. Cut
a long piece of orange crepe paper and distress it with Black Soot Distress
Ink. Create a ruffle by attaching the
crepe paper around the exterior of the lid and smashing it onto the tape to
hold it in place. I started and ended
the ruffle at the back of the lid. Then
edge the ruffle with Black Diamond Stickles and let dry. You may need to add some extra stickles after
the first round dries. Set the box to the side.
3. Create
the larger exterior lid – all four edges of the lid should be covered with
hinges that have been cut in a mitered fashion.
This will create nice, finished edges.
4. Take
the piece of cardstock that is cut into a 4 ¼” square. Since the chipboard top is cut into a 4 ½”
square, that will leave a small edge of black.
Take four Tim Holtz silver corners and color them with Sunset Orange
Alcohol Ink. Then lightly tap them with
Jet Black Archival ink to slightly darken them. Heat set. Add them to each corner of the
cardstock. Glue the cardstock in place,
centered on the top of the LARGER chipboard square.
5. Take
a scrap of corrugated cardboard and paint it with Spiced Marmalade Crackle
Paint and let dry.
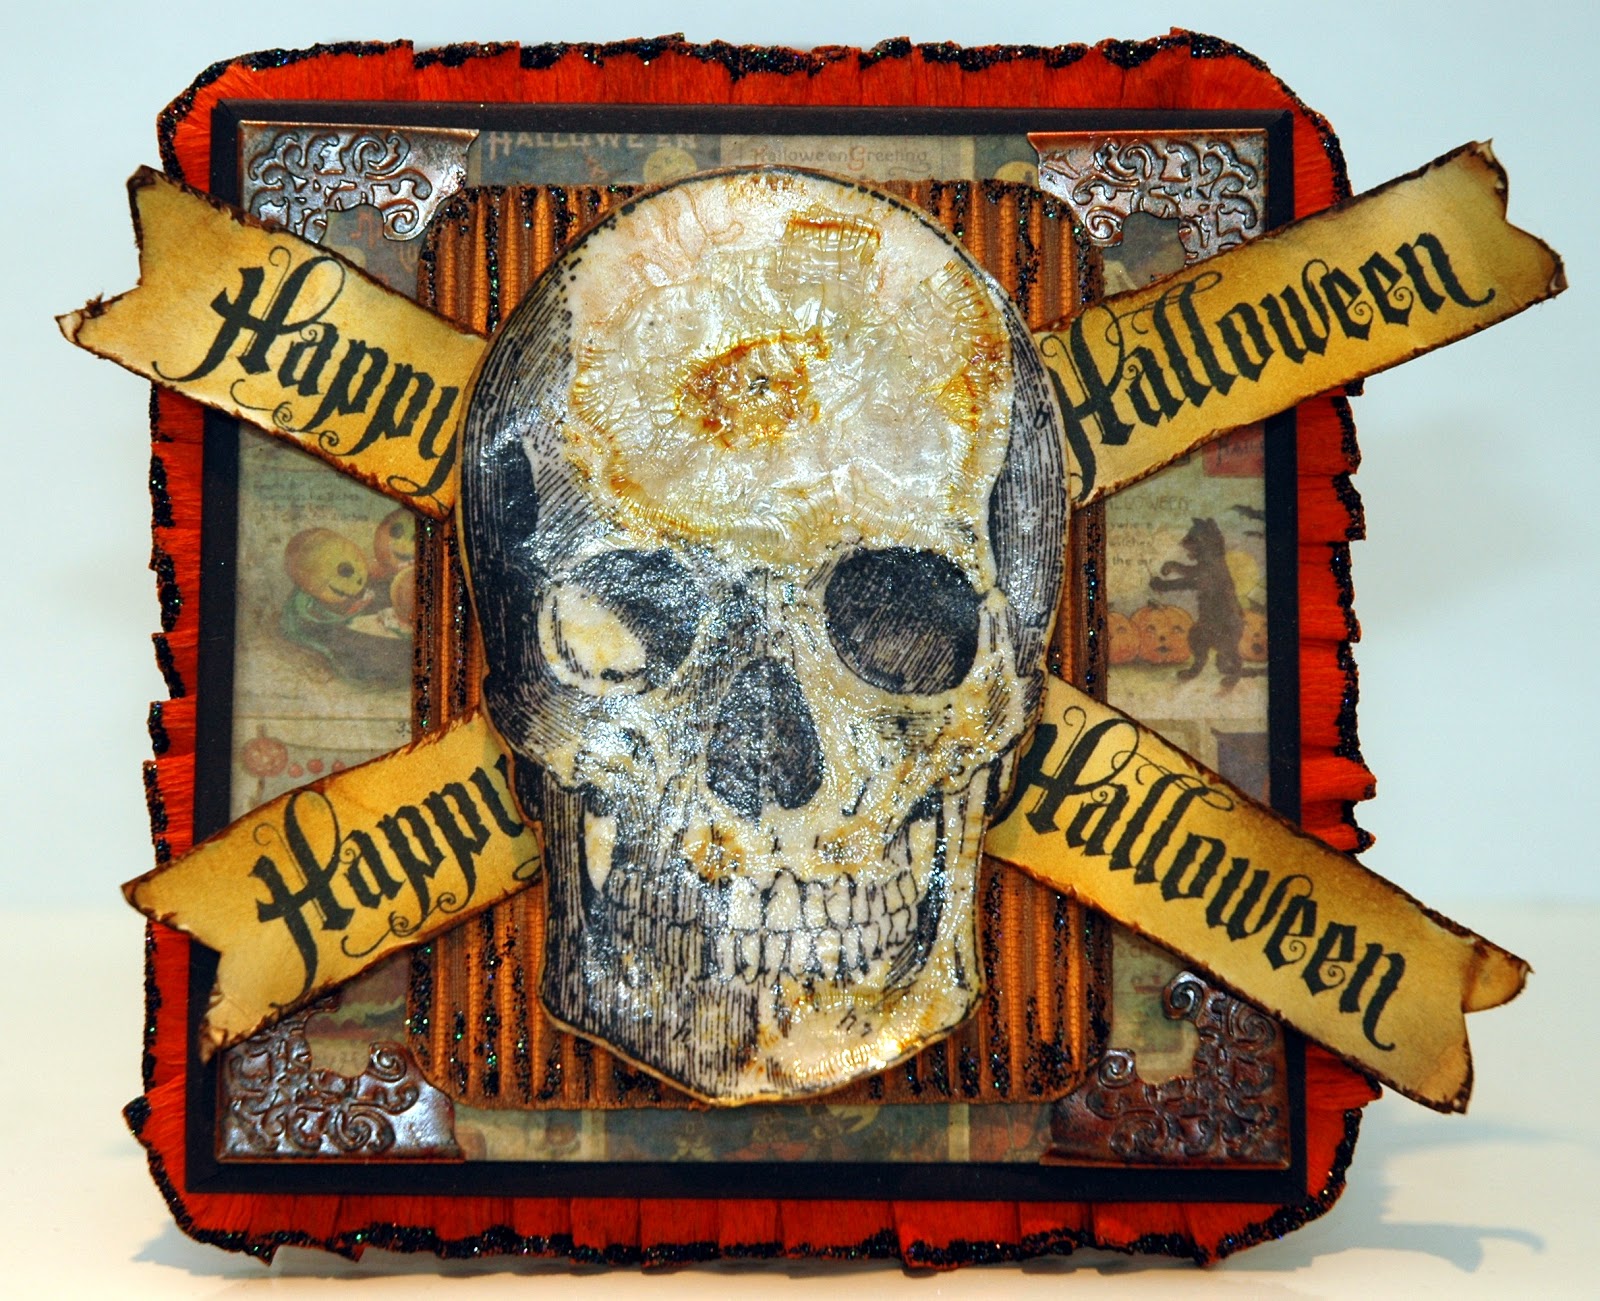
6. Stamp
the skull from Apothecary onto a piece of white cardstock and heat set. Cover the entire skull with embossing ink and
then clear embossing powder. Heat set. Repeat the embossing ink and clear embossing
powder and heat set again. Let cool.
7. Distress
with Gathered Twig and Rusty Hinge Distress Ink. Heat set.
8. Then
paint over all of the white areas of the skull with Rock Candy Crackle Paint
and let dry. Set aside.
9. *HAPPY
ACCIDENT – when the rock candy crackle paint was completely dry, it shrunk up a
little bit, becoming very brittle pulling away from the skull. But it has great texture and absorbed the
Distress Inks in a cool way. I glued the
crackle paint back into place with Glossy Accents. It left a bubbling type look that is very
cool on the top of the skull. Optional – (Glue the Seasonal Adornments spider
onto the skull).
10. Size
and fit the corrugated piece onto the center of the lid and glue in place. Add some distressing with Black Soot distress
ink and then some lightly added Black Diamond Stickles. Pop dot the skull in place on top of the
corrugated cardboard. Create some little
banners by stamping the Happy Halloween from Mini Halloween 3 onto manila cardstock. Heat set.
Distress with Spiced Marmalade, Gathered Twig. Cut out and distress the edges with a Tonic
Paper distresser. Ink the edges with Black Soot. Place underneath the skull in
a “X” formation. Set the outside lid to the side.

So there it is...my vintage Halloween box. I hope that it inspires you
to create some of your own Halloween fun using some of
Tim's wonderful vintage Halloween images. They are so fun to play with;
to emboss, the stamp, to colorized, to die cut.
So have some fun and get your "BOO" on!
Here are all of the products available at Simon Says Stamp and Show that I used in this product:


First of all huge congratulations Candy and so well deserved. I love your spooky box, wonderfully embellished, fantastic dimension and so much interest. Love all the trims you have added around the box and the pop of orange is perfect. Love the crow and bottle cap and the rosette. Another beauty Candy. Tracy x
ReplyDeleteBlow your socks off crafting candy!!! Huge congrats, you rock xxx
ReplyDeleteMore awesomeness from my great mate Candy... WAY TO GO GIRLY!!!! Am so proud of you xxx
ReplyDeleteFabulous! Saw the shout out on Ranger! The details are just wonderful and always love to see what you come up with!
ReplyDeleteI am totally in love-you are fabulous!
ReplyDeleteAmazing box!!!! Love all the details and the overall spookiness of it. Perhaps a better title for the box would be Pandora's Box. Have a great day!
ReplyDeleteMichelle
www.scrapngrow.com
This is fantastic! I love every inch.
ReplyDeleteThis is totally amazing!!! Every side is absolutely perfect and fun and just plain awesome!!! You amaze me!
ReplyDeletewow your box is super awesome and I love Tims stuff too but I just can't afford to buy items I would like to have.I live on a disability pension from canada.We don't have any craft stores and I found out there was a Micheals in Halifax and they didn't even know who he was.I couldn't believe it.So I order a couple things from e-bay but shipping is costly.Please please send me some goodies.Sandra Hannam I so much would love to be able to make an exmas tag.face book
ReplyDeleteSandy....thanks so much for your sweet comment you left on my blog. If you see this, email me...with your contact information. My email is ccolwell9@mchsi.com
ReplyDelete